As an affiliate, I earn from qualifying purchases, but this doesn't affect the reviews or recommendations—your trust is important to me!
Build a Simple Circuit: Fun and Educational Science Activity

Today, We're Making:
- Simple Circuit
- Battery-operated Light Bulb: This experiment teaches kids about simple circuits by creating a light bulb circuit using a battery, wire, and a small light bulb. The children will connect the wire from the battery to the light bulb, showing them how electricity travels and lights up the bulb.
- Conductive Playdough Circuit: In this experiment, kids will design and mold their circuits using two types of homemade playdough—one conductive (with a high salt content) and one insulating (with a high sugar content). They will use an LED.
Remember when you were a child and you used to get mesmerized by the magic of lights turning ON at the flick of a switch?
Well, it's all about circuits, simple circuits to be precise. This fascinating chunk of science is certainly worth exploring, especially when looking for some fun science activities for kids.
Building a simple circuit might sound technical, but it is actually a hands-on science project that your kids can easily maneuver at home.
This educational science activity not only sparks curiosity but can also ignite a long-lasting love for learning electronics.
So, let's delve into the playground of science
familiarizing ourselves with the basic circuit building step by step, turning your home into a little laboratory for your little scientists.
Building Simple Circuits with Your Children
I remember when I was first introduced to a simple circuit. It was during the summer at a science camp, and we were tasked with circuit creation as part of our hands-on science activities. With basic circuit building components such as a battery, a bulb, some wires, and a switch, we set off on our fun science quest. The feeling of seeing that bulb come to life for the first time as I flicked the switch is something that has remained with me till today. This is the magic and science fun at home we will be replicating.
It's Simpler Than You Think!
Now, you might be thinking, 'Building a circuit at home? Isn't that complicated?'. Not at all! Creating a simple circuit can actually be a delightful and easy process, just like playing a game or solving a puzzle. Once you have your primary circuit materials (a battery, an LED light or a small bulb, wires, and a switch), all that's left to do is to arrange them in a certain way. This step by step circuit building is not just a great educational science activity but also an opportunity for interactive learning between you and your child.
Safety First
It is important to mention that safety should always be the priority while indulging in this exciting science activity for kids. Always ensure your child is always supervised during the home science experiment. This practical provides an excellent opportunity to instil some basic safety precautions in your budding scientists. Learning electronics does not have to be dangerous!
More Than Just Fun
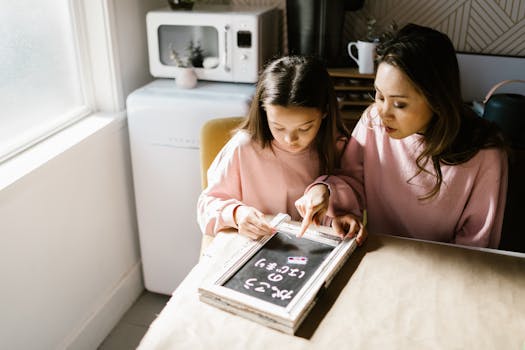
As a parent, I have found that activities such as these are more than just fun science; it is also a wonderful way to bond with your child. The process of building a simple circuit together fosters teamwork, encourages communication, and instils confidence in them. It becomes a parent-child activity, where there is both learning and laughter.
The Light Of The Simple Circuit
And then it happens. The gleaming light of the simple circuit you’ve built together will not just be the result of a successful DIY electronics project. It symbolizes so much more—the light of knowledge, the joy of learning, and an illuminated path towards science education for your child. These memories and lessons are lifelong gifts from an experiment as simple as a DIY circuit.
Science Beyond The Textbook
When your child participates in this kind of science practical, they are not just learning about electricity and circuit construction, but also understanding the real-world implementation of scientific theories. It advances their problem-solving skills while also sparking an interest in learning physics. In this home laboratory built by you, your child doesn’t just read about science, they live it!
The Connection With Real-World
Pointing out these connections between what your child learns and how it applies to life outside the textbook might just make them one of those lucky few who see the world as a giant playground of science. It’s an approach that can cultivate a deep-seated interest in STEM and nudge them towards becoming future innovators.
Conclusion
Remember, the goal here isn't to get your child to build a flawless circuit on their first try but to nudge their curious minds, allow them to explore, experiment and most importantly learn how much fun science can be. After all, what's more, exciting than turning your home into a mini science lab and embarking on this electric adventure?

Unveiling the Magic of Circuits
And so you see, the seemingly complex world of circuits can be unraveled, explored, and understood even in the comfortable confines of your home. This simple yet profound science activity can brighten your child's world, their education, and their curiosity. It allows them to experience the joy and wonder of learning beyond books and classrooms.
As you build a simple circuit together, remember, every spark, twist, and flicker is a precious step on their journey to discovery. So get ready to dive into your home laboratory, embrace the spark of creativity, and forge a beautiful memory. As you guide their hand to illuminate that little bulb, you won't just be lighting a circuit, but also the fire of passion for learning in them.
After all, to them - it's not just science, it's magic. And to you - it's not just teaching, it's creating a lifetime of fascination. And on that note, with a touch of science, a dash of fun, and a whole lot of love, there's only one thing left to do - make that light bulb glow!

You May Also Like These:
Battery-operated Light Bulb Experiment
This fun and educational activity will help your kids learn about simple electrical circuits. The aim of the experiment is to create a light bulb circuit powered by a battery.
Ingredients:
- 1 small light bulb (a flashlight bulb works perfectly)
- 1 D-cell battery
- 2 pieces of insulated wire, each about 1 foot long
- Tape (electrical tape works best but any type will do)
Instructions:
- Strip the insulation off both ends of each wire, revealing about an inch of bare wire.
- Attach one end of the first wire to the positive terminal of the battery (the end with a +), securing it with a piece of tape.
- Attach the other end of the first wire to the metal part at the base of the light bulb.
- Attach one end of the second wire to the negative terminal of the battery (the end with a -), securing it with a piece of tape.
- Touch the other end of the second wire to the metal part on the side of the light bulb.
- If everything is connected properly, the light bulb should light up! This creates a simple electrical circuit.
Note: If the bulb doesn’t light up, check to make sure all of your connections are secure, and the wires are touching the correct parts of the bulb and battery.
What is learned?
This experiment demonstrates how electrical energy can be used to generate light, introducing children to the basic principles of electrical circuits. It helps to understand and visualize the flow of electricity in a simple circuit and lays the foundation for more complex studies in electronics and electricity.
Create Your Own Simple Circuit
Objective:
Create a simple electrical circuit using very basic materials, demonstrating how electricity moves and can be controlled.
Ingredients:
- 1 D-cell battery
- 2 pieces of small light gauge wire (4-6 inches long)
- 1 small flashlight bulb
- Electrical tape
Procedure:
Step 1:
Strip the ends of the wire pieces, so there is about an inch of exposed metal on each end.
Step 2:
Attach one end of one wire to the positive terminal (+) of the battery (typically the raised nub) using the electrical tape.
Step 3:
Attach the other end of that same wire to the side of the flashlight bulb. Use care to ensure the metal of the wire is touching the metal of the bulb base, and tape to secure it.
Step 4:
Attach one end of the second wire to the negative terminal (-) of the battery using the electrical tape.
Step 5:
Touch the free end of the second wire to the bottom of the flashlight bulb. If everything has been done correctly, the bulb should light up, indicating you've successfully completed a simple circuit!
Your Kids' First Light Bulb Experiment
Introduction
In this fun and exciting STEM experiment, your kids will make a light bulb shine using only a battery and some wire. The process is simple, safe, and won't take more than a couple of minutes!
Ingredients:
- A small light bulb (You can use a small flashlight bulb)
- One D Cell battery
- Two pieces of wire (about 6 inches long)
Instructions:
- Inspect the Light Bulb: Before you start the experiment, take a moment to inspect the light bulb with your child. Note how it has a small wire filament inside and two metal sections on the base.
- Prepare the Wires: Strip a short section from both ends of each wire if they are insulated.
- Connect the First Wire: Attach one end of a wire to the side metal part of the bulb. You may need to wrap it around a few times to ensure a good connection.
- Connect the Second Wire: Attach one end of the second wire to the bottom of the bulb. Again, wrap it around a few times for a solid connection.
- Connect to Battery: Take the free end of the first wire and attach it to the bottom of the D Cell battery. Use some tape if needed to secure it.
- Let There Be Light: Now, touch the free end of the second wire to the top of the battery. If everything is connected correctly, the small wire filament inside the light bulb should glow brightly, providing a shining example of electrical energy in action!
Safety Notice:
Please remember, safety first! Although this experiment uses low voltage, always ensure your children are supervised when conducting experiments of any kind. Never leave your children unattended while conducting this experiment.
Conductive Playdough Circuit Experiment
This fun and interactive STEM experiment shows how electricity travels and lights up a bulb using simple homemade playdough!
Ingredients
- For Conductive Playdough:
- 1 cup of water
- 1.5 cups of flour
- 1/4 cup of salt
- 3 Tbsp. of lemon juice or vinegar
- 1 Tbsp. of vegetable oil
- Food coloring (optional)
- For Insulating Playdough:
- 1.5 cups of flour
- 1/2 cup of sugar
- 3 Tbsp. of vegetable oil
- 1/2 cup of deionized or distilled water
- Additional Materials:
- LED lights
- 9-volt battery
- Battery connector
Instructions
- Make the Conductive Playdough: Bring 1 cup of water to a boil. In a bowl, mix together 1.5 cups of flour and 1/4 cup of salt. Add 3 Tbsp. of lemon juice/vinegar and 1 Tbsp. of vegetable oil. Gradually add the boiled water to create a dough. Add food coloring if desired and knead the dough until it’s smooth.
- Make the Insulating Playdough: In a separate bowl, mix 1.5 cups of flour and 1/2 cup of sugar. Add the 3 Tbsp. of vegetable oil. Slowly add 1/2 cup of deionized/distilled water to create the dough. Knead until it's smooth.
- Assemble the Circuit: Flatten a piece of conductive playdough and insert the LED's legs into the dough. Be sure the legs do not touch each other. Attach the clip leads to the LED and the 9-volt battery, one at a time. The LED should light up, showing electricity is flowing through the conductive dough.
- Test with Insulating dough: Now, roll a piece of insulating dough into a log. Place it between two pieces of conductive dough, making sure they don't touch. Repeat the steps to connect the battery and the LED light. The LED light should NOT light up, proving that the insulating dough acts as a resistor, resisting the flow of electricity.
- Observation: Discuss with your child how conductive materials allow electricity to pass through freely, while insulating materials resist the flow of electricity. This demonstrates a basic principle of electrical circuits.
Sure, here you go: ```
STEM/Experiment - Creating Circuits with Play Dough
Ingredients:
- For the Conductive Playdough:
- 1 cup of water
- 1.5 cups of flour
- 1/4 cup of salt
- 3 tbsp. cream of tartar
- 1 tbsp. vegetable oil
- Food coloring (optional)
- For the Insulating Playdough:
- 1/2 cup of sugar
- 1.5 cups of flour
- 1/2 cup of deionized/distilled water
- 3 tbsp. vegetable oil
- Food coloring (optional)
- LEDs
- 9v Battery
- Wire
Instructions:
- Make the conductive playdough: Combine all the 'conductive' ingredients in a pot and stir over medium heat until the mixture forms a ball. Allow it to cool.
- Make the insulating playdough: Combine sugar, flour, and oil in a pot. Add in water slowly, stirring constantly over medium heat until it forms a ball. Let it cool.
- Create the circuits: Break off pieces of the conductive and insulating playdough. Place them around each other, ensure they do not touch. Create a 'path' for the electricity to flow with the conductive playdough.
- Install the LEDs: Insert both ends of the LED into the conductive playdough. Make sure that one wire goes to each piece of conductive playdough and that they are not touching in the dough.
- Connect the battery: Connect one wire from the battery to one piece of conductive playdough. Connect a second wire from the battery to the other piece of conductive playdough. With this, your LED should light up!
Note: If the LED doesn't light up, switch the battery wires around. LEDs only allow electricity to flow in one direction, so if it doesn't work one way, try the opposite way.
``` This HTML code will create a webpage with clear instructions on how to carry out the described STEM experiment. Parents and children can follow these steps to create their own circuits using homemade playdough.


