Craft Corner: DIY Origami Paper Lantern Making Explained
Science at Home: Creating Your Own Homemade Lava Lamp
Culinary Delight: Baked Zucchini Fries Food Recipe Unveiled
Adventure Unleashed: A Scavenger Hunt in Home or Backyard
As an affiliate, I earn from qualifying purchases, but this doesn't affect the reviews or recommendations—your trust is important to me!
Today, We're Making:
- Craft: Origami Paper Lantern Making
- STEM Experiment: Homemade Lava Lamp
- Food Recipe: Baked Zucchini Fries
- Game: Scavenger Hunt in the Home or Backyard
- Origami Elephant Making
- Aquaponics STEM Project
- DIY Mini Pizza Making
- DIY Board Game Creation
- Paper Mache Planets Craft
Welcome to our Blog
Elevate Your Home Décor with Traditional Japanese Art
Ever thought of bringing a touch of traditional Japanese art into your home? With a few simple folds and creases, you can transform a sheet of paper into a breathtaking lantern, adding a magical touch to your décor. Welcome to Craft Corner, where art meets creativity. In this DIY origami guide, we'll decode the enchanting world of origami paper lantern making. Discover the excitement of creating handmade lanterns, a skill that is not just artistic but meditative, fun and a definite conversation starter.
Ignite Your Child’s Curiosity in Science from Home
Ever wondered how you can ignite your child’s curiosity in science without letting them step outside the comfort of your home? Grab some household ingredients and watch their faces light up as they create a homemade lava lamp. In this STEM experiment, science comes home in the most colorful way possible. Our easy science projects offer an entertaining and educational activity for the entire family, merging fun and learning seamlessly.
Redefine Healthy Eating with Our Baked Zucchini Fries Recipe
Imagine biting into crispy, golden fries. Sounds tempting, right? Now imagine those fries being low calorie, high in nutrients and equally addictive. Welcome to our culinary delight where we reveal the secrets of an alluring baked zucchini fries recipe. This blog is all about embracing healthy eating without compromising flavor. So, take a step towards home cooking and fall in love with veggie snacks that are baked to perfection.
Add a Thrilling Adventure to Your Routine with a DIY Scavenger Hunt
Do your days feel repetitive? Craving a shot of excitement right at home or in your backyard? What if a thrilling adventure was just a few clues away? Here’s introducing a fun-filled scavenger hunt, an exciting game that will guarantee laughter, exploration, and a bucket load of memories. The next time the weather brightens or you're looking for a unique family game night, embark on this DIY scavenger hunt and unleash the adventure at home. Happy hunting!
DIY Activities
Craft: Origami Paper Lantern Making
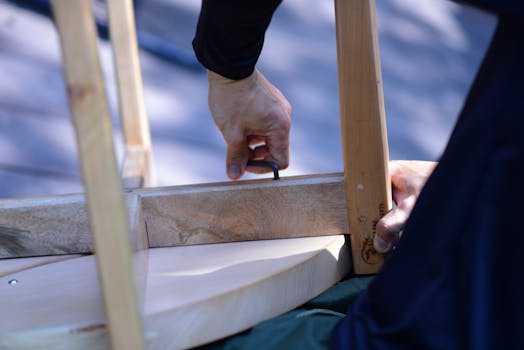
To embark on your DIY Origami journey, start by choosing your paper. The beauty of Paper Lantern Making lies in the versatility – any
paper, as long as it holds a crease, can be used. From lightweight origami paper to craft paper to an old map, anything can be transformed into a piece of art.
The process of transforming this flat paper into a 3D paper craft, begins with the basic folds. Following Origami Instructions, you start by folding the paper into a square, and then into a series of smaller squares and triangles.
Each fold and crease form the skeletal structure of your lantern.
As you continue with this Origami Craft, the paper begins to form a unique pattern. This pattern is emphasized once the lantern is lit, casting a beautiful
play of shadow and light. The combination of precision and creativity that you put into each handmade lantern makes every piece unique. Hence, Origami Projects
like this are not only simple crafts but a means of expression.
STEM Experiment: Homemade Lava Lamp
First off, gather ordinary kitchen materials such as a clear container, water, vegetable oil, food coloring and effervescent tablets (like Alka-Seltzer).
This Chemistry at Home begins with a simple combination of water and oil. Pour water into your container, add a few drops of food coloring, and then
top it with oil. The oil and water experiment here brings the first layer of visual interest, watching the oil and water separate naturally due to their density difference.
As an Easy Science Project, all you need to do next in your homemade lava lamp is drop in an effervescent tablet. Watch as bubbles form and chaos ensues!
The tablet reacting with water creates gas. Forced to pass through oil on its way up, the gas forms into unique bubble formations, mimicking the stylish and
retro aesthetics of a lava lamp. This Home Science Experiment is a mesmerizing live lesson in fluid dynamics – perfect for Family Activities
focused on educational fun.
Food Recipe: Baked Zucchini Fries
As you embark on your culinary delight, preheat your oven to 425 degrees Fahrenheit so it'll be primed and ready for your oven-baked fries. Slice zucchinis into strips,
resembling a 'french fry' shape. The beauty of this home cooking lies in the preparation. A three-step breading procedure is key to crispy, golden fries. First, coat
the zucchini sticks in flour, then dip in a mixture of beaten egg and milk, finally coat them in breadcrumb and parmesan mix.
Place your coated zucchini sticks in a single layer on a lined baking tray and bake until they're beautifully golden and crisp. This baked zucchini fries recipe is
uncomplicated, incredibly delicious, and a healthy snack. The end result is a low calorie snack that's high in flavor - living proof that Healthy Eating
doesn’t have to be boring or tasteless.
Game: Scavenger Hunt in Home or Backyard
For this fun-filled DIY Scavenger Hunt, the first thing you need to do is plan. Choose whether the scavenger hunt will be indoors, outdoors, or a combination
of both. Create a list of items that need to be found. These could be household objects, toys, or natural elements like a leaf or pinecone if you're having a
Backyard Adventure. To add some challenge, you can create clues or riddles for each object.
Now scatter the clues around the home or backyard. Incite the thrill of the chase with Scavenger Hunt Clues leading to the next target. Ensure each clue
is marked with a number to keep the trail flowing and prevent confusion. This scavenger hunt game seamlessly blends Family Fun, creativity, problem-solving,
and physical activity. Whether you're on a rainy day indoor hunt or embarking on an invigorating backyard adventure, this game is an entertaining Family Game Night option.
Blog Post
And there you have it!
A radiant origami paper lantern to light up your evenings, a homemade lava lamp bringing a colorful display of science to your kitchen, scrumptious baked zucchini fries that satisfy your taste buds without sabotaging your wellness goals, and an innovative scavenger hunt to boost family fun and adventure.
From crafting to cooking to science experiments and games, we've handpicked different activities to explore and enjoy right at home. Remember, every DIY project you undertake, every dish you prepare, every experiment you conduct, every game you play, breathes life into your home. So, keep crafting, keep experimenting, keep cooking, keep playing, and most importantly, keep creating magical memories with your loved ones.
Each moment you spend together in your home is precious, make it count!
Until our next rendezvous at Craft Corner, Science at Home, Culinary Delight, or Adventure Unleashed - happy learning and creating!
You May Also Like These:
Instructions for Origami Elephant Making
Origami Elephant Making
Ingredients
An origami paper of your choice
A flat surface to fold the paper on
Patience and care
Instructions
Prepare the paper: Start with your paper color-side facing up, positioning it in a
diamond shape.
Fold the paper in half: Bring the bottom point up to the top point to create a triangle.
Create the guides: Fold the triangle in half by bringing the left corner to the right,
creating a smaller triangle. Unfold this step.
Form the elephant's body: Fold the left and right corners up to the top corner
Shape the elephant's head: Fold the top layer from the bottom point up a bit to start
forming the elephant’s body and head.
Form the trunk: Fold the top layer of the bottom corner down to create the elephant’s
trunk. Adjust this to your liking.
Finish the elephant: You can complete your elephant by drawing an eye and any other personal touches you would like.
DIY Mini Pizza Making
Ingredients:
1 Packet of ready-made Pizza Dough
1 jar of Pizza Sauce
Grated Mozzarella cheese
Your Choice of Toppings (Pepperoni, Sliced Bell Peppers, Mushrooms, Olives, etc.)
1 tbs of Olive oil
A Pinch of Salt
Instructions:
Step 1: Preheat the Oven
Preheat your oven to its highest setting, or 475 degrees F.
Step 2: Roll Out the Dough
Divide the dough into small balls and roll them out into small circles, about 1/4 inch thick. You can use flour if the dough sticks.
Step 3: Add the Sauce and Toppings
Spread a thin layer of pizza sauce on each circle, then add your cheese and toppings.
Step 4: Bake the Mini Pizzas
Bake in the preheated oven for about 10-12 minutes or until the crust is golden and the cheese is bubbling and slightly browned.
Step 5: Cool and Serve
Allow the mini pizzas to cool for few minutes before serving. Enjoy your Homemade Mini Pizzas.
DIY Mini Pizza Making Instructions
DIY Mini Pizza Making
Ingredients:
Pizza dough
Pizza sauce
Mozzarella cheese
Your preferred pizza toppings (e.g., pepperoni, olives, bell peppers, etc.)
Instructions:
Preheat your oven to 450 degrees Fahrenheit.
Roll out your pizza dough and use a cookie cutter or a glass to cut out mini pizza bases.
Spread a spoonful of pizza sauce on each mini pizza base.
Sprinkle a generous amount of mozzarella cheese over the sauce.
Add your chosen pizza toppings.
Place your mini pizzas on a baking sheet lined with parchment paper.
Bake the pizzas in the preheated oven for about 10-15 minutes, or until the cheese is melted and bubbly.
DIY Guide for Parents
CRAFTS: DIY Paper Airplanes
Make your own paper airplanes with the kids. The materials needed and the process to be followed are listed below:
Materials:
A4 Paper
Colored Markers
Steps:
Fold the A4 paper in half vertically.
Unfold the paper and fold each of the top corners into the center line.
Fold the top edges into the center line.
Fold the plane in half towards you.
Fold the wings along the line of the folding to make a straight edge.
Your paper airplane is ready to fly!
STEM PROJECTS: DIY Lava Lamp
Involve your kids in this hands-on project to create the effect of a lava lamp at home:
Materials:
Clear glass
Water
Vegetable Oil
Food Coloring
Alka-Seltzer tablets
Steps:
Fill the glass with 3/4 of vegetable oil.
Fill the rest of the glass with water.
Add a few drops of food coloring.
Break the Alka-Seltzer tablet into a few small pieces and drop them into the glass one at a time.
Watch your homemade lava lamp come to life!
FOOD: DIY Pizza
Ingredients:
Pizza dough
Tomato sauce
Mozzarella cheese
Your favorite toppings
Steps:
Preheat your oven to 475 degrees.
Roll out your pizza dough to your preferred thickness.
Spread a thin layer of tomato sauce over the dough, leaving a small border on the edges for the crust.
Sprinkle mozzarella cheese on top of the sauce.
Add your favorite toppings.
Bake in the oven for about 10-15 minutes or until the cheese is melted and crust is browned.
GAMES: DIY Board Game
Create your own board game for endless family fun.
Materials:
Cardboard
Marker pens
Small items to use as game pieces
Steps:
Cut the cardboard to your desired size.
Draw your game board onto the cardboard.
Create a set of rules for your game.
Use small items as game pieces.
Your DIY Board Game is ready to be played!
Paper Mache Planets Craft
Ingredients
Newspaper pieces
Balloons
Flour
Water
Paint (various colors including black)
Glitter (optional)
String or yarn
Paintbrushes
Instructions
Inflate the balloons to the desired sizes of your planets.
Mix one part flour with two parts water to create your paper mache paste.
Dip your pieces of newspaper into the paste and start covering your balloons. Cover them with at least three layers and allow them to dry completely.
Pop the balloons once the paper mache is dry and remove the balloon pieces.
Paint your planets using various colors and layering techniques to create the planet texture. Allow to dry.
Add glitter if desired for a sparkling effect.
Attach string or yarn and hang your planets to display.
About the Author
Other Blog Posts You May Enjoy...
Wendell Longpants
Meet Wendell Longpants, our whimsical word wizard at AngelinaAllsop.com, where screen-free fun is the game, and imagination runs wild for kids 9-12. With a knack for noodling up the nuttiest narratives, Wendell's the mastermind behind our giggle-packed adventures. He's a storytelling sorcerer, turning plain old play into epic escapades without a screen in sight. Dive into the delightful world Wendell weaves—where laughs are aplenty and the fun never stops!