


As an affiliate, I earn from qualifying purchases, but this doesn't affect the reviews or recommendations—your trust is important to me!
Creating a Homemade Lava Lamp Science Experiment Made Simple


Today, We're Making:
- - Homemade Lava Lamp Science Experiment
- - Solar System Model Building: The International Space Day falls on April 30, just a few days after the given date. Parents can introduce their kids to the mysteries of the cosmos by creating a solar system model together. This project can be completed using inexpensive materials like foam balls, paint, and wires for hanging.
- - DIY Weather Station: Since April is springtime, a DIY weather station can help children understand the climatic changes this season brings. They can create their own barometer.
Homemade Lava Lamp Science Experiment
Have you ever gazed in fascination at a lava lamp, with its hypnotic blobs of color bobbing up and down? How would you like to re-capture that transfixing joy using ordinary household materials?
Transform your kitchen into a fun and engaging lab
With our homemade lava lamp science experiment, transform your kitchen into a fun and engaging lab. This easy-to-follow DIY science project will not only illuminate your home with its entrancing dance of light and color, but also become an engaging educational activity.
Teaching essential principles of science for kids
This homemade lava lamp can teach essential principles of science to kids, and kids-at-heart. Let's summon our inner scientists and dive into this simple yet magical experiment!
The Magic Behind Your Homemade Lava Lamp
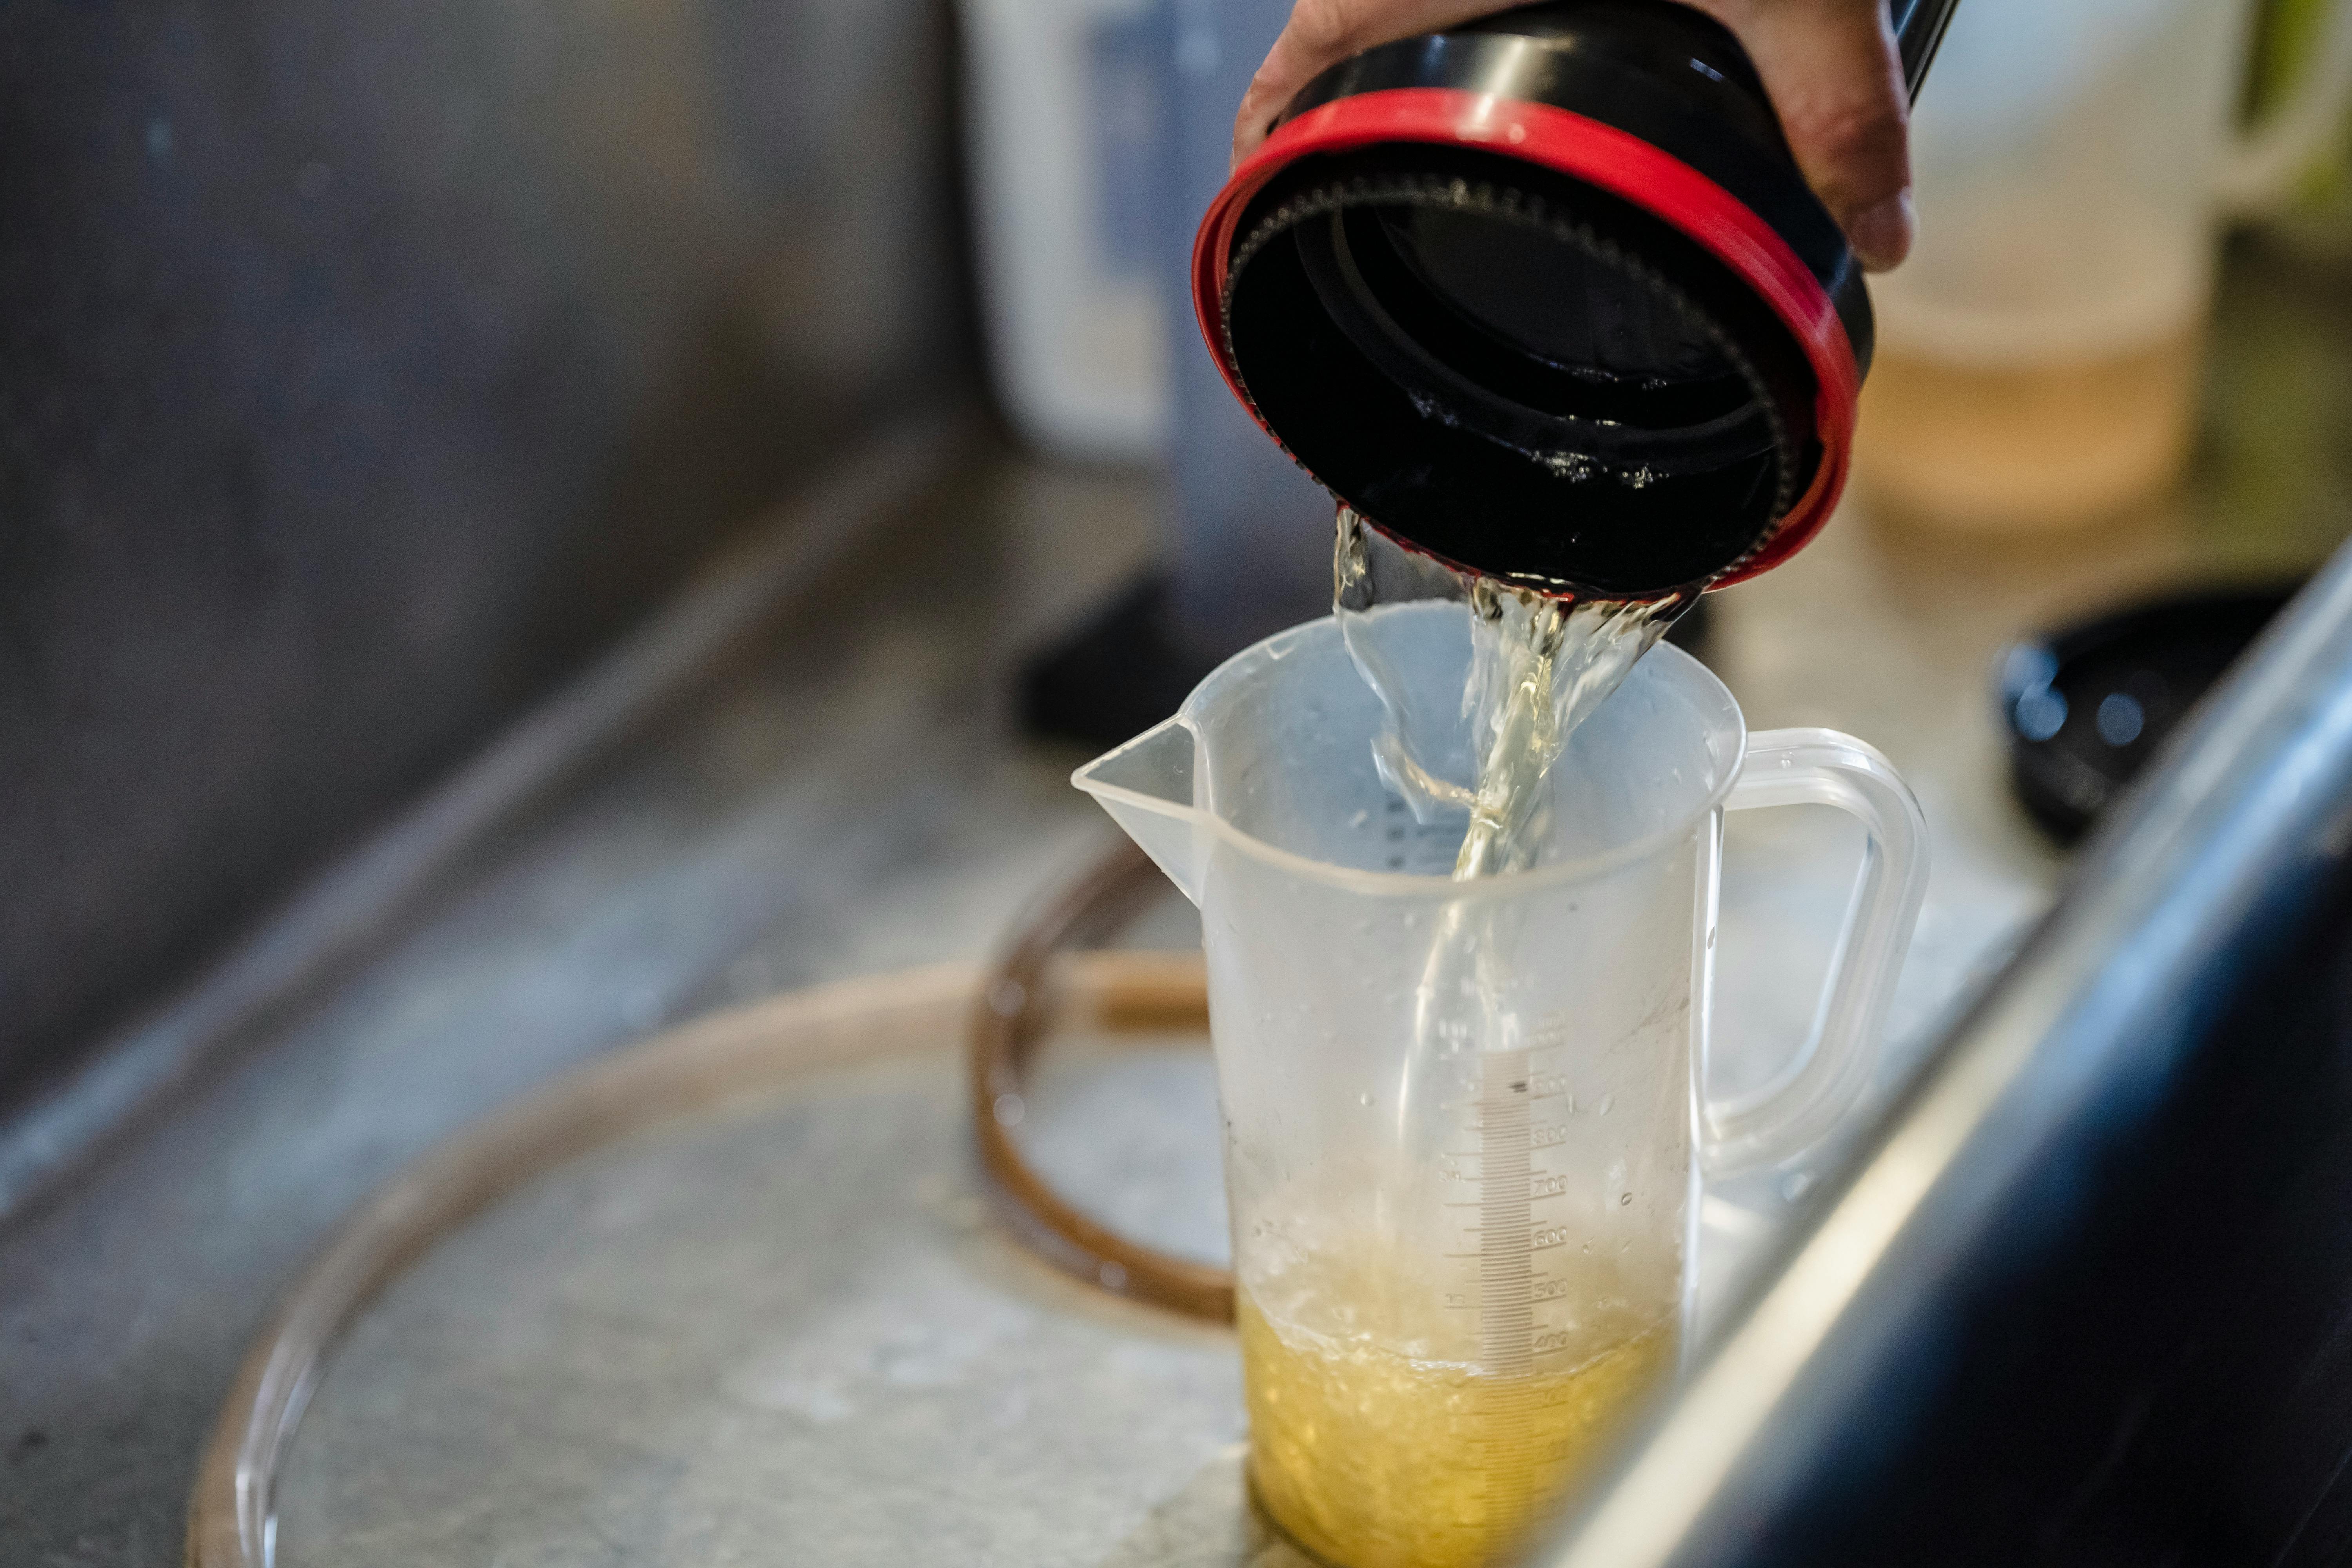
Before we venture into the actual construction process of your Homemade Lava Lamp Science Experiment, it's worth understanding the science behind it. Don't worry, it's truly a Simple Science Experiment that can effortlessly be explained. The key lies in understanding the density of liquids, as the fun part of our DIY Lava Lamp is all about oil’s lovable attribute of being lighter than water.
The oil floats on top of the water, creating a clear separation, because it is less dense. When you add food coloring (which is denser), it sinks through the oil, colors the water, and forms that gorgeous hypnotic blob dance that we all love. Heating the mixture causes the colored water to rise through the oil, creating the illusion of a magical dance in a symphony of colors. When it cools, the colored water falls back down, ready to rise and amaze you again once reheated. It's not just a fun DIY project, it's a cool science experiment lesson about density in disguise!
Creating a Lava Lamp: Your Making Process
Because this is positioned as an Easy Science Project, we foresee that the most strenuous part will be gathering your materials. But remember, this is a Homemade Lava Lamp, which means everything you'll need is likely already right at home in your kitchen or could be easily obtained from the nearest grocery store. Now let’s roll up those sleeves and immerse ourselves in some serious Kitchen Science.
Materials to gather:- A clean, clear, and empty glass or plastic container
- Water
- Vegetable oil or baby oil
- Food coloring of your choice
- Effervescent tablets (like Alka-Seltzer) or Baking Soda and Vinegar mixture.
- Flashlight (optional, for added illumination)
The homemade lava lamp science experiment promotes learning science at home in an interactive way, which is a perfect choice for fun and educational home science fun. It's ideal not just as a personal project, but also as a weekend science project for school or a cool science experiment to do with your kids at home. So why wait? Channel your inner scientist and get lost in the mesmerizing magic of your homemade lava lamp – a simple DIY craft that paves the way for so much learning and amusement.
In Conclusion
Igniting the spark of scientific curiosity has never been more delightful or accessible! Recreating the magic of a lava lamp in your own home is an adventure that unifies the thrill of crafting, the enchantment of visible magic, and the enlightening discovery of scientific principles.
Kitchen Science: An Immersive Adventure
So dive into the immersive forest of Kitchen Science, where learning and fun sways in a colorful dance of light, just like your homemade lava lamp. The joy of watching the vibrant blobs rise and sink will certainly captivate your heart while the knowledge earned will be an invaluable treasure.
Let the Light and Learning Fill Your Home
So, let the light and learning from this fun-filled science experiment fill your home and heart with the brilliance of curiosity. The wonders of a lava lamp are just a little kitchen magic away!
You May Also Like These:
Solar System Model Building: International Space Day Project
Materials Needed:
- Styrofoam balls in various sizes (2 small, 4 medium, 3 large)
- Acrylic paint in various colors
- Paintbrushes
- Wooden skewers
- Glitter (optional)
- String or clear fishing line
- Stick or hanger to hang the planets from
Instructions:
1. Prepare Your Materials
Arrange your Styrofoam balls in order of size. These will be your planets. Your largest balls will become Jupiter, Saturn, and Uranus. Your medium balls will represent Venus, Earth, and Neptune. The small balls will be Mars and Mercury. Remember that the sizes of the balls don’t have to perfectly reflect the actual planet sizes – this is just an approximation!
2. Paint the Planets
Using your acrylic paint, paint each ball to resemble the planet it represents. For example, Earth can be blue and green, Mars can be red, and Jupiter can have stripes. Don't forget to allow your painted planets to dry!
3. Assemble the Solar System
Once your planets are dry, carefully push a wooden skewer through each one - this will help you hang them later. Next, cut different lengths of string or fishing line and attach one to each planet by tying it to the stick. Remember, the order of the planets from the sun is: Mercury, Venus, Earth, Mars, Jupiter, Saturn, Uranus, Neptune. Make sure each planet hangs at a different length to mimic the diverse distances.
4. Display Your Solar System
You now have a beautiful, handmade model of the solar system. Find the perfect spot to hang it where it can be admired! Remember, every good scientist double-checks their work - check one last time that your planets are in the right order!
Remember: This project involves the use of sharp skewers and scissors, so parent supervision is required.
Materials Needed:
- 1 fl oz White Vinegar
- 1/2 teaspoon Baking Soda
- Food Coloring (Multiple Colors)
- Small Cups or Containers
- Paper (Watercolor paper works best)
- A Tray (to contain any mess)
Instructions:
Step 1: Preparing your Color Mixtures
In your small cups or containers, mix a few drops of different food coloring with an equal amount of vinegar. You can create as many or as few colors as you wish.
Step 2: Creating a Baking Soda Paste
In a separate container, mix together your baking soda with a small amount of water. The mixture should have the consistency of a thick paste.
Step 3: Applying your Baking Soda Paste
Using a paintbrush, apply your baking soda paste onto your paper. You can paint a specific image, or simply spread it across the page. Let the paper dry completely before moving on to the next step.
Step 4: Adding Color
Once your paper has dried, use a dropper to apply your vinegar/food coloring mix onto the baking soda paste. Watch as the chemical reaction creates a beautiful, fizzing color display!
Step 5: Drying and Preservation
Allow your artwork to dry completely. Be careful not to touch or disturb the paper while it is drying to preserve the unique patterns created by the vinegar and baking soda.
STEM Project 1: Homemade Paint
Ingredients:
- 1 cup of salt
- 1 cup of flour
- 1 cup of water
- Food coloring
Instructions:
- Combine the salt, flour and water in a large bowl.
- Stir it until it becomes a smooth mixture.
- Divide the mixture into separate smaller bowls for each color you wish to make.
- Add a few drops of food coloring to each bowl and mix until you achieve your desired color.
- Your homemade paint is now ready to use!
STEM Project 2: Erupting Volcano
Ingredients:
- A container (Plastic Cup, Bottle etc.)
- Vinegar
- 2 tablespoons of baking soda
- A few drops of food coloring (optional)
- Dish soap
Instructions:
- Add baking soda to your container.
- Add a few drops of food coloring (This is optional, it is to make the lava look 'hot').
- Fill about 1/3 of the container with vinegar.
- Add a few drops of dish soap to make the foam thick.
- Now, watch as your homemade volcano erupts.
DIY Weather Station
Project Overview: Make a homemade weather station. Perfect project for kids exploring STEM areas.
Materials Needed:
- 1 large cork board
- Assorted printouts (barometer, thermometer, rain gauge)
- 1 clear plastic bottle
- 1 outdoor thermometer
- Glue
- Marker pens
- Ruler
- Scissors
- Wire or string for hanging
Instructions:
- Prepare your board: Get your large cork board ready, this will act as the base for your weather station.
- Print and cut out the gauges: Print out a barometer, thermometer, and rain gauge from the internet. Cut them out and put them aside.
- Make a rain gauge: Take a clear plastic bottle, cut the top off and invert it into the bottle to create a funnel. Mark off millimeters with a permanent marker on the side of the bottle. This will act as your rain gauge.
- Arrange weather instruments on your board: Arrange the cut out gauges and rain gauge on the corkboard. Use glue to stick them into place.
- Attach the outdoor thermometer: Attach the thermometer to the cork board with glue.
- Hang your weather station: Attach a piece of wire or string to the top of your corkboard for hanging outdoor.
DIY Weather Station for Kids
In this project we are going to create a homemade barometer to understand the climatic changes.
Ingredients:
- 1 empty glass jar or tin can
- 1 balloon
- 1 rubber band
- 1 plastic straw
- Glue
- Scissors
- 1 sheet of paper
Instructions:
- Prepare the Jar: Start by making sure that your jar or tin can is clean and dry and doesn't have any cracks or holes.
- Cut the Balloon: Cut the top off the balloon. You want to keep the large part that you inflate.
- Cover the Jar: Stretch the piece of balloon over the top of your jar. It should be tight like a drum. Secure it with the rubber band, making sure it's airtight.
- Attach the Straw: Attach the straw to the center of the balloon top with a bit of glue. Make sure to leave more of the straw on one side of the jar. Allow the glue to dry.
- Create the Gauge: On the piece of paper, create a gauge for your barometer. You can mark it from high to low pressure.
- Arrange the Barometer: Position your jar in front of the gauge, with the long end of the straw pointing towards the gauge. Use a bit of sticky tack to hold the paper in place.
Note: The barometer works as the air pressure changes, causing the balloon to contract or expand, which will result in the straw moving up or down the scale.
Happy Learning!