


As an affiliate, I earn from qualifying purchases, but this doesn't affect the reviews or recommendations—your trust is important to me!
Creating an Underwater Volcano Science Experiment At Home

Today, We're Making:
- - Underwater Volcano Science Experiment
- - DIY Lava Lamp: In line with the underwater volcano theme, children can create their own DIY Lava lamps using oil, water, food coloring, and effervescent tablets. This project helps explain the science of densities and chemical reactions.
- - Create a Tornado in a Bottle: With two plastic bottles.
What if we told you that you could create a thrilling underwater volcano science experiment right in your kitchen?
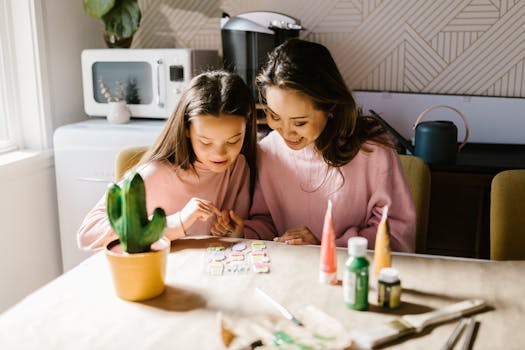
Surrounded by eager eyes and inquisitive minds, you could transform your home into a dynamic hub for DIY science. You don't need a towering lab or a fancy degree to engage in scientific experiments for kids – all it takes is a little creativity, some pantry essentials, and a whole lot of fun.
Brace yourself for a captivating deep-dive into the world of STEM activities at home, making learning an adventure for your curious little scientists. This blog post will guide you step-by-step on how to safely build an underwater volcano, turning your family together-time into an exciting journey of discovery and learning.
Setting Up Your Space for an Underwater Volcano Science Experiment
Before we dive into the specifics on how to prepare your DIY Underwater Volcano, it's important to first set up your space. This is where the magic of Home Science Projects comes to life. Be sure to pick a spot that is roomy, safe, and easily cleaned. Have tiles or linoleum? Perfect, that takes care of the easy cleaning part. We recommend setting up on a surface that's less likely to stain or one you don't mind getting a tad messy – because let's be honest, the best Kid-Friendly Experiments are the ones you can get a little dirty with.
The other element to consider is ensuring your space is bright. Excellent lighting can be a gamechanger for children as it helps them stay focused and interested in the experiment. Plus, it can make your Underwater Volcano Experiment more visually exciting! So, whether you're diving into At-Home Science in the early morning or late in the afternoon, be sure your homemade lab accentuates those multi-colored volcanic eruptions.
Shopping List for Your DIY Underwater Volcano
Now that your space is all set, let's gather the materials. The beauty of DIY Science is that most items required are readily available at home. For your Underwater Volcano Science Experiment, you'll need:
- A transparent glass or plastic container (large enough to accommodate a smaller container inside)
- A smaller glass or jar
- Baking soda
- Vinegar
- Red food color
- Dishwashing soap
- A piece of cardboard (optional)
- A torch or flashlight (optional)
You'll find that these materials don't scream 'science lab.' Instead, they're everyday items utilized in Kitchen Science – transforming the mundane into extraordinary.
Understanding the Science Behind the Fun
Just because we're having fun, doesn't mean we can't learn along the way. An essential part of any Volcano Project is understanding the science behind it. The underwater volcano is a fantastic introduction to chemical reactions in an engaging and colorful way, making it one of the most popular Chemistry Experiments for kids.
The effervescent eruption is a result of the reaction between baking soda and vinegar. Baking soda is a base, while vinegar is an acid. When you mix the two, you get a classic acid-base reaction creating carbon dioxide gas. This gas is what produces the frothy bubbles that rise to the surface, imitating a volcanic eruption.
Enjoy the process of making your own Underwater Volcano Science Experiment. Engage your children in this enthralling experience, fostering their love for science, and turning your home into a foundation for their future STEM Activities.

And voila! Your Very Own Underwater Volcano at Home!
Remember, what truly counts isn't the frothy, rising bubbles, but you as the catalyst sparking your child’s interest in science and making learning fun.
With just an array of household items and a tad bit of science magic, you've transformed your everyday home into something mesmerizing.
So, go on, dive deep into the world of science, and let's churn out more kitchen-table scientists who discover through experimenting.
Be the bedrock for your child’s STEM journey today, and watch them create and explore their own scientific marvels tomorrow. After all, who knew science could spill such colorful, effervescing wonders right in your kitchen?
Happy experimenting, folks!
You May Also Like These:
DIY Lava Lamp STEM Project
Ingredients
- 1 clear, clean glass container
- 3/4 cup of water
- Vegetable oil or a lighter oil, such as baby oil
- Fizzing tablets (like Alka Seltzer)
- Food coloring
Instructions
- Prepare your workspace: Cover your workspace with paper towels or newspaper for easy cleanup.
- Fill your container: Fill your container about one-third full with the water.
- Add oil: Pour the oil into the container until it’s almost full. Wait until the oil and water have separated.
- Add color: Choose a color of food coloring and add about 6 drops to the container.
- Add a fizzing tablet: Break a fizzing tablet in half and drop it into the container. Watch as the water begins to bubble up like a real lava lamp.
- Enjoy your homemade lava lamp: The homemade lava lamp should react for about 10 to 15 minutes, during which your child can observe the reactions.
Safety Tips & Notes
- Do not drink the lava lamp liquid.
- Be sure to clean up your workspace when you’re finished to prevent any potential stains or mess.
- This project is great for explaining density and chemical reactions to kids. The oil is less dense than the water, which is why they don’t mix. The fizzing tablet creates a gas, which is why the colored water bubbles up into the oil!
STEM Project: Build a Simple Water Filtration System
Materials Needed:
- 2 liters plastic bottle
- Gravel
- Sand
- Cotton balls
- Coffee Filter
- Dirty water (you can make this by adding soil or food coloring to water)
Instructions:
- Cut the bottom off the plastic bottle. Turn the bottle upside down (with the cap on) and set it on a stable surface.
- Fill the bottle about one-third full with a layer of gravel. This will help to catch larger particles.
- Add a layer of sand on top of the gravel until the bottle is about half full. Sand will catch smaller, more microscopic particles.
- Add a layer of cotton balls until the bottle is about two-thirds full. Cotton will help to catch and hold very fine particles that might have made it through the other layers.
- Secure a coffee filter over the top of the bottle. It will serve as a pre-filter, catching any very large particles before they hit the other layers.
- Slowly pour the dirty water over the coffee filter and into the bottle. The water that comes out the bottom into the glass is your filtered water.
- Repeat the process if necessary, until the water is clear.
Explanation:
The layers in the bottle act as filters, catching and holding impurities. This is a very basic version of how a water filtration system works!
STEM PROJECT: BUILD YOUR OWN WATER FILTER
Overview: Learn about water purification and create your own water filter using household items.
Ingredients:
- 1 large plastic water bottle (cut in half)
- 1 coffee filter
- Gravel
- Sand
- Activated charcoal
- Tape
- Dirty water (for testing)
Instructions:
Step 1: Preparations
Preliminarily, gather all the ingredients listed above. Ensure to clean the gravel and sand before use. Do handle the activated charcoal carefully.
Step 2: Bottle Set-Up
Invert the bottle's top half (funnel) and place it inside the bottom of the bottle. Secure it firmly with tape.
Step 3: Building the Filter Layers
Firstly, place the coffee filter at the neck of the inverted bottle.
Secondly, pour a layer of activated charcoal onto the coffee filter. The layer should be approximately 3cm thick.
Thirdly, add a layer of sand onto the activated charcoal. The sand should also be about 3cm thick.
Lastly, add a thick layer of gravel on top of the sand. The layer should fill up the remaining space in the bottle's top half.
Step 4: Filtering Water
Pour the dirty water into the filter, ensuring it passes through all layers. Collect the filtered water from the bottom of the bottle.
Step 5: Observation
Analyze and record the changes in the dirty water before and after filtration. Please note, the filtered water may not be suitable for drinking.
With proper adult supervision, this project can be a fun and enlightening way of helping kids understand water purification systems!
STEM Project: Food Coloring Rainbow
Create a beautiful rainbow using just a few simple ingredients from your kitchen! This fun and easy STEM project is a great way for kids to learn about color mixing and capillary action.
Ingredients:
- 6 clear cups or glasses
- Food coloring in three primary colors: red, yellow, and blue
- Water
- Paper towels
Instructions:
- Line up the cups in a row.
- Add water to the 1st, 3rd, and 5th cups until they are about 3/4 full.
- Add 5 drops of red food coloring to the 1st cup and 5th cups.
- Add 5 drops of yellow food coloring to the 3rd cup.
- Now you should have one cup red, one cup yellow, and one cup red in the order.
- Fold a paper towel into a strip and place one end into the 1st cup and the other end into the 2nd cup. This will form a bridge between the two cups.
- Do the same for the rest of the cups to form a ring.
- Wait for several hours or overnight and watch the colors mix to form a rainbow!
Create a Tornado in a Bottle: A STEM Project Explaining Densities and Chemical Reactions
Ingredients
- Two plastic bottles: They should be of same size and shape. The larger the bottles, the better you will see the formation of the tornado.
- Water: This will be the base of your tornado.
- Effervescent Tablets: These will create a chemical reaction causing the tornado effect.
- A Connector: Specific bottle connecting devices can be bought. If they are unavailable, duct tape can be used to secure the bottles together.
- (Optional) Glitter or Food Coloring: These can be added to the water to make the tornado more visible and interesting.
Instructions
- Fill one of the Bottles: Fill one plastic bottle about three-quarters full of water. If desired, add glitter or food coloring to the water for a visual effect.
- Attach the Effervescent Tablet: Break the effervescent tablet into a few pieces and drop them into the water-filled bottle.
- Connect the Bottles: Attach the empty plastic bottle to the top of the water-filled bottle. If using a connector, secure it in place as per instructions provided with the device. If using duct tape, ensure the bottles are taped securely, with no chance of leaking.
- Flip the Bottles: Turn the bottles over so that the one containing the water and tablet is on the top. Make sure to hold them tightly!
- Create the Tornado: Shake the bottles in a circular motion for a few seconds. Set them down and watch as the tornado forms in the top bottle before your eyes!
Through this experiment, children can learn about vortex, the principle behind tornado formation, and the exciting chemical reaction caused by effervescent tablets.


