


As an affiliate, I earn from qualifying purchases, but this doesn't affect the reviews or recommendations—your trust is important to me!
Creating DIY Terrarium, Neodymium Magnet, Sushi Rolls and Scavenger Hunt
Today, We're Making:
- Activity: DIY Mason Jar Terrarium
- STEM Experiment: Homemade Neodymium Magnet
- Food Recipe: Make Your Own Sushi Rolls
- Game: Backyard Scavenger Hunt
- DIY 'Time Capsule': Encourage children to make a time capsule related to the specific date (06-23-2025). They can include items like the date's newspaper,a letter about their daily life, and other small trinkets. To make it more fascinating they could seal this time capsule into a decorated mason jar.
- Homemade Neodymium Magnet Rocket Racer: Turn the STEM experiment into a fun game! After creating the neodymium magnets, children can use them to propel small,lightweight toy cars. The race is on to see whose magnet-powered car can go fastest or the furthest.
- Sushi Roll Art: After making sushi rolls together.
Just imagine, one sunny Saturday afternoon spent crafting the vibrant green hues of a DIY Mason Jar Terrarium
Indulge in the mysterious allure of creating your very own Neodymium Magnet, getting hands-on in blending fantastic flavors while making your own sushi rolls, and finishing off the day with a thrilling outdoor scavenger hunt in your backyard. Feel excited?
There's nothing quite like the joy of creating something all by yourself
This blog post is going to offer you easy-to-follow guides on DIY Terrarium constructions, how to make delectable sushi rolls, crafting with Neodymium magnets and planning a fun-filled scavenger hunt. So whether you're an indoor gardening enthusiast, a Japanese cuisine lover, a STEM experiment fanatic, or you simply enjoy fun family games, we've got you covered.
Dive into these creative hobbies that do more than just filling your leisure time
They also let you explore, learn and most importantly, have fun.
Activities you can enjoy at Home
Activity: DIY Mason Jar Terrarium
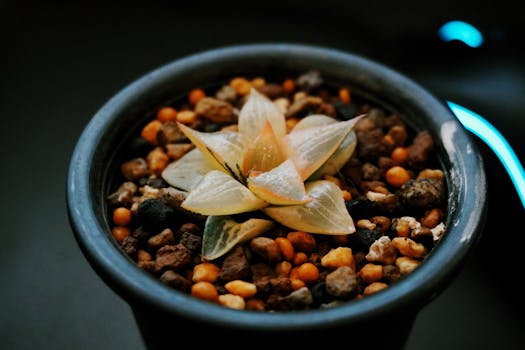
One of the most rewarding home activities is indulging in the delicate craft of indoor gardening. Making a DIY Mason Jar Terrarium is an eco-friendly craft that allows you to express your creativity while having fun with nature. This DIY Terrarium tutorial will walk you through the steps needed to develop your own little green world inside a mason jar.
To start, select a few of your favourite indoor plants. Succulents and ferns make great choices! With the help of some gravel, activated charcoal, potting soil, and your chosen plants, your simple glass jar will soon transform into a thriving, self-sustainable eco-system. The fun doesn't stop there! Get creative with the design by adding miniature garden decorations to accentuate your green creation.
STEM Experiment: Homemade Neodymium Magnet
Unleash your science wizardry with your own homemade Neodymium Magnet! These aren't your typical refrigerator magnets; Neodymium magnets are one of the strongest magnets found on Earth. Starting a Neodymium Magnet project doesn't just give you a break from everyday life, but it also adds an educational twist to your leisure time.
But be warned: once you realise the array of Neodymium Magnet uses, you might find yourself magnetised by this new hobby. Enjoy the awe-inspiring process of watching tiny iron filings becoming instantaneously attracted to your homemade magnet. This science experiment is a fun family game. Encourage your kids and their curiosity by trying out different Neodymium Magnet experiments together.
Food Recipe: Make Your Own Sushi Rolls
Are your taste buds craving for a culinary adventure? Exploring the delicate art of sushi making can be a fascinating journey into Japanese cuisine. Making your own sushi rolls is an experience unlike any other.
The richness of flavorful sushi ingredients like fresh fish, tangy rice vinegar, and crunchy vegetables combined with the ritual of hand-rolling sushi provide an immersive sensory experience. Imagine sitting at your craft table, bamboo mat in hand, feeling the cool touch of sushi rice slowly forming into your very own homemade sushi masterpiece. There’s simply no comparing the satisfaction of enjoying sushi rolls that didn’t just satisfy your hunger but treated you to a creative and cultural indulgence right at home.
Game: Backyard Scavenger Hunt
Last but certainly not least, add a sprinkle of excitement and a dash of mystery to your day with a DIY Scavenger Hunt. Transform your ordinary backyard into an fascinating playground. Scavenger Hunt Ideas could range from simple list of backyard objects for little ones to complex Scavenger Hunt Riddles for adults and teenagers.
Engage in this interactive outdoor activity that not only promotes physical activity but also encourages critical thinking and team work. Whether it's a simple afternoon of fun or a themed party, this home improvement project will liven up any ordinary day, turning it into an unforgettable adventure. With a DIY Scavenger Hunt, you're not just creating a game, you're creating memories. Remember, it's not about what's at the end of the hunt - it’s the thrill of the hunt itself that counts!

Exploring New Hobbies, Hands-On Learning, and Endless Fun
In the comings and goings of daily life, learning and exploring new hobbies can be our happiest moments. Whether creating an eco-friendly oasis in a Mason Jar Terrarium, captivating minds and hearts through a homemade Neodymium Magnet, diving into a cultural experience while making your own sushi rolls, or designing memorable adventures with a backyard scavenger hunt, each allows an opportunity for hands-on learning and endless fun.
And the thrill? It lies not just in the end product, but in the journey and the uniqueness each of these pursuits bring. As you indulge in these fun-filled hobbies, remember, the greatest satisfaction comes from creating with your hands, exploring new areas, and most importantly, enjoying the process.
Here’s to brilliant DIY adventures for each one of us!
And as always, keep exploring, keep learning, and keep creating. Happy DIY-ing, folks!
You May Also Like These:
DIY 'Time Capsule' Project
Encourage your children to make a fascinating time capsule that corresponds to the specific date (06-23-2025). Such project develops their creativity, sense of time, and understanding of the world. Follow these clear steps:
You will need:
- A durable, waterproof container
- The newspaper from 06-23-2025
- Any other meaningful items from that date (photos, letters, a small toy, etc.)
- A safe place to bury the capsule
Instructions:
- To begin, gather all the items you would like to include in your time capsule. Remember the idea is to choose items that represent the specific date (06-23-2025), like the day's newspaper, and items that tell a story about this day.
- Have a conversation with your children about why these items are significant and how they reflect the current times.
- Next, make sure all items are safely stored in the durable, waterproof container. Arrange them in such a way that the most delicate items are in the middle and surrounded by more sturdy items.
- Finally, choose a safe place in your yard to bury the time capsule. Remember to mark the spot or write down its location so it can be found in future years.
- Consider setting a date in the future for when the time capsule will be opened. It can be a significant date, like a future birthday or graduation.
Crafts, STEM Projects, Food, Games For Parents
Time Capsule Mason Jar
Ingredients:
- 1 Mason Jar
- Family photos
- Books
- Handwritten Letters
- Other small trinkets
- Art supplies for decorating the jar
Instructions:
- Gather all ingredients.
- Place your family photos, books, handwritten letters and any other small trinkets inside the Mason Jar.
- Close the Mason Jar tightly.
- Decorate the Mason Jar using the art supplies.
- Your time capsule mason jar is ready to be sealed and stored for future enjoyment.
Homemade Neodymium Magnet Rocket Racer
Ingredients:
- Neodymium Magnets
- Metal Ball
- Straws
- Cardboard
Instructions:
- Attach a neodymium magnet to the metal ball with adhesive.
- Out of the two joined straws, attach the leftover straw onto the cardboard.
- Put the magnet, attached with the metal ball, into one end of the straw and push it with slight force.
- Repeat the process by pushing the magnet into the other end of the straw.
- Your Homemade Neodymium Magnet Rocket Racer is ready to use.
Making your own Time Capsule Mason Jar
Materials needed:- 1 Mason Jar (or any Glass Jar)
- Fancy decoration materials (Stickers, Paint, Sequins etc.)
- Various personal keepsakes and small trinkets to preserve
- First, gather all the materials that you want to put into your time capsule. These could be small keepsakes, pictures, notes and other small trinkets.
- Next, carefully place these items into the mason jar. Make sure everything is arranged in a way you would like to preserve them.
- Then, using the decorations materials you've gathered like stickers, paints, and sequins, start decorating the mason jar. Unleash your child's creativity and make the jar visually appealing.
- Finally, once your mason jar is decorated and all your selected items are stored inside, seal the jar for a fascinating little time capsule.
Homemade Neodymium Magnet Rocket Racer
Materials needed:- Neodymium Magnets
- Aluminum Foil
- Balsa Wood (or any lightweight material)
- Glue
- Start off by creating small rockets out of balsa wood and glue. Make sure you are creating a channel for the magnets within the rockets.
- Next, place a magnet in each channel of your rockets. Ensure the magnet is secure.
- Then, create a track on a flat surface using the aluminum foil.
- Once the track is ready, set your rockets at the start of the track. Power your rocket racer by using another magnet at the bottom of your rocket.
- Remember, don't let the magnets touch! The wonderful properties of magnets will propel your rocket forward!
Crafts
Colorful Paper Plate Birds
Materials:
- Paper plates
- Poster paint (different colors)
- Paintbrushes
- Googly eyes
- Glue
- Scissors
Instructions:
- Paint the paper plates in your preferred colors.
- Once dry, cut the paper plates into bird shapes.
- Glue the googly eyes to the birds.
STEM Projects
DIY Floating Stick Raft
Materials:
- Popsicle sticks
- String
- Scissors
Instructions:
- Lay out the popsicle sticks side by side.
- Use the string to tie each end of the sticks together.
- Once complete, float your raft in a sink or bathtub full of water!
Food
Peanut Butter Banana Smoothie
Ingredients:
- 1 banana
- 1 cup of milk
- 2 tablespoons peanut butter
- 1 tablespoon honey
Instructions:
- Peel and slice the banana.
- Add the banana, milk, peanut butter, and honey to a blender.
- Blend until smooth.
- Pour into a glass and serve.
Games
Indoor Treasure Hunt
Materials:
- Paper
- Pencil or pen
- Various household items
Instructions:
- Write down clues on the paper about the locations of the items.
- Hide the items in matching locations.
- Let the children read each clue and search for the items.
1. Fun with Crafts: Collage Adventure
Materials Needed:- Old Magazines or Photos
- Colored Papers
- Scissors
- Glue
- Marker Pens
- Collect the old magazines or photos.
- Cut out interesting pictures or textures. Be sure to supervise children when using scissors.
- With the colored papers as the background, arrange the cutouts to create a picture or abstract design.
- Glue them down once you're satisfied with the arrangement.
- Add final touches with marker pens if you wish.
2. STEM Project: Magnet-Powered Toy Car Race
Materials Needed:- Lightweight Toy Cars
- Small Magnets
- String
- Ruler or Measuring Tape
- Attach a small magnet to each lightweight toy car.
- Create a race track using the string. Measure the length so you know how far the cars travel.
- Use another magnet to move the toy car by placing it under the table or behind an object and moving it along, causing the car to follow due to the magnetic attraction.
- Have fun experimenting with how fast or how far you can get your car to move. Remember, experimentation and observation are key elements in STEM learning.
3. Food Fun: Sushi Roll Art
Ingredients Needed:- Sushi Rice
- Nori Sheets
- Various Fillings (cucumber, avocado, cooked shrimp, etc.)
- Soy Sauce
- Wasabi (optional)
- Prepare sushi rice according to instructions on the package.
- Place a nori sheet on a bamboo rolling mat and spread out a layer of sushi rice on top of it.
- Select your favorite fillings and place them on top of the rice.
- Roll the sushi tightly using the bamboo mat, applying pressure evenly.
- Cut rolled sushi into bite-size pieces.
- Arrange your sushi art design on the plate. Get creative!


