


As an affiliate, I earn from qualifying purchases, but this doesn't affect the reviews or recommendations—your trust is important to me!
Creating Your Own Origami Bookmark Craft Step by Step

Today, We're Making:
- - DIY Origami Bookmark Craft
- - 'Time Capsule Jar': Parents can help their kids to create a time capsule jar filled with mementos,drawings,and notes about what's currently important in their life. This could include popular YA or Middle Grade books or characters at the time. The time capsule can then be opened on 03-19-2030 for a fun trip down memory lane.
- - 'Fairy Tale Puppet Show': Using paper,markers,glue sticks.
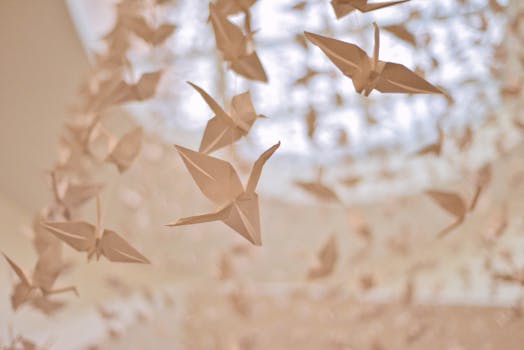
How many times have you lost your spot in your favorite book?
Only to improvise a makeshift bookmark from a crumpled receipt or a hastily torn piece of paper? If you've been there, this DIY Origami Bookmark Craft tutorial is just for you. We're going to journey into the Japanese art of origami and explore the creative magic of folded paper crafts. Think about it, not only a functional reading accessory but also a beautiful piece of artwork to personalize your reading experience.
This step by step guide is perfect for beginners too. So, if you're looking to initiate your kids into the world of paper folding or are just looking to immerse yourself into an easy and calming origami project, read on!
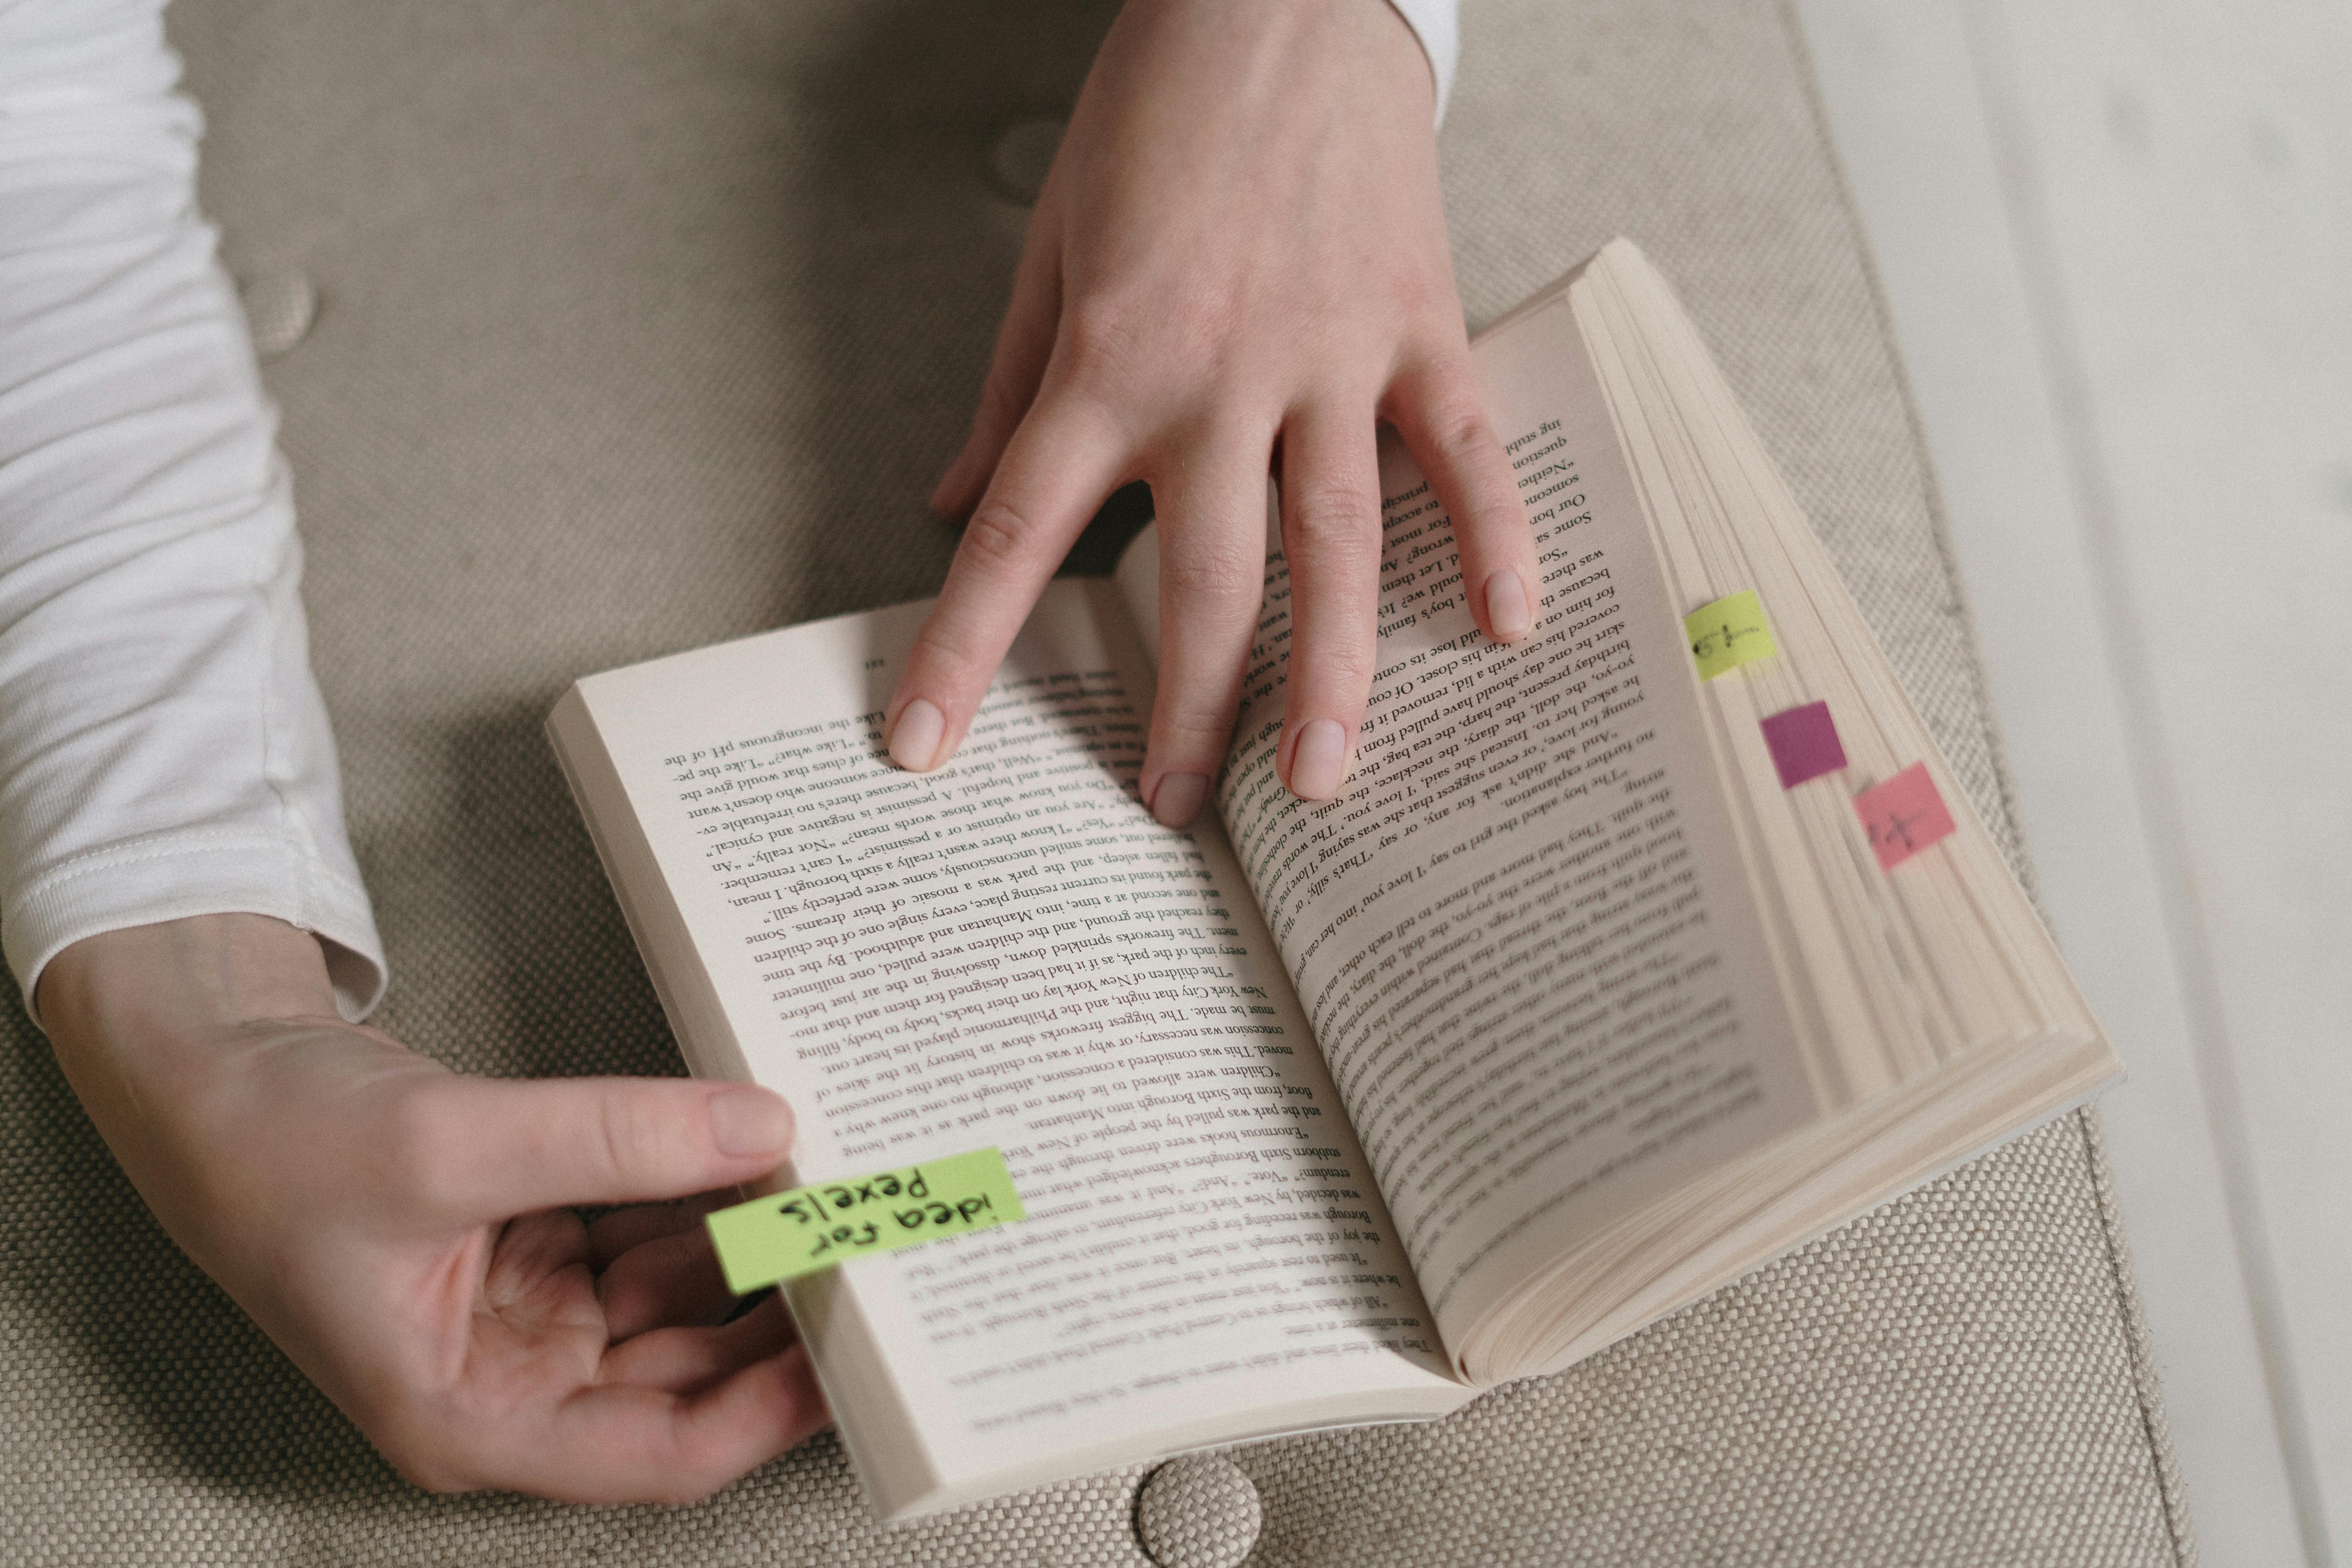
Step One: Choosing Your Paper
The first step in the process of crafting your DIY Origami Bookmark Craft is choosing the right type of paper. Now, remember, origami is the true essence of uniqueness and creativity—you have the liberty to pick literally anything—the aesthetic of plain, patterned, or colored paper. Including a paper that reflects your own style or the theme of your book adds a personalized touch to this craft tutorial. Note that the standard size for an origami bookmark is approximately 15cmx15cm. Beginners in the world of paper folding might find it easier to start with a larger piece until they get to grips with the origami technique.
Step Two: Let's Get Folding
Now that you’ve chosen your perfect origami paper, you’re ready to immerse yourself in the paper folding process. Each origami bookmark DIY requires precision to achieve the final product. To begin, place your paper square on your working surface. Fold the paper in half diagonally to create a triangle, then unfold it back to the square position. This creates a central line that guides the rest of our origami instructions.
Step Three: Origami Magic
With the central line now visible, fold both opposite ends of your paper towards it, resembling a square once more. It might be a little tricky at first, but remember, every origami for kids or adults requires patience. The beauty of an origami project is witnessing a simple piece of paper transforming into a practical and personalized bookmark.
Step Four: The Final Touches
Once your previous folds sit nicely in place, you need to do one last fold to complete your easy origami bookmark. Gently fold the top layer of the lower section upwards, tucking its point into the pocket created by previous folds. Congratulations, you have successfully created your unique origami bookmark craft! Repeat these steps with different types of paper or colors to add a variety of creative bookmarks to your reading accessories.
Isn't it remarkable what you can create from a simple piece of paper? Step by step origami is not only an engaging home craft project, but it also gifts something tangible and useful at the end—the satisfaction is inordinately rewarding. With the unleashed book lover’s gift for the Beginner origami enthusiast in you, losing your page will be a tribulation of the past! Tune in for more paper craft ideas that will surely jazz up your free time with creativity and fun.
And There You Have It, Your Very Own DIY Origami Bookmark Craft
Just imagine the joy of always having a vibrant, artistic touch at hand to mark your reading adventure. These bookmarks add a personalized touch to your favorite novels, while being a testament to your dive into the art of origami.
The best part? Each one is as unique as you! It's been a pleasure guiding you through this artful journey with paper. Keep practicing and soon every book on your shelf will be adorned with these colorful tokens of creativity.
Enjoy the folding, enjoy the reading, and most importantly, enjoy the magnificent world of origami!

You May Also Like These:
Crafts for Kids: Time Capsule Jar
Creating a time capsule jar is a fun and meaningful activity parents can enjoy with their kids. Children will have a blast filling their jars with various knickknacks, memories and messages to their future selves.
Ingredients
- A clear glass or plastic jar with a lid
- Various items to fill the jar
- Photographs
- Small Toys
- Letters or Messages
- Artwork
- Newspaper Clippings
- Decorative materials such as paint, stickers, ribbons, etc. for the jar
Instructions
- Gather Your Materials : Assemble all the ingredients listed above.
- Fill Your Jar: Have your child select the items they would like to include in their time capsule.
- Decorate The Jar: Using the decorative materials, allow your child to personalize their time capsule jar anyway they want.
- Seal the Jar: Once all items are placed inside and the jar is decorated, carefully close the jar ensuring it's sealed well.
- Store the Time Capsule: Find a safe place to store the time capsule jar. Decide as a family when you will reopen it in the future.
This simple yet engaging activity not only promotes creativity but also serves as a wonderful keepsake for both you and your child to look back on years from now.
```HTML
Fairy Tale Puppet Show Craft
Materials Needed
- Paper (construction and regular)
- Scissors
- Markers
- Glue
- Popsicle Sticks
- Optional: Stickers, Glitter, etc. for decoration
Instructions
- Choose a Fairy Tale: Start by choosing your favorite fairy tale story.
- Create Characters: Using the construction paper, cut out characters from your chosen fairy tale. You can also use the regular paper to draw on faces and other details.
- Decorate: Use markers, stickers, glitter, and any other craft supplies you have on hand to decorate your characters.
- Stick: Glue each of your characters onto a popsicle stick. Allow the glue to dry before moving onto the next step.
- Rehearse: Now that you have your puppets, rehearse your fairy tale. Make sure each character knows their part!
- Showtime: Perform your puppet show for family and friends. Don't forget to take pictures or record a video so you can remember the fun for years to come!
The Fairy Tale Puppet Show is a great way to bring your child's favorite fairy tale to life, while also encouraging them to be creative and use their imagination. This craft can be tailored to fit any fairy tale, or even a favorite book or movie. And once the puppet show is over, the puppets make great toys to play with or display in their room.
```'Time Capsule Craft'
Create a time capsule to capture the essence of your life with your favorite family and kids' memories. Fill it with crafts, notes, and tokens that are currently important in your life. This can include aspects related to pop-culture such as YA or Middle-Grade books or characters. Set it to be opened on March 19, 2030 for a nostalgic walk down memory lane.
Ingredients
- An airtight metal or plastic container
- Various craft materials (like paper, markers, colorful tapes, scissors etc.)
- Chosen items to include in the time capsule
Instructions
- Pick a container: Ensure that the container is airtight and sturdy to protect your mementos over time.
- Choose crafts/notes: Start by selecting all of the items you would like to include. Remember, these should be relevant and important to you or your kids at this point in time. This can include favorite storybooks, personal letters, drawings, or photos.
- Decorate if desired: Use your craft materials to decorate the container to make it more personal.
- Fill the capsule: Place all the chosen items in the box. You could even include a list describing each of the items and why they were chosen.
- Seal and store: Once everything is inside, seal your time capsule and store it in a safe, dry place. Remember, it is to be opened on 03-19-2030.
'Fairy Tale Puppet Show'
Bring the magic of fairy tales to life by creating your own puppet show. Let your kids play, narrate, and enact their favorite stories, giving wings to their imagination.
Ingredients
- Colorful papers / cardboards
- Markers
- Miscellaneous craft decorations (glitter, stickers, etc.)
- Wooden craft sticks
Instructions
- Choose a fairy tale: Let your kids pick their favorite story.
- Draw characters: On the colorful papers or cardboards, draw and color the characters from the chosen fairy tale
- Decorate: Enhance the look of the characters by adding sparkly embellishments and other decorative craft materials.
- Make puppets: After the drawings are complete and dry, cut them out, leaving a small tab at the bottom of each. Glue or tape a wooden craft stick to the back of each character.
- Puppet show time: Now the stage is set for your kids' very own puppet show. Use a tablecloth or sheet to create a stage and let the creativity unfold!
Crafts for Markers - A Guide for Parents
Ingredients
- Paper Sheets
- Set of markers (assorted colors)
- Pencil and Erasers
- Glue
- Scissors
Instructions
Step 1: Idea Sketching
Start by discussing the craft idea with your child. Once an idea is finalized, use a pencil to sketch it out on a piece of paper. This will help your child have a clearer idea of what they will be creating.
Step 2: Marker Work
Now it's time to bring in the markers. Encourage your child to follow the pencil sketch and fill in the colors using the markers. Remind them that they can use multiple shades of the same color to create depth and highlight.
Step 3: Cutouts
If your craft project involves making cutouts, help your child safely use the scissors to cut out the necessary shapes.
Step 4: Gluing and Mounting
For projects that need different parts stuck together, assist your child in applying glue and sticking the parts. Make sure they leave the craft to dry before moving on to the next step.
Crafts with Glue Sticks: A Step-by-Step Guide for Parents
Ingredients:
- Glue sticks: Always have multiple on hand as they can run out.
- Colorful papers: Handy for cutting out shapes, designs, and creating collages.
- Scissors: Necessary for cutting papers, make sure these are safety scissors if kids are involved.
- String, beads or glitter: These are optional but can be used to add more texture and sparkle to your crafts.
- Googly eyes (optional): These can be used for character design in the crafts.
Instructions:
- Step 1: Ensure you have a clean, flat surface to work on and gather all your ingredients.
- Step 2: Depending on your project, start by cutting out shapes or designs from your colorful papers.
- Step 3: Draw or trace an outline of your craft on a piece of paper. This will be your base.
- Step 4: Begin applying glue to your cut-out shapes or directly onto your base, depending on your design.
- Step 5: Stick your shapes or designs onto your base. Use your fingers to smooth out any bumps or air bubbles.
- Step 6 (Optional): Now, you can add any extra embellishments like glitter, beads or googly eyes. Remember to apply glue before sticking these on.
- Step 7: Leave your creation to dry for a few hours. Once it's fully dry, you can hang it up, give it as a gift, or use it as a decoration!


