


As an affiliate, I earn from qualifying purchases, but this doesn't affect the reviews or recommendations—your trust is important to me!
Creating Your Own Universe with DIY Galaxy Jar Craft
Today, We're Making:
- - DIY Galaxy Jar Craft
- - DIY Space Themed Slime: Slime is a hit amongst kids. Making some glittery, star-studded space-themed slime will be a wonderful addition to the galaxy jar craft, besides it is an effective way to improve children's sensory development. All you need is some clear or black glitter glue, baking soda, contact lense solution.
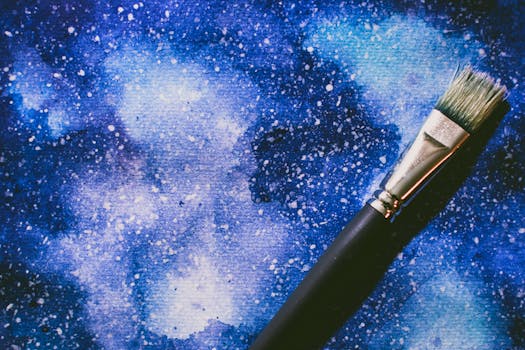
Ever gaze up at the night sky, awestruck by the seemingly boundless universe?
The vibrant hues of galaxies far, far away, the twinkling of countless stars, the elusive beauty of nebulae – it's a sight to behold! With our DIY galaxy jar craft tutorial, you can bring that awe-inspiring cosmic spectacle right into your living room. Now, how heavenly does that sound?
Whether you want an engaging DIY crafts for kids or you're a science enthusiast simply fascinated by astrology crafts, this space-themed DIY project is sure to kindle your inner stargazer.
Pack your bags, because we're about to embark on a journey to 'create your own universe' with a little twist of artistic flare!
Getting Started with DIY Galaxy Jar Craft
The beauty of this DIY Galaxy Jar Craft is that it is fun and accessible to all, from arts and crafts beginners to nerdy scientists! To get started, you'll need a few readily available materials: a mason jar, cotton balls, acrylic paint in galaxy colours, some glitter, and a couple of other craft tools. With these materials at the ready, you’re one step closer to having your own homemade galaxy. Remember, when opting for DIY crafts for kids, it's always wise to use non-toxic paint and tools for safety reasons.
Creating Your Own Universe: Step By Step Guide
- The first step to make your own galaxy is to inject some colour into your cotton balls. Choose two to three shades that mimic the stunning hues of a galaxy. A combination of pink, blue, and purple, for example, can really capture the essence of a nebula in a jar.
- Once you've coloured your cotton balls, stuff them layer by layer into your mason jar, creating the illusion of clusters of stars and nebulae which are the building blocks of any galaxy crafts. Each colour signifies a different nebula in your DIY universe.
- The next step is where your DIY galaxy comes alive! Sprinkle some glitter on top of each layer. The glitter represents the twinkling stars in the night sky crafts.
- Continue this process until the jar is filled, keeping true to the galaxy jar instructions. Before sealing your jar, give it a gentle shake. Voila, your crafty galaxy jar is ready!
Stargazing Activities: Bringing Space to Your Living Room
Creating your own DIY cosmos jar isn’t only about engaging in creative arts and crafts. It’s also a fantastic way to introduce kids to the wonders of space. It might just spark their interest in stargazing activities and astrology crafts. When they hold the beautiful galaxy jar that they helped to create, they’ll feel as though they're holding an entire universe in the palm of their hands.
Integrating this DIY space crafts idea into your kids’ art time not only stimulates their creativity, it also piques their curiosity about the vastness of the universe. As they engage with this space themed craft, you could also enlighten them with fun facts about galaxies and stars further intensifying their rewarding craft experience.
Bringing Creativity and Learning Together
In a nutshell, the DIY Galaxy Jar Craft can be a platform for imagination, creativity, learning, and fun. Hopefully, it will get your little ones fascinated with the night sky and the universe beyond. Whether you are adding a splash of cosmic décor to your living room, or nurturing future astronauts and space scientists, this craft presents an array of exciting opportunities. This isn’t merely a craft project; it’s a whole world of creativity and knowledge packed into one nifty jar!
And there you have it, your own universe, safely captured within a jar!
Crafting your own DIY Galaxy Jar is far greater than a simple arts and crafts project. It's a captivating journey through the cosmos, an exploration of creativity, a tool for learning, and a source of endless fascination. So, grab your glitter, reach for your stars, and let’s light up your world, one galaxy jar at a time!
By blending creativity and science, we can inspire young minds, adding a dash of astral magic to our everyday lives. Remember, the universe is limitless, and so is your imagination.

You May Also Like These:
DIY Space Themed Slime
Slime is a favourite amongst kids. Making some glittery, space-themed slime adds a fun, educational twist to this popular activity.
Ingredients
- 1/2 cup of clear or white PVA glue
- 1/2 cup of water
- 1/2 cup of liquid starch
- Silver glitter
- Purple glitter
- Blue food coloring
- Star-shaped sequins
Instructions
- In a bowl, mix together the glue and the water until they are fully combined.
- Add a few drops of blue food coloring to the mixture. Add in more drops for a darker shade of blue.
- Stir in the silver and purple glitter. The amount is up to you depending on how sparkly you want your slime.
- Add in some star-shaped sequins to give your slime a true space-themed feel.
- Slowly add in the liquid starch while continuously stirring the mixture. Be sure to add it in slowly because adding too much at once can make the slime too hard.
- Once the slime starts to form, take it out of the bowl and knead it with your hands until it's no longer sticky. If it's still sticky, add a bit more liquid starch.
And there you have it! Your very own DIY Space Themed Slime. Remember to store it in an airtight container to keep it fresh.
Mesmerizing Glitter Glue Sensory Craft
Materials Required
- Clear or Black Glitter Glue
- Water
- Reusable shaped container (optional)
Steps to Follow
- First, gather all the necessary materials. This activity is less about precision and more about the process, so feel free to encourage your child to participate in the gathering phase as well.
- Next, open the glitter glue. If you are working with a younger child make sure to supervise this step to avoid any accidents.
- Start pouring the glitter glue inside the container, spread out or fill up as you wish, sure to create a shiny eye-catching base layer.
- To dilute the glitter glue a bit and make it more movable, slowly start adding water. We recommend adding a bit at a time and stirring it in so that it gets completely mixed together with the glitter glue.
- Finally, Seal the container and shake it up to let the glory of the glitter glue flow.
- Note: The container can be reusable. Just rinse it out when you're finished and let it dry completely before using it again.
Tips and Tricks
- Ensure to properly supervise your child during the craft work especially when dealing with non-edible materials
- Add more water if necessary, until you achieve the desired fluidity
- Have fun and make this activity a learning experience for your child
Glitter Glue Crafts for Sensory Development
Ingredients
- Clear or black glitter glue
- Additional crafting materials (optional)
Instructions
- Purchase clear or black glitter glue from your local craft supply store. If ordering online, ensure the glitter is fine and well mixed within the glue for optimal sensory experience.
- Set up a crafting area. Choose a space that is easy to clean, such as a kitchen table covered with newspaper or a disposable tablecloth.
- Explore the glue. Allow your child to handle the glue bottle, squeeze it, and see the glitter. Talk about how the glue feels and looks, fostering sensory vocabulary.
- Create with the glue. This can be an open-ended activity. Your child could draw designs, write their name, or create a collage with paper scraps using the glitter glue.
- Clean up together. Make the end of the crafting session just as fun with a shared clean-up time.
Baking Soda Crafts Instructions
Materials Needed:
- 1 cup of Baking Soda
- 1/2 cup of Cornstarch
- 3/4 cup of Warm Water
- Craft Paint
- Paintbrushes
- Clear acrylic sealer (optional)
Instructions:
Step 1: Mix Ingredients
Combine the baking soda and cornstarch in a pot. Stir in warm water until the mixture is smooth.
Step 2: Heat Mixture
Place the pot on a stove and heat until the mixture is the consistency of mashed potatoes. Stir constantly to avoid lumps.
Step 3: Cool the Mixture
Remove the pot from the stove and let the mixture cool completely.
Step 4: Mold Your Crafts
Once the mixture is cool enough to handle, mold it into your desired shapes.
Step 5: Let It Dry
Allow your crafts to dry completely. This may take up to 24 hours depending on the size and thickness of your crafts.
Step 6: Paint Your Crafts
Once dry, you can paint your crafts using the craft paint and paintbrushes. Allow the paint to dry completely.
Step 7: Seal (optional)
For added durability, you may seal your crafts with a clear acrylic sealer. Follow the manufacturer's instructions for use.
DIY Crafts using Contact Lens Solution
Create amazing crafts with just a few simple items, the main one being contact lens solution. Follow these easy instructions to create your own crafts.
Ingredients
- Contact Lens Solution: This will be used as our primary crafting agent.
- Baking Soda: This will be used to set our craft item.
- White Glue: This will be used to create a good consistency for our craft.
- Food Coloring: This will be used for some cool and fun added color.
Instructions
- Prepare your materials: Gather all your needed materials and prepare your working area.
- Mix the ingredients: In a large bowl, mix together one part glue, one part baking soda and a few drops of your chosen food coloring.
- Add lens solution: Slowly start adding the contact lens solution to the mixture. Keep adding until you achieve your desired consistency.
- Mould and Set: Once your mixture has reached a consistency you're happy with, you can start moulding it into your desired craft shape. Once shaped, allow it to set.
- Enjoy: Your craft item made with contact lens solution is now ready to be enjoyed.


