


As an affiliate, I earn from qualifying purchases, but this doesn't affect the reviews or recommendations—your trust is important to me!
Creative Family Fun: DIY Galaxy Art, Slime, Cupcakes & Games
Today, We're Making:
- - Watercolor Galaxy Painting
- - Homemade Slime Experiment
- - Rainbow Unicorn Cupcakes
- - Escape Room in a Box Game
- - DIY Time Capsule Craft
- - DIY Solar System Mobile Project
- - Starry Night Pancakes
- - DIY Memory Board Game
- - Build Your Own Rainbow Telescope STEM Project
Are you ready to dial up the volume on family fun?
Let's explore a universe of DIY galaxy art, transform kitchen basics into an ooey-gooey homemade slime experiment, bake a batch of whimsical rainbow unicorn cupcakes, and challenge your clan with an engaging escape room in a box game.
These creative activities aren't just the keys to a memorable afternoon, but also an amazing opportunity to encourage creativity, boost family bonding, and create a magnum opus for your living room wall.
So, put on your imaginative caps and join us as we delve into these fantastic DIY art projects and fun indoor games that will transcend your regular routine and take you to another galaxy of joy!
Watercolor Galaxy Painting: Artistic Family Project
Firstly, let's delve into the cosmic arts with a DIY Galaxy Art project. This is a remarkable way to bring art and family bonding activities into one harmonious setting. Watercolor Galaxy Painting can seem quite intimidating at first, but let me assure you, with some essential tips and galaxy art techniques, it's a delightful and easy craft even beginners can master. Grab your art supplies and encourage your little ones to express their creativity. Plus, it's double the fun when each family member picks their picture to paint. The finished work could decorate your living room wall, bringing your family's artistic charm to your cozy space.
Homemade Slime Experiment: A Fun Science Project
Next on the agenda of our DIY family fun is the Homemade Slime Experiment. It's not just a kids craft, but also a science experiment slime that can inspire your budding little scientists. Transform ordinary kitchen supplies into an ooze of joy in minutes with our simple and safe recipe. Safety goggles on, let's plunge into the world of goo and stickiness. While we're at it, why not sprinkle some stars and glitter to make galaxy slime DIY? It’s sure to keep your kids captivated and tickle the scientist within them. Remember, creativity has no boundary.
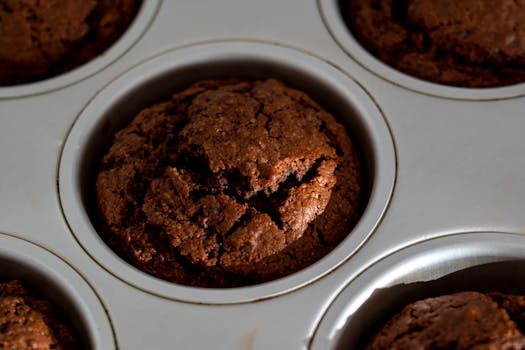
Rainbow Unicorn Cupcakes: Creative Baking Ideas
Do you smell that on your journey? That's the scent of our Rainbow Unicorn Cupcakes baking to perfection. On top of family art and scientific exploration, is there a joy more shared than the act of baking cupcakes as a family? The recipe for cupcakes is an easy, kid-friendly recipe. You're bound to create tantalizing treats that are both delightful to the eyes and the taste buds. It won't be surprising if your kitchen is filled with laughter and powdered sugar. That’s the sweet embodiment of family bonding activities over baking cupcakes.
Escape Room in a Box Game: Fun Indoor Games
Last but not least, we’d be amiss not to explore the exciting world of family games. After a day of successful DIY crafts and art projects, there's nothing like winding down with a stimulating Escape Room in a Box Game. It’s a fun example of indoor activities that require some clever thinking and teamwork to master, making it a perfect amalgamation of education and entertainment. You can even embrace your DIY spirit and customize your homemade games. After all, there's no age limit on solving mysteries!
There is certainly no dearth of DIY ideas when it comes to creating beautiful memories with your family. All you need is a wholesome sense of fun, a dash of creativity and you’re well on your way to hosting an unforgettable afternoon in your very own home.

As our cosmic journey draws to a close
It's clear that creative family fun activities are about more than passing the time. They're about laughing together, learning together, and letting our collective creative energies flow.
Whether crafting watercolor galaxy paintings, concocting homemade slime, indulging in baking rainbow unicorn cupcakes, or solving an intriguing escape room game
Each provides a unique way to bond and create lasting memories.
Here's to embracing creativity, cherishing those precious family moments, and always seeking out new universes of joy to explore together.
Remember, a galaxy of fun is only an art project, a science experiment, a sweet treat, or a clever game away. So, let's keep painting, experimenting, baking, playing, and, most importantly, having fun. After all, family time is the best time!
You May Also Like These:
DIY Time Capsule Craft
If you're looking for a fun and meaningful family activity, creating a DIY Time Capsule is an excellent choice. This project allows you to document memories and anticipation for future reflection.
Materials Needed:
- Durable Container - A sturdy metal or plastic container that can withstand the elements.
- Paper and Pen - For writing down thoughts, dreams, and memories.
- Memorabilia - Photos, small toys, or any other small items that are special.
- Protective Bags - To protect items from moisture, consider using zip-lock bags.
- Date Marker - A note to remind you when to open the time capsule.
Instructions:
- Choose a Container: Select a container that's durable and capable of protecting the contents from elements.
- Brainstorm About the Contents: As a family, decide what you want to put in the time capsule. You might choose photos, small keepsakes, or notes about your life right now.
- Gather Items: Once you decide on the contents, gather them together. Make sure they are small enough to fit in your chosen container.
- Write Notes: Have every family member write a note. This could be about current likes and dislikes, hobbies, friends, dreams, or predictions for the future.
- Pack the Container: Place the items in the protective bags, if you're using them, then put everything carefully into the container.
- Seal the Capsule: Close the container securely. You might want to tape it shut to prevent accidental opening.
- Mark the Date: On the outside of the capsule, write the date and a 'do not open until' date. This might be 5, 10, or even 20 years in the future.
- Store the Time Capsule: Choose a safe place to store your time capsule where it won't be disturbed until the date you’ve chosen.
Creating a DIY Time Capsule is a great way to bond as a family and provide a fun and intriguing activity for the future.
Starry Night Pancakes
A fun and easy recipe that turns a family breakfast into a cosmic experience! Starry Night Pancakes are great for children who love astronomy and delicious meals!
Ingredients
- 1 cup of all-purpose flour
- 2 tablespoons of granulated sugar
- 1 teaspoon of baking powder
- 1/2 teaspoon of baking soda
- 1/4 teaspoon of salt
- 3/4 cup of buttermilk
- 1/4 cup of milk
- 1 large egg
- 2 tablespoons of unsalted butter, melted
- Blue food coloring
- Edible glitter stars
- Maple syrup for serving
Instructions
- Combine the flour, sugar, baking powder, baking soda, and salt in a large mixing bowl.
- In a separate bowl, whisk together the buttermilk, milk, egg, and melted butter until well blended.
- Pour the wet mixture into the dry ingredients and stir until all the dry ingredients are moistened.
- Drop several drops of blue food coloring into the batter and mix until the batter is an even blue color.
- Heat a large nonstick skillet over medium heat. Once hot, scoop 1/4 cup portions of the batter onto the skillet. Cook until bubbles form on the surface, then flip and cook until set.
- While the pancakes are still hot, sprinkle edible glitter stars over the top.
- Serve with a drizzle of maple syrup.
With the above steps, you've transformed a humble pancake breakfast into a celestial spectacle. Enjoy your Starry Night Pancakes!
Starry Night Pancakes: A Fun and Tasty Project
Indulge your kids' love for art, astronomy and breakfast food with this fun and delicious craft project. Let's transform an artistic masterpiece into a plateful of sweet delight using this easy, step-by-step guide.
Ingredients:
- 1 cup all-purpose flour
- 2 tablespoons white sugar
- 1 teaspoon baking powder
- 1/2 teaspoon baking soda
- 1/4 teaspoon salt
- 3/4 cups buttermilk
- 1/4 cup milk
- 1 large egg
- 2 tablespoons unsalted butter, melted
- Blue and white food coloring
- Decorative star-shaped sprinkles
Instructions:
Step 1: Preparing the Pancake Batter
- First, combine all the dry ingredients, including flour, sugar, baking powder, baking soda, and salt in a large bowl.
- In a separate bowl, whisk together buttermilk, milk, and the egg.
- Pour the wet mixture into the dry and mix until smooth, then stir in the melted butter.
- Separate the batter into two bowls. Add a few drops of blue food coloring into one, and mix until the color is uniform. The other bowl remains plain.
Step 2: Cooking the Pancakes
- Heat a lightly oiled griddle or frying pan over medium-high heat.
- Using the back of a spoon, spread the blue batter into a circular shape onto the griddle.
- Once bubbles form on the surface of the pancake, drop dollops of the plain batter onto the blue pancake. These will be the 'stars'.
- After a minute, or when the underside is golden brown, flip the pancake. Cook for another 1-2 minutes on the other side.
Step 3: Final Touches
- Remove the pancakes from the griddle and place onto a plate. Add additional 'stars' by sprinkling the star-shaped sprinkles on the warm pancakes. They will slightly melt and adhere to the pancakes, creating a starry night effect.
- Repeat the process with the remaining batter. Get creative with the placement of your stars on each pancake!
These Starry Night Pancakes are not just a tasty treat, but also a fun way to encourage creativity and learning. Enjoy!
DIY Memory Board Game
Materials Needed:
- Cardstock or heavy-duty paper
- Scissors
- Marker
- Glue
- Pictures or printed images
- Laminate sheets (optional)
Instructions:
Step 1: Prepare the cards
To start, you will need to cut out square-shaped pieces from the cardstock which will serve as your memory cards. Make sure to have matched pairs for each image or picture you choose to use.
Step 2: Attach images
Align your selected images to the cardstock squares and glue them. Remember, each image or picture should have a duplicate as this is a game of pairs. Let them dry completely.
Step 3: Laminate (Optional)
If you want your game to last longer, you can opt to laminate the cards for extra durability. This step is not necessary but is helpful especially when the game will be played by young children.
Step 4: Play the game!
Once your cards are dry (or laminated), you are ready to play! Shuffle the cards and lay them out face down in rows. The first player flips over two cards. If they are a match, the player keeps them. If not, the player turns them back over and it's the next player's turn. The game continues until all the cards are matched.
Build Your Own Rainbow Telescope STEM Project
This STEM project is a fun and colorful way for children to learn about the science of light and color while building their own rainbow telescope.
Materials Needed:
- 1 cylindrical cardboard tube
- 2 circular mirrors with a diameter slightly smaller than the tube
- Colorful transparent cellophane sheets (red, orange, yellow, green, blue, indigo, and violet)
- Black cardstock
- Double-sided adhesive tape
- Scissors
Instructions:
- Cut the black cardstock to fit the inside of your tube. This will prevent light from reflecting off the inside walls of your telescope.
- Cut the cellophane sheets into rectangular sections. Each section should be the same width as the tube but different lengths to represent each color of the rainbow.
- Stick the cellophane sections inside the tube using double-sided adhesive tape. They should be arranged in the order of the colors of the light spectrum - Red, Orange, Yellow, Green, Blue, Indigo, Violet. Ensure one end of each cellophane extends beyond the top of the tube forming a cascade of colors.
- Insert one mirror at the bottom of your tube, flat side facing up. Secure it using the double-sided adhesive tape.
- Position the second mirror inside the tube, at an angle. This mirror should reflect the colors from the cellophane upwards and out of the tube. Adjust the angle of the mirror until you achieve a satisfactory reflection.
- You've now successfully built your rainbow telescope! Peer through the bottom of the tube and turn towards a light source to see a beautiful spectral display.


