


As an affiliate, I earn from qualifying purchases, but this doesn't affect the reviews or recommendations—your trust is important to me!
Fun DIY Projects for Kids: Crafts, Edibles, and Science Experiments
Today, We're Making:
- - DIY Personalized Bookmarks
- - Edible Play Dough Recipe
- - Floating Egg Science Experiment
- - Indoor DIY Scavenger Hunt Game
- - DIY Time Capsule Craft Kit
- - Homemade Galaxy Ice Cream
- - Build a Solar System STEM Project
- - Virtual Reality Space Exploration Game
- - DIY 2025 Calendar Board Game
Ever found yourself scratching your head, wondering how to keep your little Einstein or Picasso engaged indoors?
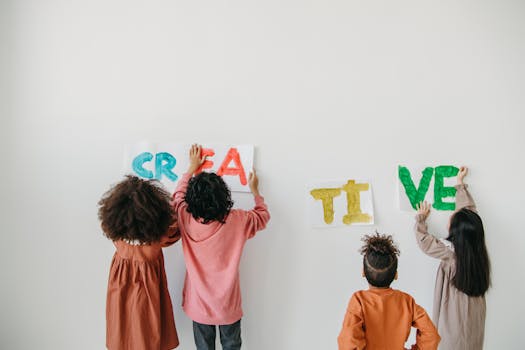
You're not alone! Every parent faces the conundrum of finding the right balance of fun and educational activities for kids. The solution is right at your fingertips – DIY projects for kids!
Imagine merging their love for creativity with learning through crafts, scientific experiments, and even edible treat creations.
From crafting personalized bookmarks, concocting edible play dough recipes, to fascinating STEM explorations like the captivating floating egg science experiment or an exciting indoor DIY scavenger hunt game. No matter your child's interest, there's a fun-filled learning project waiting to spark their excitement.
But the question remains, where do you start?
Well, fasten your seatbelts because this fun DIY journey is about to start!
Ignite Their Imaginations with DIY Personalized Bookmarks
Reading is a magical journey. Why not add some extra sparkle to this adventure with DIY Personalized Bookmarks? Transforming favorite characters, animals, or objects into personalized bookmarks is not only a wonderful Art and craft project but also a superb way to foster a love for reading. Get your kids to sketch their designs, cut them out, and decorate using vibrant colors, sparkly glitter, or crafty stickers. For the little bookworms in your home, seeing their handmade bookmarks peeking out from the pages of their favorite books will surely be a joy! It's a cheap DIY craft for kids that requires minimal materials but heaps of creativity.
Stir Up Some Fun with This Edible Play Dough Recipe
Moving on from books to bakes, how about whipping up a simple yet sensational Edible Play Dough Recipe? Unique among Edible crafts for kids, this dough is safe, fun, and most importantly, tasty! All you need is cream of tartar, flour, water, salt, vegetable oil, and food coloring. Once mixed, kneaded, and divided into colorful balls, the possibilities are endless! From sculpting miniature cakes to fashionable figurines, this DIY project for kids is fantastic for hands-on learning activities and creative exploration. It is not just an indoor activity for kids; it’s a cultivation of culinary creativity.
Give Curiosity a Floating Chance: The Floating Egg Science Experiment
Next, serve up some scintillating science with the Floating Egg Science Experiment. This mind-blowing, simple kids experiment teaches them about the principle of density in a fun, interactive way. Guide your little scientists to pour water into a glass, dissolve a good amount of salt into it, and then gently lower an egg. Witness their wide-eyed amazement as the egg miraculously avoids sinking. This DIY Science project isn't just a fascination; it's a golden opportunity for learning through play. It's safe, straightforward, and super fun, making it an absolute hit amongst Science experiments for kids.
Go Indoor Adventuring with a DIY Scavenger Hunt Game
Finally, to keep kids active and engaged, why not set up an Indoor DIY Scavenger Hunt Game? It encourages children to observe their surroundings and think critically. Prepare a list of objects or clues every morning and let your little detectives have a field day hunting down these items at home. Convert education into an adventure with this fun DIY idea that promotes problem-solving skills along with rewarding a sense of achievement. It’s one of the top kids activities at home that blends fun, physical activity, and intellectual challenge into one amazing package.
Applying these DIY projects for kids ensures that they are constantly learning, creating, and most importantly, having fun. You see, the key to keeping your little ones engaged isn’t just about buying the most expensive toys, it’s about turning the ordinary into extraordinary!
The Power of DIY Projects
To sum up, the power of DIY projects lies in their simplicity, adaptability, and ability to magically transform everyday household items into tools of creativity and learning. Whether it's the artistic pleasure of personalized bookmarks, the taste-loaded fun of edible play dough, the mind-boggling magic of the floating egg experiment, or the thrilling exploration of an indoor scavenger hunt, there's a world of wonder waiting to be uncovered.
So, get ready to take dive into this exciting pool of DIY projects and craft an unforgettable learning adventure for your kids. Let their imaginations soar, their curiosity unfold, and creativity flow. After all, every child is an artist, a scientist, a chef, and an explorer waiting for the right canvas, the right lab, the right kitchen, and the right journey!

You May Also Like These:
DIY Time Capsule Craft Kit
Collect and preserve precious memories with this simple DIY Time Capsule Craft Kit. It's an enriching activity suitable for both children and adults. This guide will walk you through the steps of creating your very own time capsule.
Ingredients
- Container: An airtight, durable box or canister
- Personal Items: Pictures, letters, toys, or any significant items you wish to include
- Paper and Writing Materials: For your personal messages and future predictions
- Preservation Materials: Acid-free tissue paper, envelopes or Ziploc bags for storing items
- Decorative Materials: Paints, stickers, or markers to decorate your time capsule
Instructions
- Choosing Your Container: Select a sturdy, airtight container to act as your capsule. You can use a simple shoebox or a stainless steel box.
- Setting a Date: Decide on a future date to open the capsule and write it on the box.
- Selecting Your Items: Choose personal items that reflect your current life to preserve in your time capsule. You might include pictures, a favorite toy, or a written message about your life right now
- Writing a Letter: Write a letter to your future self. What do you hope for? What do you think will change?
- Preserving Your Items: Wrap items individually in acid-free tissue or place them in envelopes or Ziploc bags. This will prevent damage and fading over time. Personal items can now be placed inside the container.
- Decorating Your Capsule: Use your creative talents to decorate the outside of your capsule. Make it uniquely yours.
- Sealing Your Capsule: It's time to seal up your time capsule. Make sure it's tight and store it in a cool, dry place.
- Waiting: Now comes the toughest part: waiting! Remember not to open your capsule until the date you selected.
Remember
This time capsule is a snapshot of your life at a particular time. Do not rush in opening it. The longer you wait, the more fascinating it is to see how much everything has changed!
All rights reserved. DIY Time Capsule Craft Kit Instructions. Copyright @ 2022
Build a Solar System STEM Project:
Ingredients
- 1 pack of styrofoam balls (assorted sizes for various planets)
- 1 pack of wooden skewers or thin dowels
- Acrylic paints (Red, Blue, Yellow, Green and White)
- Paint Brushes
- Glitter (Optional)
- String or Twine
- 1 pack of round wooden disc (for the base)
- School Glue
Instructions:
- Gather all your materials.
- Start by painting each styrofoam ball according to the planet's color. For example, Earth could be painted blue and green, Mars red and so on. Feel free to get creative and add glitter for stars or other special effects.
- While the paint is drying, assemble your base. You can either place the skewers/dowels on the wooden disc directly or drill tiny holes to stick them into.
- After the styrofoam balls have dried, use the skewers or dowels to create the solar system model, starting with the sun in the middle and progressing outwards to the further planets. Remember to keep the arrangement of the planets correct according to your reference.
- Finally, attach string/twine to the top of each skewer to suspend your model from the ceiling or a curtain rod.
- And voila! Your Solar System STEM project is complete.
Build a Solar System STEM Project
Ingredients- 10 Styrofoam balls of varying sizes
- Acrylic paint in various colors
- Paint brushes
- Glue
- Styrofoam base
- Wooden skewers
- Clear fishing line (optional)
Instructions
Step 1: Painting the Planets- Choose a Styrofoam ball for each planet. The largest for Jupiter, the smallest for Pluto.
- Paint each ball the appropriate color for its planet. Jupiter might be painted with bands of brown and white, Mars bright red, Earth blue and green, etc.
- Allow the planets to dry thoroughly before moving to the next step.
- Arrange your dry planets on the Styrofoam base in the order they appear in the solar system. You may want to mark the spots with a pen before gluing them.
- Once you’re happy with the arrangement, apply a small amount of glue on the bottom of each planet and place it back onto its marked spot.
- Allow the glue to dry fully.
- If you wish to show the planets’ orbits, carefully insert one end of the wooden skewer into each planet.
- Tie the fishing line to the other end of the skewer, and adjust it so it loops around the sun (the middle of the Styrofoam base).
- Tie the ends of the fishing line together and carefully remove the skewer, leaving the loop of line in place.
- Repeat this for each planet. Remember, the further from the sun, the larger the orbit will be.
Paper Mache Planet Craft
Teach your child about the planets with this fun and educational craft.
Materials:- 1 balloon
- Newspaper strips
- 1 cup of flour
- 1 cup of water
- Acrylic paint in various colors
- Inflate the balloon and tie it closed.
- Prepare the paste by combining the flour and water.
- Dip the newspaper strips in the paste and apply them to the balloon.
- Let dry overnight.
- Once dry, paint your planet using the acrylic paints.
Galaxy Cookies
Whip up some delicious and 'out of this world' cookies!
Ingredients:- 1 batch of sugar cookie dough
- Blue, purple and black food coloring
- Edible glitter
- Preheat the oven and prepare your cookie dough.
- Split your dough into 3 and mix in a different food coloring into each.
- Twist the dough together and roll out.
- Use a round cookie cutter to shape the cookies.
- Bake as per the instructions on your cookie dough package.
- Once cooled, sprinkle some edible glitter on top for a galaxy effect!
STEM Rocket Project
Learn basic STEM principles with this fun rocket project.
Materials:- Baking soda
- Vinegar
- Plastic film canister
- Paper
- Tape
- Wrap a piece of paper around the film canister and tape it in place to form the body of the rocket.
- Make a cone from a piece of paper and tape it to the top of the rocket.
- Put a spoonful of baking soda into the canister
- Add a little bit of vinegar and quickly snap the lid on the canister.
- Flip the rocket and step back - it will blast off in no time!
Virtual Reality Space Exploration Game
Instructions:- Download and install the VR Space Exploration Game on your VR device.
- Put on your VR headset.
- Select the ‘Explore’ mode in the game menu.
- Now, you can explore various celestial bodies. Use the controller to navigate through space.
- Click on the planets to get more information about them.
DIY 2025 Calendar Board Game
This engaging, fun-filled board game incorporates educational elements with a DIY twist! This board game will not only help children to master the calendar but also to count, sequence, and learn about the days, weeks, and months of the year. So, roll up your sleeves and let’s get started!
Materials Needed:
- A 24'x36' foam or cardboard poster board
- Acrylic paints (various colors)
- Paintbrushes
- Permanent markers (various colors)
- Printable calendar pages for the year 2025
- 12 small envelopes
- Scissors
- Glue
- Different colored construction paper
- Small items or toys for game pieces
- Dice or spinner
Instructions:
1. Prepare the board:
Paint the entire poster board with your preferred color. Allow it to dry.
2. Create the game path:
Divide the poster board into 12 sections (representing the calendar month), and then further subdivide into an approximate number of rectangles or circles (representing the days of the month).
3. Label the path:
Using the permanent markers, label each circle or rectangle with a number for each day. Start with 1 at the top left corner, and end with 31 (or respective) in the bottom right corner of each section.
4. Monthly Envelopes:
Cut the construction paper into squares to fit on the back of the envelopes. Label each envelope with a month and stick the printable calendar of the respective month inside. Glue the envelopes at the beginning of their respective sections.
5. Create Game Pieces:
Use small items or toys to make the game pieces. You can have as many game pieces as the number of players.
6. Gameplay:
Each player rolls the dice or spins the spinner and moves that number of spaces on the game board. If a player lands on a square that begins a month, they must open the envelope, read the calendar, and answer a question pertained to that month before they can proceed.
Enjoy your DIY 2025 Calendar Board Game. This fun project will keep your kids engaged and educated all year long!