


As an affiliate, I earn from qualifying purchases, but this doesn't affect the reviews or recommendations—your trust is important to me!
Creating Your Own Homemade Rainbow Soap Making Kit
```
 ```
```
Homemade Rainbow Soap Making Tutorial
Make Your Own Rainbow Soap: A Guide


Space Explorer Crafts for Moon Day
Galaxy in a Jar Craft
DIY Telescope Craft for Kids
Astronaut Helmet Craft for Kids
Today, We're Making:
- - Homemade Rainbow Soap Making Kit
- - 'Space Explorer' crafts in honor of Moon Day on July 20: On the eve of Moon Day, kids can celebrate by making a variety of space-related crafts such as paper rocket ships, galaxy in a jar, DIY telescopes, astronaut helmets out of paper mache.
Have you ever thought about peppering your daily routine with a splash of creativity and a burst of color?
Picture this: an afternoon filled with pops of vibrant hues, the intoxicating aroma of essential oils swirling around your kitchen, as you craft your very own Homemade Rainbow Soap Making Kit.
It's not just about having a hands-on experience in crafting beautiful, natural soap, but also about diving headfirst into a world of DIY crafts, where you get to express your creativity and produce something not just beautiful, but also usable.
With this enlightening soap making tutorial, you're in for an adventure as we help you navigate the soap crafting journey from start to finish, creating artisanal soap masterpieces from scratch.
Suddenly, your regular bathing rituals become more enriching, with a soap that's crafted by your own hands, bursting with an array of colors that's as enchanting as a rainbow.
Let's get the party started!
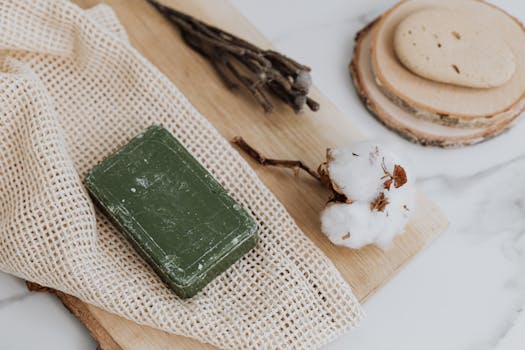
First things first, prepare all your Soap Making Supplies. Having everything at hand ensures a smooth, hassle-free experience. All you need are soap bases (clear and white), mica color powder or liquid soap dye for that iridescent rainbow effect, essential oils of your choice for that invigorating scent, and silicone molds in your preferred shapes. Doesn't it sound inviting? Just think of all the fun you have ahead in your soap crafting journey!
A vital part of the Homemade Rainbow Soap Making Kit process
Start by cutting the clear and white soap bases into small chunks for easy melting. Set your stove on a low heat and melt the soap base in a double boiler until it's entirely liquid. Like a passionate chef dressed in an apron, stirring a pot of sweet homemade jam, your kitchen fills up with the intoxicating scent of the melting soap base, creating an atmosphere teeming with anticipation and eagerness.
Next comes the most enchanting part:
Adding color and scent to your soap base. Divide your melted soap into separate containers, based on how many colors you wish to include in your Rainbow Soap. Add different mica powder colors or liquid soap dye into each container and mix well till you achieve your desired hues. Let your palette run wild; after all, the rainbow offers seven mesmerizing colors. Following this, add a few drops of your chosen essential oils for that bespoke aroma in every bath!
Hold on, we're not done yet.
To create the stunning rainbow effect for your DIY Soap Kit, you will pour each colored soap base into your silicone mold one layer at a time. Ensuring each layer fully cools before adding the next is key! This careful and patient layering takes you one step closer to your coveted homemade rainbow soap. Just imagine the looks on your loved ones' faces when they see these beauties lined up in your bathroom!
During this journey, remember,
Creating your Personalized Soap Making masterpiece isn't just a process; it's an experience—one brimming with creativity and satisfaction. You get to decide on the color mix, the aroma, the shape, and even the layers of your soap. Isn't that amazing? As you watch that last layer of soap base harden, anticipation bubbles within you, and you can't help but marvel at the various colors gracefully settling into each other, creating a striking display.
However, don't forget that like in any DIY crafts, patience is crucial. Let your soap harden overnight or for at least six hours. Then, the magical moment of unmolding your Handmade Soap, a string of rainbow colors promising the sweetest bathing experience, awaits you. Nothing beats the moment when your hand-crafted, naturally made soap comes to life! Bursting with colors that tickle your senses, your Homemade Rainbow Soap Making Kit transforms your everyday routine, making it a delightful process. Isn't it wonderful having a craft soap that is not only beautiful to look at but also contributes to your well-being, knowing exactly what went into its making?
Once you've successfully made your very first Homemade Rainbow Soap, you'll be left with a sense of accomplishment. It's no small feat to have created something so beautiful and practical from scratch. After all, the appeal of DIY Crafts lies in the fulfillment they bring. Now you won't just reach for a generic, store-bought soap; instead, your own handmade rainbow soap awaits you. It's not just a soap; it's a little rainbow in your bathroom, a snippet of color and creativity that brightens your day!
Also, think of gifting these to your friends and loved ones. Imagine their surprise and delight when they receive a bar of rainbow soap made by you! Gone are the days when you'd scramble to find a unique gift idea for birthdays or anniversaries. With a Soap DIY kit at home, you can create rainbow soaps as gifts that your friends and family will genuinely cherish and appreciate.
And so, we've arrived at the end of our vibrant soap crafting journey.
But this is actually just the beginning. The great thing about your new skills is that they open up a world of endless possibilities. Each handmade rainbow soap is a testament to your creativity, patience, and craftsmanship. As every pop of color and whiff of aroma accompanies you in your daily rituals, you are reminded not just of the simple luxury of homemade soap, but of the power of DIY craft in transforming ordinary objects into extraordinary experiences.
So go ahead, roll up those sleeves and get soaping! After all, who wouldn't love a piece of the rainbow in their bathroom brought to life by their own hands? Making our everyday experiences more vibrant - one DIY soap crafting session at a time! Bring the rainbow into your life with your homemade soap making kit.
You May Also Like These:
Space Explorer Crafts for Moon Day
Celebrate the Moon Day on July 20 with your little ones by creating some unique 'Space Explorer' crafts. Follow the instructions below to create an unforgettable Moon Day experience.
Ingredients
- Large paper plates
- Smaller paper plates
- Aluminium foil
- Construction paper: black, white, and yellow
- Scissors
- Glue
- Stapler
- Crayons or markers
Instructions
Step 1: Making the Rocket
- Cut a triangle out of construction paper for the rocket's top.
- Roll a piece of construction paper and staple it to form the rocket's body.
- Cut out 2 triangles from construction paper to form the fins of the rocket.
- Glue the rocket's top and fins to the body of the rocket.
Step 2: Making the Moon
- Cover the smaller paper plate with tin foil to create the moon's surface.
- Use a crayon or a marker to draw craters and valleys on the moon's surface.
Step 3: Making the Space Background
- Colour the larger paper plate in black to represent the space.
- Cut out small stars from the yellow construction paper and glue them onto this plate.
- Glue the rocket and the moon onto the space background.
Step 4: Finishing the Craft
- Let the glue dry completely.
- Your Space Explorer Craft is now ready for display!
Galaxy in a Jar Craft
Ingredients:
- A clear glass jar with lid
- Acrylic paints in at least three different galaxy colours (e.g., blue, purple, and black)
- Cotton balls
- Glitter (silver or gold)
- Spoon or paint brush
- Water
Instructions:
- Fill the jar 1/4 full with water, and add some paint. The water should be dark and opaque.
- Stretch out the cotton balls and place them into the jar until the coloured water is absorbed. Push down the cotton balls with a spoon or paintbrush until they fill the bottom of the jar completely.
- Sprinkle some glitter on top of the cotton balls to represent the stars in the galaxy.
- Repeat the above steps with different colors until the jar is almost full. Leave a small gap at the top for the lid without making it overflow.
- Screw the lid on tightly, and shake the jar lightly to mix the paints a bit and get the swirling galaxy effect.
- Place the jar in a sunny spot or near a light source to see the full galaxy effect.
How to Make a Galaxy in a Jar
Materials Needed:- 1 Glass Jar, preferably one with a secure lid
- Cotton Balls
- Acrylic Paint (you'll need 3-4 different colors for contrast)
- Fine Glitter
- Water
- Small cup or bowl for mixing paint and water
- Spoons or brushes for stirring paint
- Prepare Your Paint: Mix a little bit of water into your acrylic paint to thin it out. You should do this individually for each color.
- Fluff Your Cotton: Take a few cotton balls and stretch and fluff them out a bit. They don't need to be perfect, just looser.
- Create Your First Galaxy Layer: Place the fluffed cotton balls into the bottom of the jar. Use a spoon to push down the cotton balls and create a flat layer.
- Add Some Stars: Sprinkle a small amount of glitter over the cotton ball layer. This will look like stars in your galaxy jar.
- Paint Your Cotton:Using a spoon, drizzle some of your thinned-out paint over the cotton balls until all the cotton is colored.
- Repeat the Process: Continue layering cotton, glitter, and paint until you reach the top of the jar. For each layer, alternate the color of your paint to create a colorful galaxy effect.
- Secure Your Galaxy: Once you've completed your layers, secure the lid tightly on the jar.
- Enjoy Your Creation: Now you have an awesome Galaxy Jar to display and enjoy!
DIY Telescope Craft for Kids
Ingredients:
- 2 Cardboard tubes (one larger than the other so they can slide into each other)
- Black acrylic paint
- Paintbrush
- 2 Plastic magnifying glasses (with different magnification)
- Hot glue gun (adult supervision required)
- Starry stickers (optional)
Instructions:
- Step 1: Take your cardboard tubes and paint them inside and out using the black paint. Let them dry completely.
- Step 2: Once the tubes are dry, slide one tube into the other. Make sure it can extend and retract without too much difficulty.
- Step 3: On the smaller end of the telescope, trace around the outside of the tube on one of the magnifying glasses.
- Step 4: Carefully cut out the circle using a craft knife (adult supervision required).
- Step 5: Repeat step 3 and 4 for the larger end of the telescope.
- Step 6: With the hot glue gun, secure the lenses to each end of the tube (adult supervision required for this step).
- Step 7: Decorate the outside of your telescope with starry stickers (optional).
- Step 8: Now, your DIY telescope is ready to use! You can extend and retract the tubes to focus on distant objects or stars!
How to Make an Astronaut Helmet using Paper Mache
Ingredients:
- Large balloon - A size that can fit on your child’s head with extra space
- Newspaper - Cut into 1-inch wide strips
- White flour
- Water
- Salt
- Mixing Bowl
- White paint
- Water-resistant clear spray (optional)
Instructions:
- Inflate the Balloon: Begin by inflating a large balloon. It should be inflated to a size that would fit comfortably on your child's head, with enough additional space to allow for the thickness of the paper mache.
- Prepare the Paper Mache Mix: In a large mixing bowl, combine 1 part white flour with 2 parts water. Mix until it forms a smooth paste. Add a pinch of salt to prevent mold.
- Apply the Paper: Dip your newspaper strips one at a time into the paper mache paste, making sure each strip is thoroughly soaked. Then, place the strip onto the balloon. Repeat this step until the entire balloon is covered, leave an opening at the bottom which will be the helmet opening. Apply at least 3 to 4 layers, letting each layer dry before starting the next.
- Let it Dry: Once you've applied all of your layers, let the helmet dry for 24-48 hours, or until it's completely dry and hard.
- Pop the Balloon: Now, you can pop the balloon inside the helmet and remove it through the helmet opening.
- Paint the Helmet: Paint the outside of the helmet white and let it dry completely.
- Seal the Helmet: (Optional) For an added layer of protection, you can spray your helmet with a water-resistant clear sealant. This step is optional, but it can help your helmet last longer. Make sure to let the sealant dry before wearing.