


As an affiliate, I earn from qualifying purchases, but this doesn't affect the reviews or recommendations—your trust is important to me!
DIY Paracord Bracelets: Fun and Creative Craft for Kids
Today, We're Making:
Paracord Bracelets
- - 'Paracord Survival Bracelets': Teach your kids useful crafting skills by making paracord survival bracelets. All you need is a couple of feet of paracord,a side-release buckle,and scissors. Kids can choose their favorite colors and learn to weave their own bracelets that can be unknotted to use in outdoor survival situations.
- - 'Paracord Watchband': Turn an old wristwatch into a fashionable and durable accessory. You will need a watch,a paracord,a buckle.
In the cluttered landscape of kid's craft projects, paracord bracelets stand out
Paracord bracelets are a fun DIY project that are both creative and wonderfully simple. By tapping into the timeless appeal of homemade crafts and DIY jewelry, these wrist-bound art pieces offer children not just a fun activity, but a badge of honor they can proudly display. It's a testament to hard work, creativity, and the joy of seeing a project through from start to finish.
Crafting ideas come and go
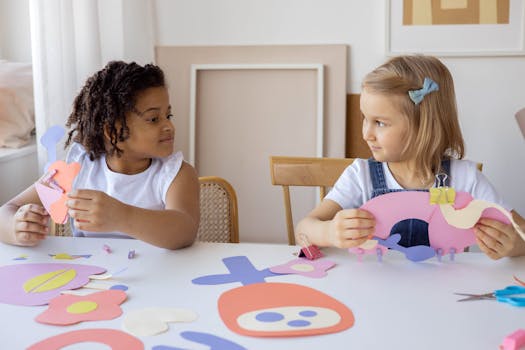
Bracelets for kids are nothing new, but creating Paracord bracelets? That's a craft for the books! Buckle up as we dive into the vibrant world of DIY Paracord bracelets - the creative craft for kids that's making headway in backyards, play dates, and Pinterest boards alike!
In the heart of every child lurks an innate curiosity
A desire to explore and create, and DIY crafts for kids feed this hunger for discovery. Of all the available options, creating Paracord bracelets tops the list. This venture allows kids to indulge in their creative crafts, bridging the gap between their imaginative minds and reality. Crafting a Paracord bracelet gives a sense of accomplishment as well as a tangible piece of jewelry to show their friends. Remarkably, they’re more than just a jewelry piece; they give life to a child’s creativity.
Choosing the Paracord Style
To begin this engaging activity, choosing the paracord style is of utmost importance. Kids craft ideas often lean toward colorful, playful designs, and there’s no shortage when it comes to Paracord bracelets. Ranging from rainbow hues to monochrome undertones, the options are plentiful. What’s more, they can even add beads or small charms for an extra spark of individuality. Imagine the delight in a child's eyes as they conceptualize and bring to life their DIY bracelet - a simple kid's craft that's sure to light up their day.
Paracord Bracelets: Fun and Educational
Everyone knows kids love fun DIY projects. Paracord bracelets are the perfect blend of interactive crafting and an appealing end product. But, the joy of making Paracord bracelets doesn’t end there. The process aids in developing a child's motor skills and focuses their attention on a single task, subtly honing their craft projects for kids. As they loop, knot and weave the paracord, they learn the value of focusing on detail, patience, and persistence.
A step beyond mere fads
Paracord bracelets aren’t just the latest fad in kids arts and crafts. This DIY jewelry exercise is heartwarming proof that children are eager to create, to make something that moves beyond the realm of imagination into the physical world. It’s one of the most wholesome and tangible ways for children to express themselves and their creativity. The process teems with lessons of fulfillment, achievement, patience, and the thrill of seeing their Paracord projects come to life.
Why DIY Paracord Bracelets are More Than Just an Accessory
In closing, when children participate in creating DIY Paracord bracelets, they're doing much more than just crafting a trendy piece of jewelry. They're learning valuable skills, fostering their creativity, and experiencing the joy of creation - all while producing something they can be proud of. This activity goes beyond a quick craft or a fun distraction; it’s an experience, a journey that molds a child’s creativity, patience, and dedication into something tangible.
Paracord bracelets are not just accessories, but symbols of accomplishment and individuality. So if you're seeking a creative outlet for your children or just a cool, new craft, dive into the vibrant world of DIY Paracord bracelets. Witness the magic yourself as the colorful strands intertwine, evolving into a priceless emblem of creativity and hard work, lighting up the eyes of each child that weaves them. Because in the end, every child loves a good story, and what's a better one than creating a fabulous piece of jewelry handmade with love, patience, and a dash of imagination? Not many, I'd say!

You May Also Like These:
Paracord Survival Bracelets
Introduction
Teach your kids useful crafting skills by making paracord survival bracelets. A fun and educational craft project that children will love.
Ingredients
- 10 Feet of Paracord (You can get creative with the color)
- Scissors
- Lighter
- Measuring Tape
- Buckle
Instructions
- Measure your wrist. For a comfortable fit, add 1 inch to your wrist measurement.
- Cut two lengths of paracord, each 5 feet long.
- Hold the two lengths of paracord side by side. Fold them in half to form a loop. The loop should be large enough to fit the buckle.
- Thread the loop through one end of the buckle. Pull the ends of the cord through the loop and tighten.
- Thread the ends of the cord through the other end of the buckle. Adjust the cord till the length matches your wrist measurement. This forms the bracelet base.
- Start braiding. Cross the right cord over the middle cords and under the left cord. Now take the left cord under the middle cords and through the loop of the right cord. Ensure your knots are always tight.
- Keep repeating step 6 until you reach the end of your bracelet.
- After you have fully braided your bracelet, cut any remaining lengths of the cord and melt the ends with a lighter to prevent them from fraying.
- Once cooled, use the lighter to seal the melted ends to the bracelet.
- Your paracord survival bracelet is now ready to use!
Conclusion
Well done! You have now successfully created a Paracord Survival Bracelet. Not only does this bracelet look great but it can also provide a handy length of cord in survival situations. Happy Crafting!
Side-Release Buckle Craft Instructions
Ingredients
- Paracord (1 or 2 colors)
- Side-release buckle
- Scissors
- Lighter
Instructions
- Cut Paracord: Cut two lengths of paracord. Each length should be about twice the size of your finished project.
- Melt Ends: Using the lighter, carefully melt the ends of the paracord to prevent unraveling.
- Insert into Buckle: Thread the ends of both cords into one part of the side-release buckle.
- Tighten Cord: Pull the cords tightly to secure them to the buckle.
- Insert other Cord: Repeat the process with the other part of the buckle.
- Join Buckles: Push the two parts of the buckle together and adjust the cords so the resulting bracelet or keychain is the desired length.
DIY Paracord Bracelet and Watchband
Have fun and learn a new skill with this exciting craft project. Kids can create their own fashionable and durable Paracord Bracelets and Watchbands. The best part? These accessories can be unknotted to use in outdoor survival situations!
Ingredients:
- Paracord (choose your favorite colors)
- Scissors
- Buckle or old watch
- Lighter (for parents use only)
Steps to create a paracord bracelet:
- Cut and Burn: Cut two lengths of paracord each measuring 7 feet. Burn the ends of the cords using the lighter to prevent fraying. (This step should be done by adults only)
- Attach to Buckle: Attach the two paracord stands to the buckle. Make sure they are of equal length on both sides.
- Weave: Start weaving the paracord using your desired weaving pattern.
- Finish: Once finished weaving, cut any remaining paracord and burn the ends with the lighter.
Steps to create a paracord watchband:
- Prepare Watch: Remove the original watchband from your watch.
- Cut and Burn: Cut two lengths of paracord each measuring the length of your original watchband and burn ends.
- Attach to Watch: Loop the paracord stands around both ends of the watch. Make sure they are of equal length on both sides.
- Weave: Start weaving the paracord using your desired weaving pattern.
- Once finished weaving, cut any remaining paracord and burn the ends for a neat finish.
Enjoy your new Paracord Bracelet and Watchband! Remember, if ever you are in an outdoor survival situation, you can unweave your accessory to use the paracord. Stay safe and have fun crafting!
Paracord Craft Instructions for Parents
Ingredients:
- 10 feet of 550 paracord
- Paracord bracelet buckle
- Scissors
- Lighter
Instructions:
Follow these instructions to create a fun and functional paracord bracelet.
Step 1: Preparing Your Materials
- Cut a piece of paracord to 10 feet in length.
- Slide the paracord through one side of the buckle. Fold it over and loop it through to fasten it to the buckle. This will create the loop that you'll use to secure your bracelet.
Step 2: Weaving the Bracelet
- Thread the ends of the paracord through the other end of the buckle. Adjust the length of the loop to fit your wrist.
- Start your weave. Take the right paracord strand, pass it over the center strands and under the left strand.
- Pull the left strand under the right and central strands and through the loop on the right side. This is known as a 'cobra weave'.
- Continue this weave pattern until you reach the end of your bracelet.
Step 3: Finishing the Bracelet
- Once you reach the end of the bracelet, cut off any excess paracord.
- Use a lighter to heat the ends of the paracord until they start to melt. Press the melted ends into the bracelet to secure them.
Congratulations! You've just made a stylish and functional paracord bracelet.
DIY Buckle Craft
This craft is both fun and educational, improving motor skills for children while they create something functional and decorative. Follow the steps below to make a simple yet elegant buckle craft.
Ingredients:
- Buckle: You can find these from old belts, bags or buy them from a craft store.
- Leather strips or colourful yarn: Depending on your preference and the overall design you want to achieve.
- Scissors
- Glue: A hot glue gun is preferable, but regular craft glue works as well.
- Optional Decorative: Beads, sequins, glitter, or any other embellishments that you want to add to the buckle.
Instructions:
- Prepare your materials: Gather all the materials mentioned above, clear a workspace and make sure you're ready to start crafting.
- Cut the leather strips or yarn: The strips should be long enough to wrap around the buckle multiple times. Usually, a length of 3 to 4 feet is sufficient.
- Begin wrapping: Start wrapping the strip or yarn around the buckle, making sure to keep it tight and neat. If using yarn, you might need to add some glue at the start to secure it.
- Securing: Once you reach the end of the buckle, cut off any excess material and secure the end with a dab of glue.
- Add embellishments: If you're using beads, glitter, or any other embellishments, now's the time to add them. Apply a dab of glue where you want the decoration to be, then attach the item.
- Let it dry: It's important to let your craft dry completely before using it.
Excellent job! Now you have our own DIY buckle, made with your personal touch. It's an accessory and a piece of art in one!


