


As an affiliate, I earn from qualifying purchases, but this doesn't affect the reviews or recommendations—your trust is important to me!
Exploring Innovative DIY: Crafting Homemade Glitter Slime Experiment

Today, We're Making:
- Homemade Glitter Slime Experiment
- 'Pi Day' Paper Plate Pies: Celebrate Pi Day (03-14) by creating paper plate pies. All you'd need is small paper plates,brown construction paper for the 'crust' and different colored paper to represent various flavors. Kids can learn about the concept of pi while crafting.
- Edible Molecular Models: On the theme of Pi Day,which is also Albert Einstein's Birthday,you can build molecular models using toothpicks and marshmallows or gummy candies. This will demonstrate basic chemistry principles in a fun and tasty way.
- Homemade Planetarium: In remembrance of Hawking's demise on March 14,you could make a homemade planetarium. Kids could poke holes in a tin can to represent constellations.
Ever thought of adding a sparkly twist to your standard DIY arts and crafts session?
It's time to embrace a vibrant burst of creativity and science with our innovative Homemade Glitter Slime Experiment.
What is Glitter Slime?
Glitter Slime is the fun DIY projects that combine the thrill of crafting with the fascinating world of science experiments.
Why Glitter Slime?
Not only does it offer an exciting way for kids to explore their imagination, but it also creates an opportunity to learn about the captivating dynamics of chemical reactions.
Who can benefit from this DIY?
Whether you're a DIY enthusiast looking for inventive craft ideas, or a parent yearning for safe, delightful activities that will keep your kids engaged, this shimmering slime DIY adventure is sure to add a hint of magic to your crafting experience!
Stepping into the World of DIY Glitter Slime Creation
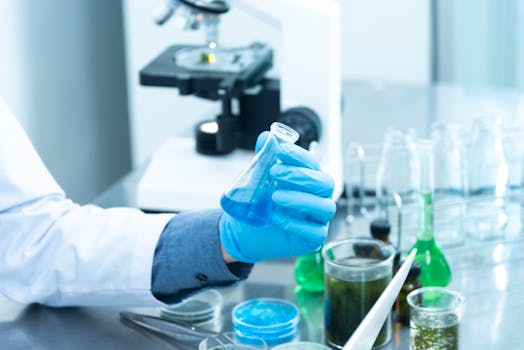
Can anyone recall that mesmerizing feeling of seeing glitter swirl in a liquid medium? Tried to capture it? We are painting that extraterrestrial image into the Homemade Glitter Slime Experiments. Our Slime DIY is a multi-colored, sparkly, squishy, and oh-so wondrous to create at home. The process of Slime Making is cost-effective, safe, and surprisingly swift! The best part? Getting your hands covered in gooey, shiny awesomeness!
So, let's delve into this Glitter Slime venture a bit deeper. To start this fascinating Slime Crafting journey, you only need a few simple ingredients found in most home kitchens. All you need is a bottle of clear or white school glue, some baking soda, contact lens solution, and, of course, your favorite glitter. Remember, be bold with your glitter choices – the more sparkles, the better your Homemade Slime would look!
The Slime Experiment Explorer Kit Lists:
- Clear or White School Glue
- Baking Soda
- Contact Lens Solution
- Glitter (Your choice of color)
Unleashing Creativity and Learning with Glitter Slime Making
Our Homemade Glitter Slime Experiment is not just about DIY fun; it’s also an incredible way to introduce young minds to a basic chemical reaction. The combination of glue, baking soda, and contact lens solution generates an entirely different material. The result? A fun and functional science lesson: the mixing of certain substances can result in a fascinating physical change!
This Slime DIY introduces kids to concepts like viscosity, elasticity, and polymer chains in a way that's inherently immersive and fun. They knead, stretch, squeeze and explore the Slime Play substance in their very hands. You'll watch their eyes light up with marvel as they experience first-hand the process of Slime Making. This DIY for Kids is intended to make education an enjoyable journey!
Innovation in Crafts and Glitter Activities
Once the Homemade Glitter Slime is ready, it's playtime! A child's imagination is limitless. The unique texture, radiant colors, and sparkling swirls of the Homemade Slime augments their play experience, encouraging them to experiment even more!
Children - and adults alike - can conjure wonderful Glitter Crafts using their DIY Slime. It could be an alien from a far-off star, a magical potion, or simple balls to toss around! While it's primarily a Slime for Kids, let's remember that even adults can indulge in these Glitter Activities once in a while!
Homemade Glitter Slime Experiment
As we wrap up this glittery adventure, remember that DIY isn't just about the result. It's also about the process, the excitement, the discovery, the twirling swirls of color, and the wonder that comes along with it.
The Shimmering World of DIY
So the next time you're pondering over a new DIY project or seeking a fun-filled science lesson for your child, why not dive into the shimmering world of the Homemade Glitter Slime Experiment?
You'll get to spend quality time with your child, crafting memories that are just as magical. So go ahead, roll up your sleeves and let your imaginations run wild with this sparkling DIY wonder. Enjoy the glittering journey that awaits!
You May Also Like These:
Pi Day Paper Plate Pies
Celebrate Pi Day (03-14) by creating fun and simple Paper Plate Pies! This craft is perfect for kids and adults alike and can be a wonderful addition to your Pi Day festivities.
Ingredients:
- Small Paper Plates
- Brown Construction Paper
- Glue
- Scissors
- Markers
- Optional: Pi Day Stickers or Decorations
Instructions:
- Preparation: Gather all your materials. Lay out the paper plates, brown construction paper, scissors, glue, and markers in your workspace.
- Cut the Construction Paper: Use the scissors to cut the brown construction paper into small pieces. These will serve as your pie pieces.
- Glue the Pie Pieces: Apply glue to the back of your pie pieces and stick them onto the paper plates. Arrange them in a circular pattern to mimic the look of a pie.
- Decorations: If you have Pi Day stickers or decorations, now is the time to add them to your pie. Make sure they are secure and pressed down firmly so they stick properly.
- Details: If you want, use the markers to add finishing touches to your pie. You can draw additional details, write 'Happy Pi Day!', or color the paper plate to resemble a pie crust.
Enjoy your Pi Day Paper Plate Pie!
Albert Einstein's Birthday Craft: Make Your Own Einstein!
Ingredients
- Construction Paper: Multiple colors of your choice (primary use: Einstein's clothing,tongue and base)
- White Craft Paper (primary use: Einstein's hair and mustache)
- Round crafting Googly Eyes: Medium size
- Glue stick
- Scissors
- Blank black Marker (primary use: Einstein's eyebrows, mouth and nose)
Instructions
- Start by drawing shapes. Draw a pear shape on a piece of colored construction paper for the face and a rectangular shape for the body. Cut them out.
- Prepare Einstein's iconic hair. Draw and cut out Einstein's hairstyle from your white craft paper. Remember, Einstein’s hair was fluffy and wild, so make the hair piece a little large with raving or jagged edges.
- Glue together the pieces. Attach the pear-shaped face on top of the rectangle body using your glue. Then, glue your the hairpiece on top of the face piece. Now we have a basic form!
- Create and attach googly eyes. Using your glue, attach the googly eyes onto the face around the middle.
- Draw eyebrows, mouth, and nose. With your black Marker, draw thin arched eyebrows, a simple dot for the nose and a smile for the mouth.
- Create and attach the mustache. Cut out a small mustache shape using the white craft paper and glue it below the nose.
- Use your imagination to finish Albert Einstein! You could draw him writing a famous equation, holding a book, or anything else you feel inspired by!
Albert Einstein's Birthday Craft: Paper Mache Planets
Supplies Needed:
- Newspaper
- Balloons
- Flour and Water (for paste)
- Paint (Various Colors)
- Paint brushes
- String or yarn
- Scissors
Instructions:
Step 1: Create your Paper Mache Paste
Mix 1 part flour with 2 parts water until it forms a thin, smooth paste.
Step 2: Inflate the Balloons
Inflate the balloons to different sizes to represent different planets.
Step 3: Apply the Paper Mache
Cut the newspaper into strips. Dip a strip of newspaper into the paste, making sure it's fully coated. Add the newspaper strip to the balloon. Repeat the process until the balloon is covered in 2-3 layers of paper mache. Allow to dry overnight.
Step 4: Paint the Planets
Once the paper mache balloons are dry, paint them to resemble planets. Let the paint dry fully.
Step 5: Display your Planets!
Attach a string or a piece of yarn to the balloon knot and hang your planets up for everyone to see. You can even create a solar system mobile!
Marshmallow Molecular Models
Ingredients:
- Large marshmallows or gummy candies - each marshmallow represents an atom
- Toothpicks - these will represent the bonds between the atoms
Instructions:
- Decide on the molecule you'd like to build; for example, water (H2O) requires two hydrogen atoms and one oxygen atom.
- Each marshmallow will represent an atom. So, for a water molecule, you'll need 2 white marshmallows for hydrogen and 1 red marshmallow for oxygen.
- Use the toothpicks to connect the marshmallows together. The toothpicks represent the bonds between the atoms. For a water molecule, connect the two hydrogen marshmallows to the oxygen marshmallow.
- There you go! You've just built a delicious and educational molecular model.
Homemade Planetarium
Materials:
- Cardboard box - the larger, the better
- Stick-on stars
- Flashlight
Instructions:
- Select the cardboard box to use as your base. The larger the box, the more room you'll have for your stellar sky.
- Open one side of the cardboard box and stick your stars inside. You can position them according to real constellations or create your own patterns.
- Once your stars are secure, place the open side of the box over your head.
- With your flashlight, shine a light up towards your stellar sky creating your very own planetarium, a special tribute to Hawking and a great hands-on astronomy lesson.
Homemade Planetarium Craft
Expand your kid's curiosity about space by creating a homemade planetarium! It's a fun and educational activity which can help your kids learn about constellations. No need for high tech equipment, you can create a homemade planetarium using a tin can and a few basic materials.
Materials Needed:
- Tin can (soup, beans, or other similar size)
- Hammer
- Nail
- Flashlight
- Print-out of constellation diagrams
- Tape
Instructions:
Step 1: Prepare Your Tin Can
Thoroughly rinse and dry the tin can. Make sure there are no sharp edges that could cause injury.
Step 2: Tape Constellation Diagram
Choose a constellation diagram from your print-out and tape it on the outer surface of your tin can.
Step 3: Create Constellation Holes
Using a nail and a hammer, carefully poke holes on the can following the pattern of the constellation on your diagram. The holes should correspond to stars in the constellation.
Step 4: Remove Diagram
After creating all the necessary holes, remove the tape and the constellation diagram from the tin can.
Step 5: Illuminate Your Planetarium
Place the flashlight inside the can and turn off the room lights. The light will shine out of the holes, projecting the constellation on your ceiling or wall, mimicking a night sky full of stars.
Enjoy Your Homemade Planetarium!
Now you and your kids can enjoy star gazing, anytime, right at the comfort of your own home!


