


As an affiliate, I earn from qualifying purchases, but this doesn't affect the reviews or recommendations—your trust is important to me!
Creating Your Own DIY Clay Jewelry Making Kit at Home

Today, We're Making:
- - DIY Clay Jewelry Making Kit
- - 'Spring Equinox Nature Clay Charms' - Since March 20, 2025, marks the first day of spring, parents can help kids use a DIY Clay Jewelry Making Kit to create nature-themed charms for necklaces or bracelets, like flowers.
Unlock Your Creativity with DIY Clay Jewelry Making
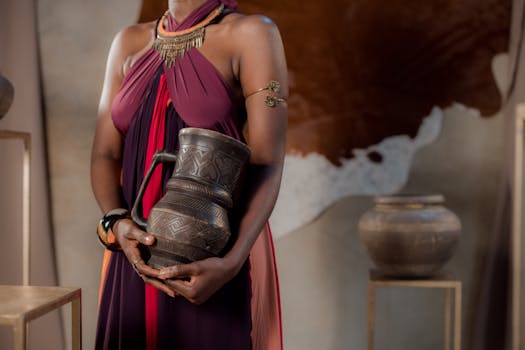
Have you ever come across a jewelry piece so unique you’ve thought, “I wish I could create something like that!”? Imagine owning a mix of vibrant, personalized jewelry, designed and sculpted by your own hands. Yes, it's absolutely possible! With a DIY Clay Jewelry Making Kit, you can spin your creative magic and craft exquisite pieces of handmade jewelry right at home.
Create Your Own Unique Pieces
From charming clay bead earrings to statement necklaces, the possibilities are as wide as your imagination. This isn’t just a fabulous way to tap into your art and craft soul, but also a delightful opportunity to make gifts that carry a special, personalized touch.
Constructing Your Home Craft Kit
Let’s get started on constructing this amazing home craft kit and dive into the world of DIY clay jewelry!
DIY Clay Jewelry: Where to Start
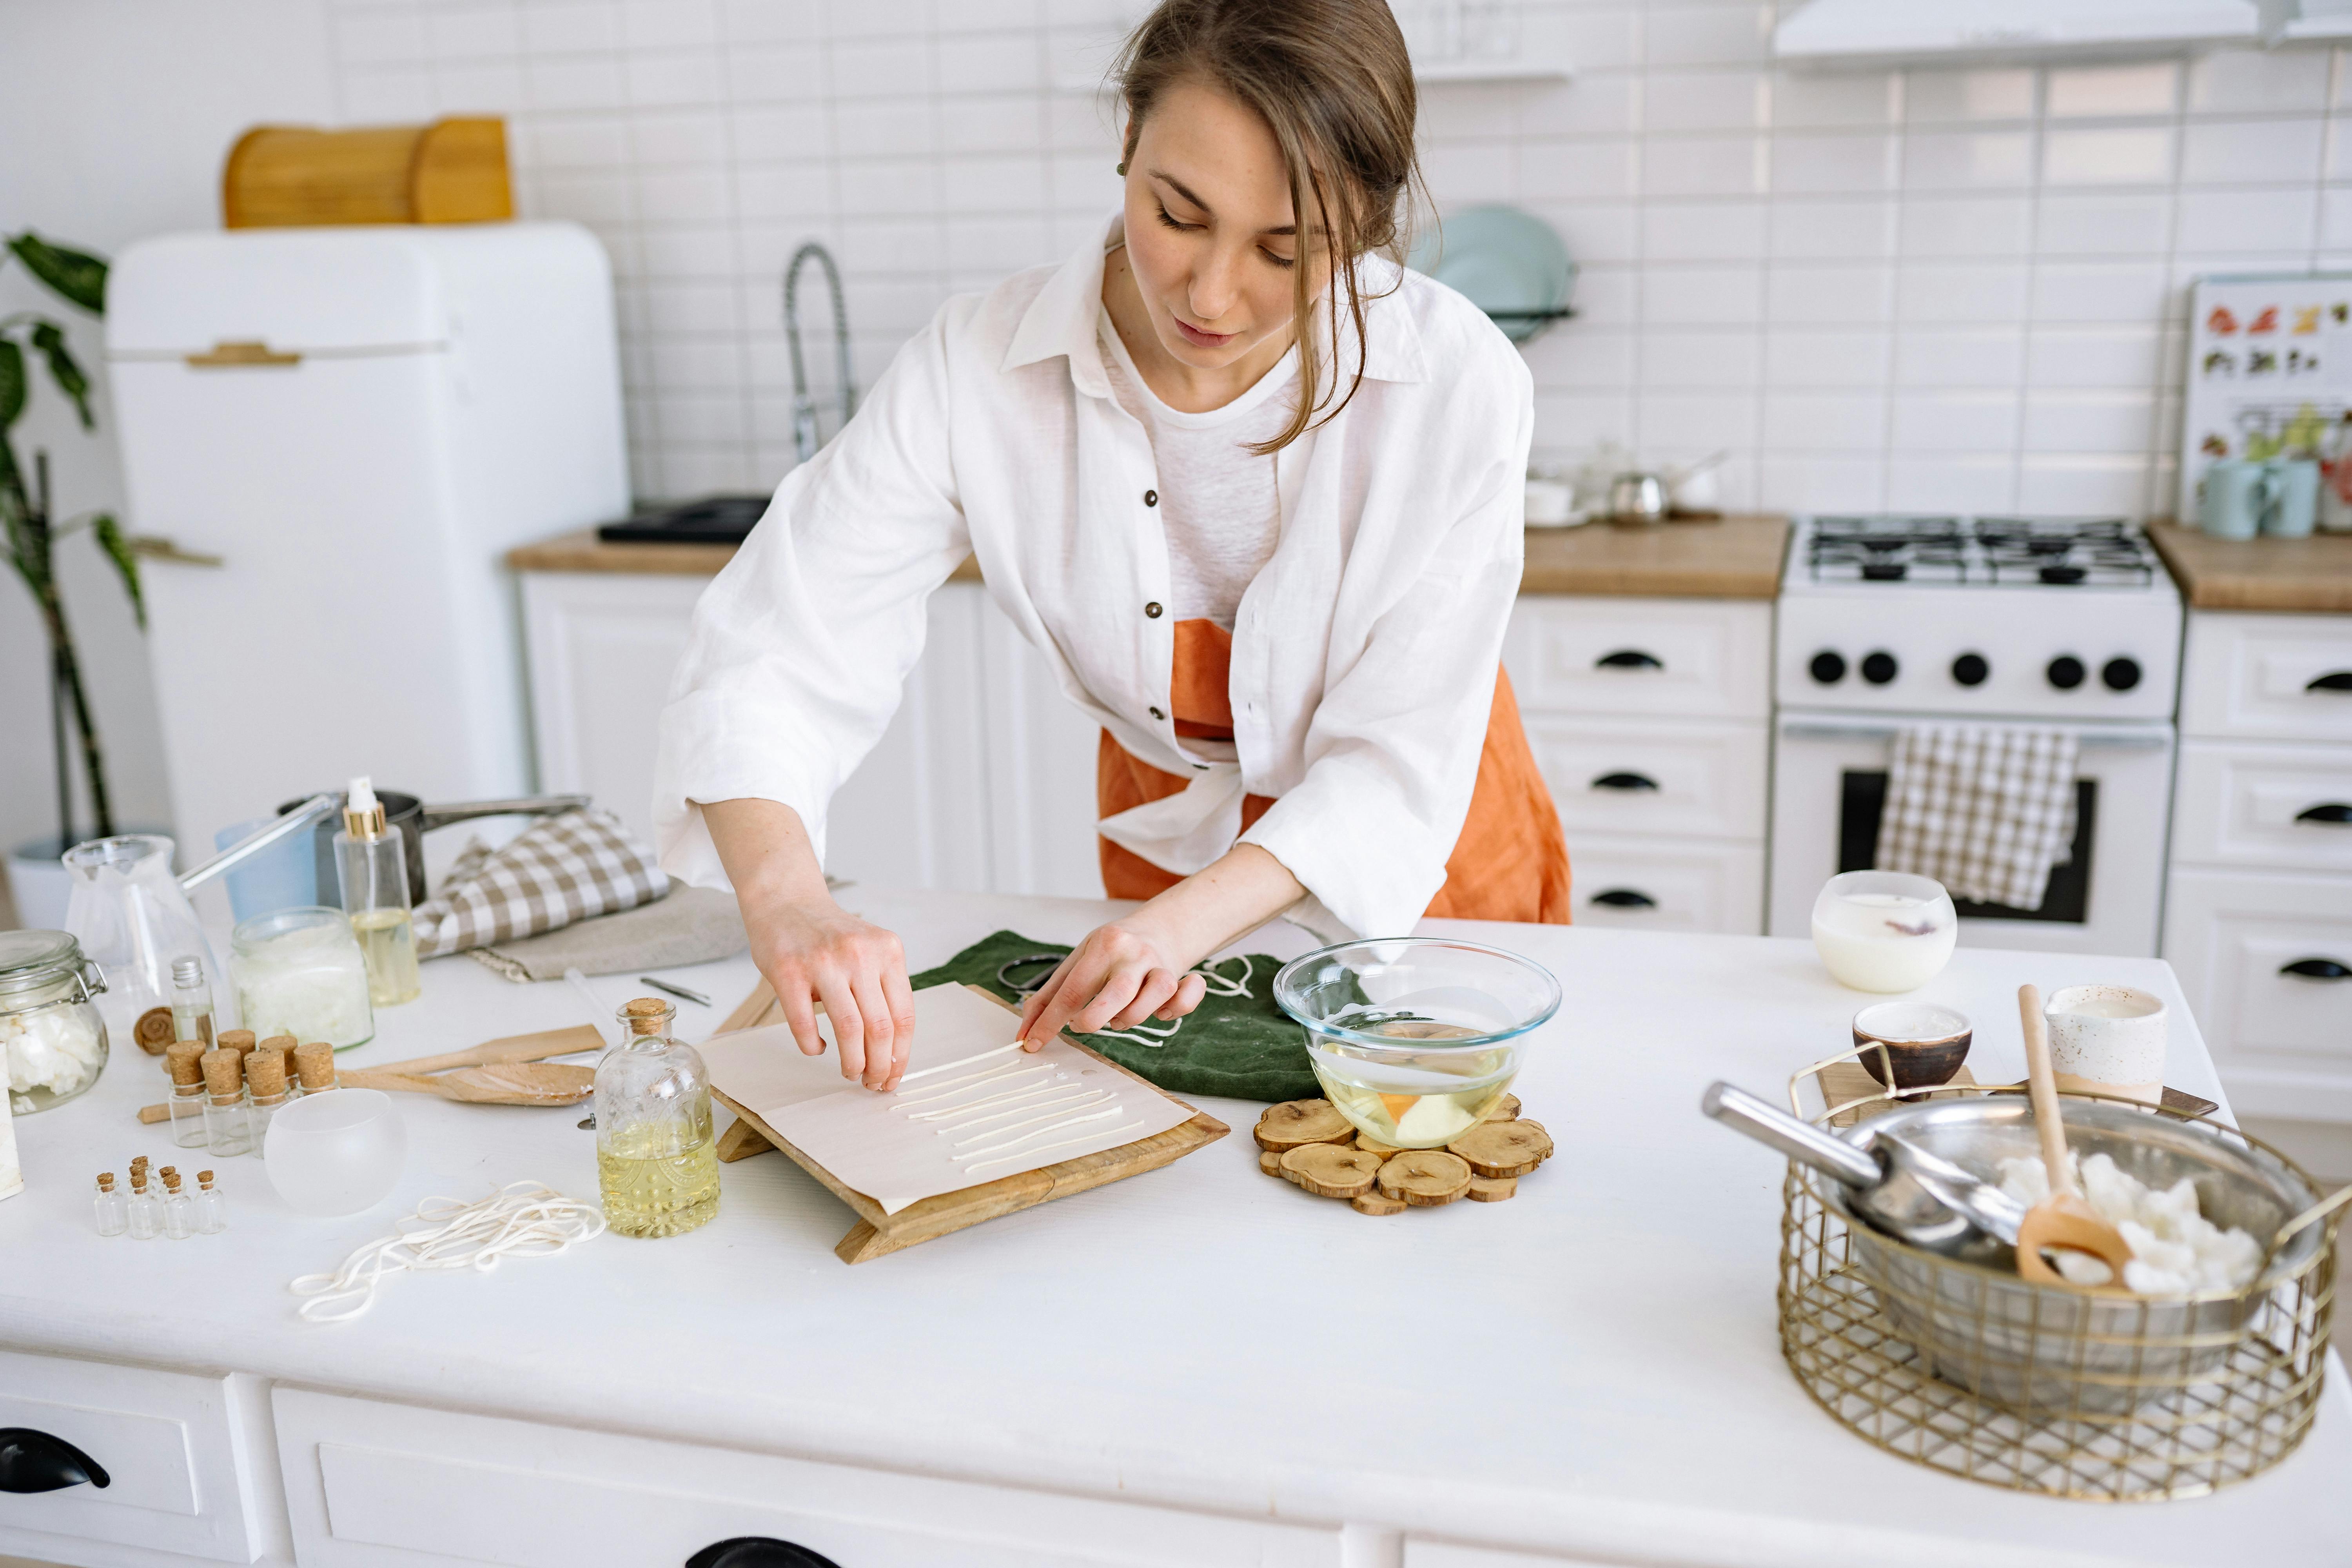
In creating your very own DIY Clay Jewelry Making Kit, having quality materials at the ready is pivotal. It's like embarking on a new culinary adventure - a handful of ingredients is all you need to seduce the senses. When it comes to Clay Jewelry, a few essentials is all it takes to indulge your creative spirit.
In your ‘ingredients list’ scribble down clay in multiple colors, a precision toolset for shaping and detailing, as well as all-important sealant for preserving your handiwork. And let’s not forget about your jewellery fixings - shiny chains, earring hooks, and jump rings to bring your designs into wearable existence. Don't worry if this sounds like a lot; your jewelry Making Kit will help consolidate all these elements, making the process seamless and enjoyable.
Crafting the Perfect Clay Beads
After gathering your supplies, it's time to venture into the world of Clay Bead Making. Clay beads are the bread and butter of your DIY Clay Jewelry. They are the foundation upon which your unique, fabulous jewelry pieces are built. Take a small piece of clay, mold it into your bead shapes, use your precision tools to carve out fine details; from there, let your creativity run wild with DIY Craft ideas! Imagine vibrant colors merging to form the perfect pair of handmade earrings, a dainty charm bracelet, or a bold statement necklace.
Are you wondering about the ideal shape? Beads can take on any form from simplistic spheres to daring geometrics. The choice truly lies in your hands!
Jewelry Design: Adding a Personal Touch
There's something incredibly rewarding about Creating Jewelry at Home. Not only do you have the autonomy to exercise control over every aspect of the design process, but you can also infuse your pieces with a personal touch. With your DIY Kit in tow, you can design Personalized Jewelry that tells a story, that's wholeheartedly you. Your very own Homemade Jewelry is an extension of your personality, a tangible imprint of your artistic flair.
Meld colors together to match your wardrobe, incorporate initials of loved ones, or create miniature clay renditions of your favorite objects. The options are endless when you embark on this Art and Craft journey – and each piece is guaranteed to be utterly unique.
Creating a Clay Jewelry Wonderland
From novice creators to seasoned DIY enthusiasts, a DIY Clay Jewelry Making Kit is your passport to a wonderland of creativity. This craft project merges the simplicity of Clay Molding with the excitement of Jewelry Making. The result? A treasure trove of Artistic Jewelry that’s imbued with originality, color, and personal meaning. Whether your interest lies in Bracelet Making, Earrings DIY, or Necklace Making; there are countless Clay Craft Ideas waiting to be explored in the journey of DIY Clay Jewelry creation.

And so, dear creative spirit,
With a pinch of dedication, a dash of imagination, and your DIY Clay Jewelry Making Kit, creating beautiful handcrafted jewelry at home isn't just a fun idea—it's an adventure waiting to be embraced.
Whether you're crafting clay wonders for yourself, designing charmed gifts for loved ones, or simply exploring the boundless realms of your creative prowess, there's undoubtedly a world of delight in every bit of clay, every bead, every earring hook. Remember, each piece you create is not just a piece of jewelry; it's a reflection of your unique story, your personal touch.
Now, it's time to roll up those sleeves, embolden your imagination, and dive into the colorful world of clay jewelry making.
Happy crafting!
You May Also Like These:
Spring Equinox Nature Clay Charms
Experience & celebrate the Spring Equinox by creating beautiful Nature Clay Charms!
Ingredients:
- Air-dry clay
- Rolled oats
- Acrylic paints
- Floral or nature-themed decorations (preferably from nature i.e. plant clippings, dried flowers, leaves, pebbles etc.)
- Clear sealant spray (optional)
- Twine or string
Instructions:
- Begin by rolling out your air-dry clay onto a clean, flat surface. Use the rolled oats to create a textured, interesting feel.
- Next, use a circular shape (a cup or cookie cutter will work) to cut out your charm.
- Make a hole at the top of your charm using a toothpick or similar, to allow for stringing later.
- Press your chosen nature decorations firmly into the clay, arranging them in a pattern or design you find pleasing.
- Leave your charm to air dry as per the clay's instructions - usually 24 hours.
- Once dry, you can opt to paint your charm with your acrylic paints. Be sure to leave to dry after this stage.
- If using, apply a clear sealant spray to protect your charm from moisture and natural wear. Again, leave to dry fully.
- Finally, thread your twine or string through the hole at the top of your charm, ready to hang and enjoy!
Enjoy your beautiful, handmade 'Spring Equinox Nature Clay Charm'. Not only does this craft allow for creative freedom, it's also a wonderful way to connect with nature and embraces the spirit of Spring.
Crafts to Celebrate the First Day of Spring
Ingredients:
- Construction paper (Assorted colors)
- A pair of safety scissors
- Glue
- Colored markers
- Colorful ribbons
- Sequins or Glitter (optional)
Instructions:
- Choose a green construction paper as base to mimic grass. This will act as our craft's backdrop.
- From different colored construction papers, cut out various spring shapes like flowers, butterflies, birds, sun, rainbow etc. with safety scissors.
- Use a blue construction paper to cut out a pond shape and attach it to the green base using glue.
- Draw stems for the flowers using colored markers and attach the previously cut flower shapes at ends of these stems.
- Decorate the flowers and butterflies with sequins or glitter, if desired.
- Finally, at the top of the green backdrop, attach your sun shape (ideally yellow), and if desired, add a rainbow.
- Cut out a long piece of ribbon, glue each end at the back of the green backdrop, allowing for a loop to hang your craft.
- Allow all the glued parts to dry thoroughly before displaying.
Spring Blossom Craft
Ingredients:
- Construction Paper: You will need both green and a color of your choice for the blossoms; pink works well for cherry blossoms.
- Glue: A glue stick will work best to keep things tidy.
- Scissors
Instructions:
- Cut out a tree shape: With your green construction paper, cut out a base for your tree. You will want the trunk to be long and the branches sprawling for plenty of blossom space.
- Cutting your blossoms: Using your colored paper, cut out small blossom shapes. Circles or ovals work great, but feel free to be creative.
- Glue your blossoms: Glue your blossoms onto the branches of your tree. Try to spread them out and mix in some along the trunk to give a full, blossoming effect. You can even make piles of blossoms underneath the tree to indicate the wind has blown some away.
- Allow to dry: Let your creation dry completely before moving or displaying. Then you're all done!
DIY Clay Jewelry Making Kit: Nature-Themed Charms
Ingredients:
- DIY Clay Jewelry Making Kit (contains colored clay, charm molds, jump rings, and necklace/bracelet chains)
- Rolling pin
- Knife
- Baking sheet
- Oven
Instructions:
Step 1: Rolling the Clay
Firstly, take a portion of the clay from your DIY Clay Jewelry Making Kit. Using the rolling pin, flatten the clay until it is approximately 1/4 inch thick.
Step 2: Creating the Charms
Once your clay is flat, use the charm molds to cut out your nature-themed shapes. Carefully remove the excess clay around the edges.
Step 3: Adding Detail
Using your knife, add any additional detail to your charms. Think about adding texture to recreate the appearance of bark, feathers, or leaves.
Step 4: Prepare for Baking
Place your clay charms onto the baking sheet. Ensure to make a small hole at the top of each charm for the jump ring to be added later.
Step 5: Baking Your Charms
Following the instructions from your Clay Jewelry Making Kit, bake your charms in the oven. Once baked, allow them to cool completely.
Step 6: Assembling Your Jewelry
Add a jump ring through the hole in each charm and attach it to your necklace or bracelet chain. Your nature-themed clay charms are now ready to wear!
DIY Paper Flowers for Kids
Ingredients
- Colorful Craft Paper Sheets
- Scissors
- Glue
- Green Pipe Cleaners
- Marking Pen
Instructions
- Step One: Start by choosing your favorite colors of craft sheets.
- Step Two: Cut the craft sheet into squares. The size of the square will determine the size of the flower.
- Step Three: Start from one corner of the square and roll the paper tightly towards the opposite corner. Ensure the bottom is aligned while rolling.
- Step Four: Once reaching the end, apply some glue to secure the roll.
- Step Five: Allow it to loosen up a bit to form the shape of the flower.
- Step Six: Apply glue at the bottom of the flower and attach it to the top of a green pipe cleaner. This will act as the stem for the flower.
- Step Seven: Repeat these steps to make as many flowers as you desire.
- Step Eight: Use the marker to enhance the details on the flower, if necessary.


