


As an affiliate, I earn from qualifying purchases, but this doesn't affect the reviews or recommendations—your trust is important to me!
DIY Guide: Tie-Dye Shirts, Water Filters, Pizza and Games

Today, We're Making:
- - DIY Tie-Dye T-Shirts
- - DIY Water Filter Experiment
- - Homemade Pizza Making
- - Indoor Treasure Hunt Game
- - DIY Paper Mache Planets craft
- - Salt Water Density STEM experiment
- - DIY Homemade Pretzel Twists cooking activity
- - DIY Cardboard Box Arcade Game setup
- - DIY Clay Charms craft activity
Have you ever dabbled in the thrilling world of do-it-yourself creations?
From fashioning fun tie-dye shirts with mesmerizing patterns, experimenting with DIY water filter systems for drinking water safety, crafting your tastiest ever homemade pizza, to organizing a lively indoor treasure hunt game – the realm of DIY projects lets you channel your innermost creativity while weaving beautiful memories.
This comprehensive DIY guide is your one-stop-shop
Serving you with step-by-step instructions to help you blithely navigate through tie-dye techniques, water filtration device assembling, gourmet pizza making, and planning engaging family games. So gear up and prepare to surrender to the joy of creating, exploring, and playing!
DIY Projects
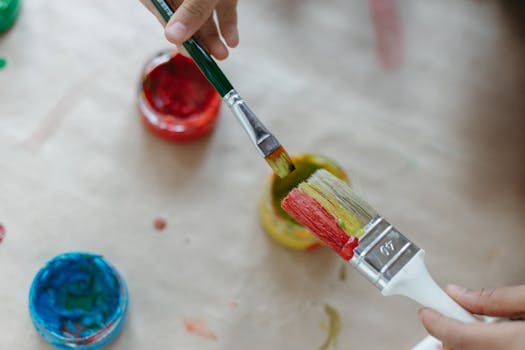
Step 1: DIY Tie-Dye T-Shirts
Imagine making your own DIY tie-dye t-shirts with magnificent swirls of colours. It's not just a creative project, it's also a whole lot of fun! Plus, the end result is a DIY fashion statement you'll be proud to flaunt. Start with a plain white shirt that's begging for some vibrant personality. Here's your chance to let loose with your DIY crafting skills. Opt to follow traditional tie-dye techniques or march to the beat of your own drum and invent your own iconic tie-dye patterns. Truly, the magic lies in taking a simple shirt and making it into a wearable piece of art.
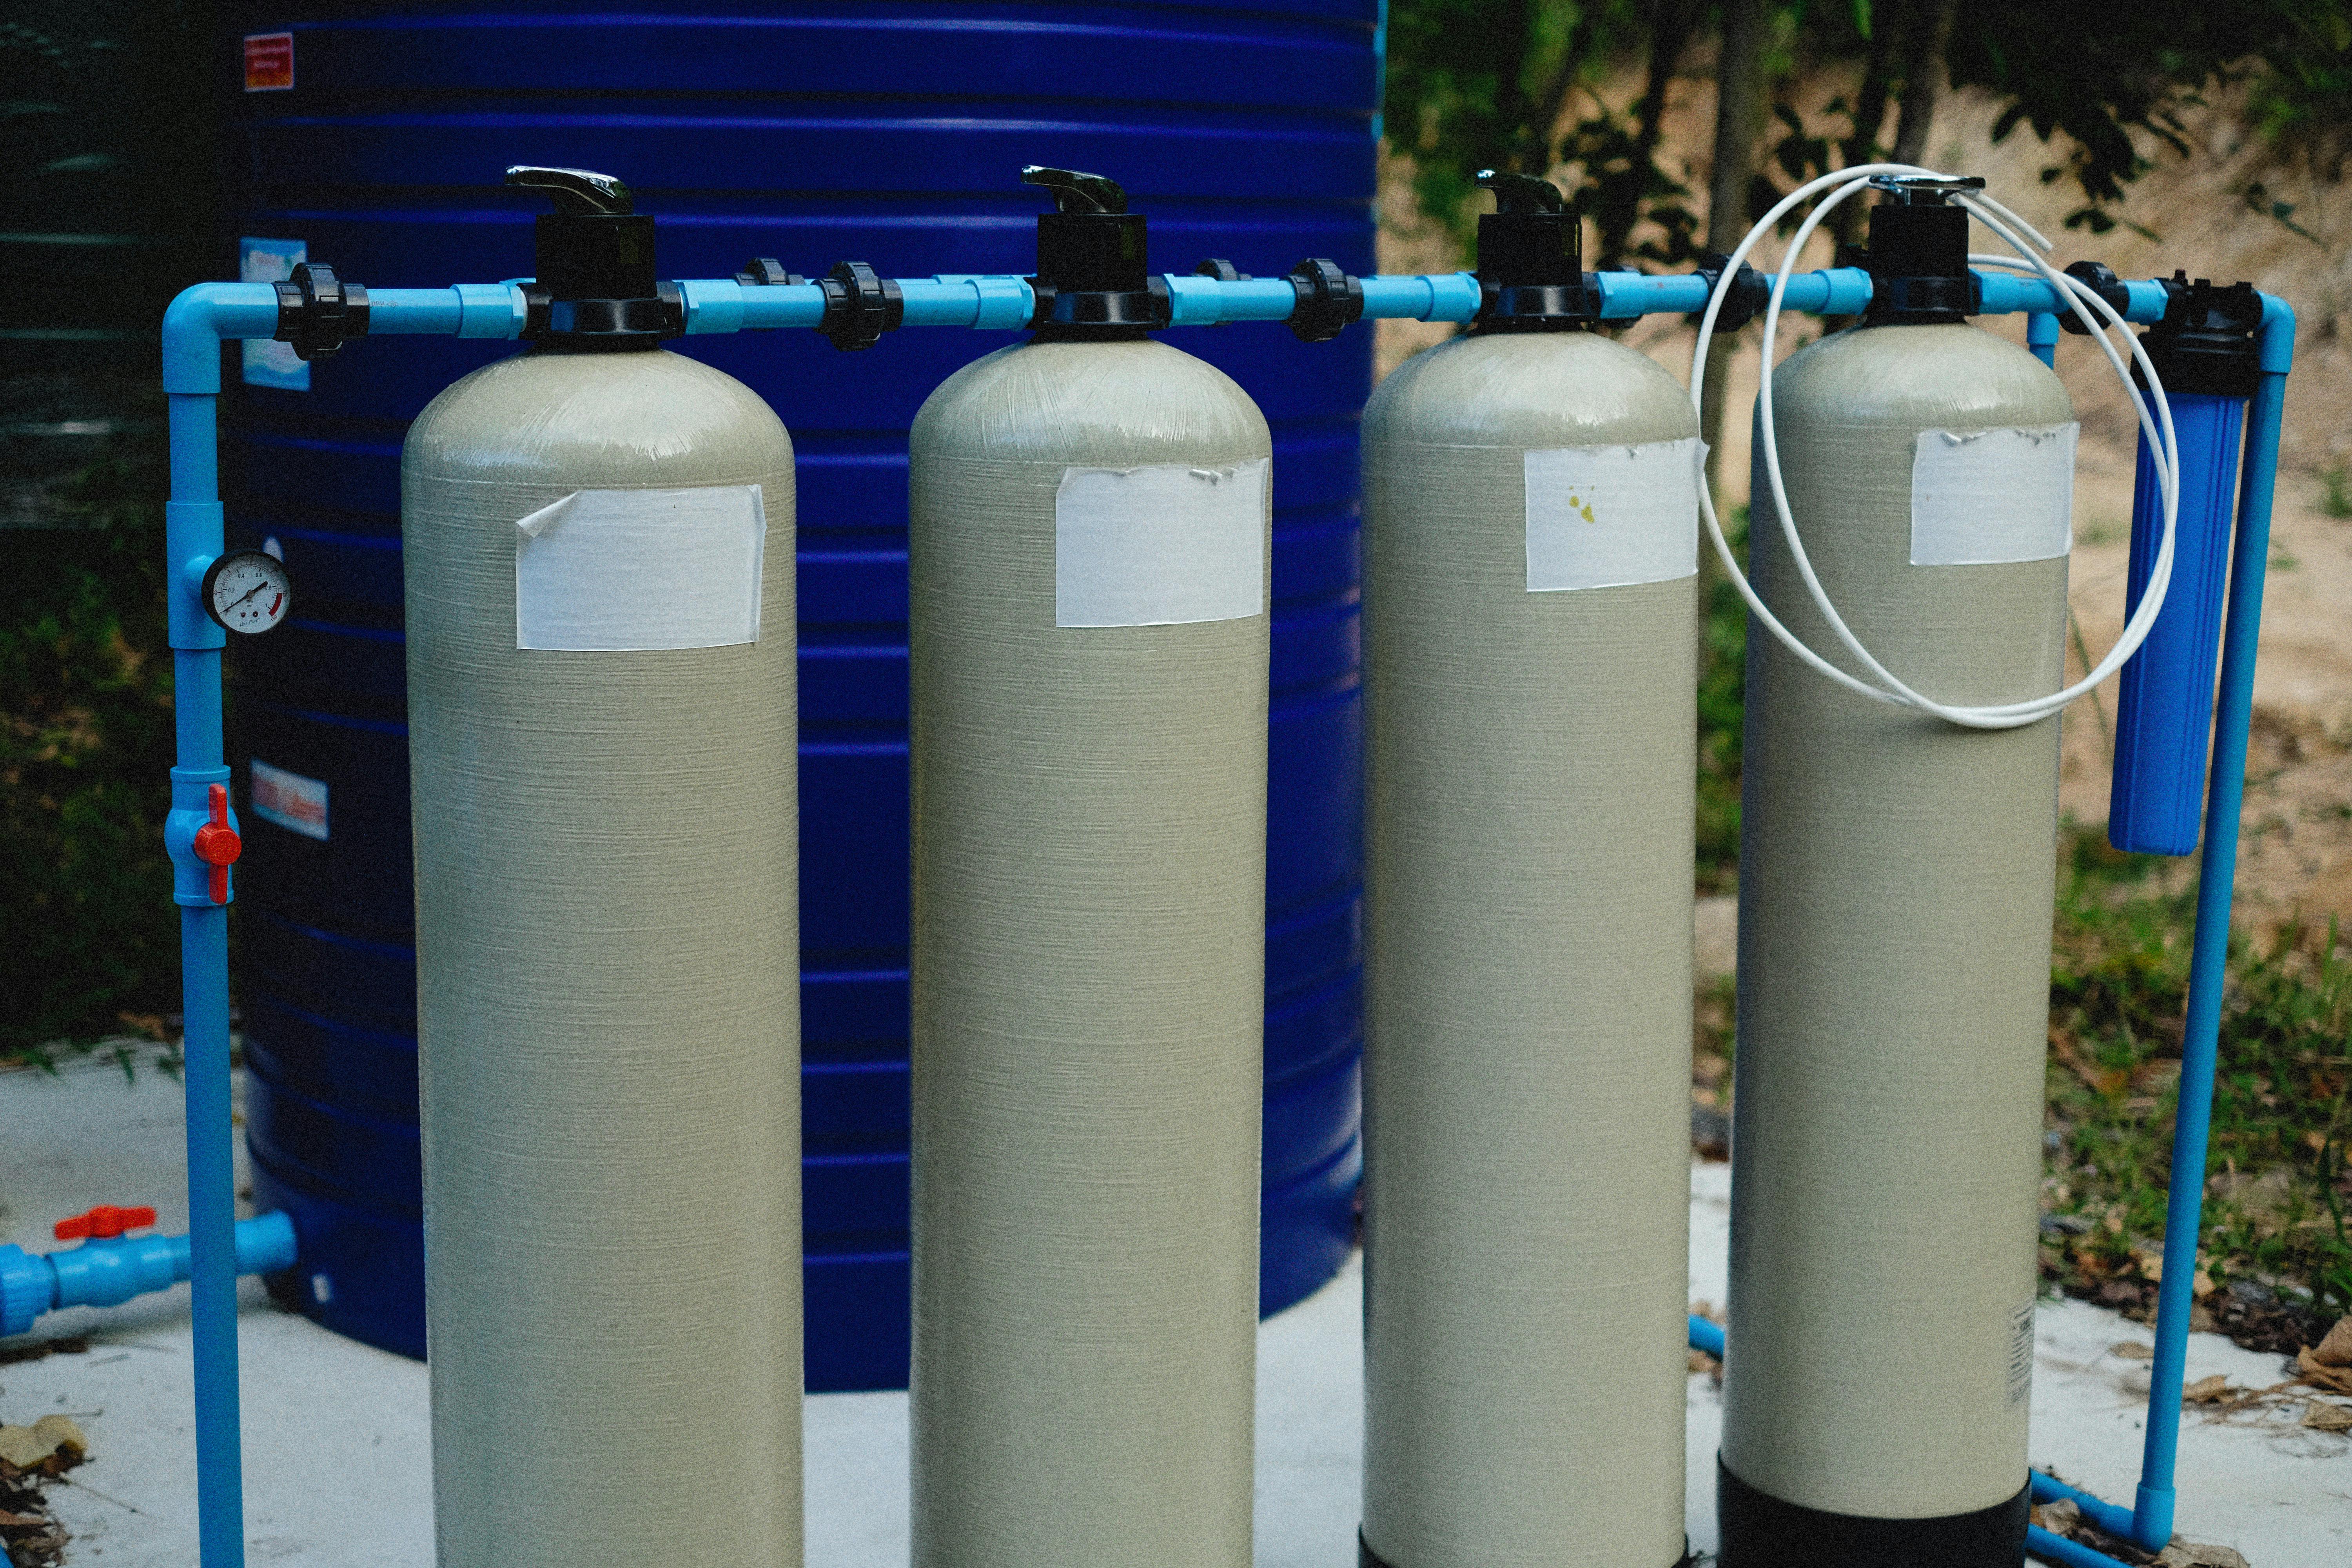
Step 2: DIY Water Filter Experiment
Water is life. But oftentimes, we take it for granted. Learning about water filters and water treatment from a do-it-yourself perspective is both educational and practical. You'll be amazed at how simple materials can lead to drinkable water with a home-brewed water filtration system. And more than just drinking water safety, DIY water filter experiments unleash the scientist in you, providing a deeper understanding of water purification. In just a few simple steps, you're creating clean water right from your own kitchen.
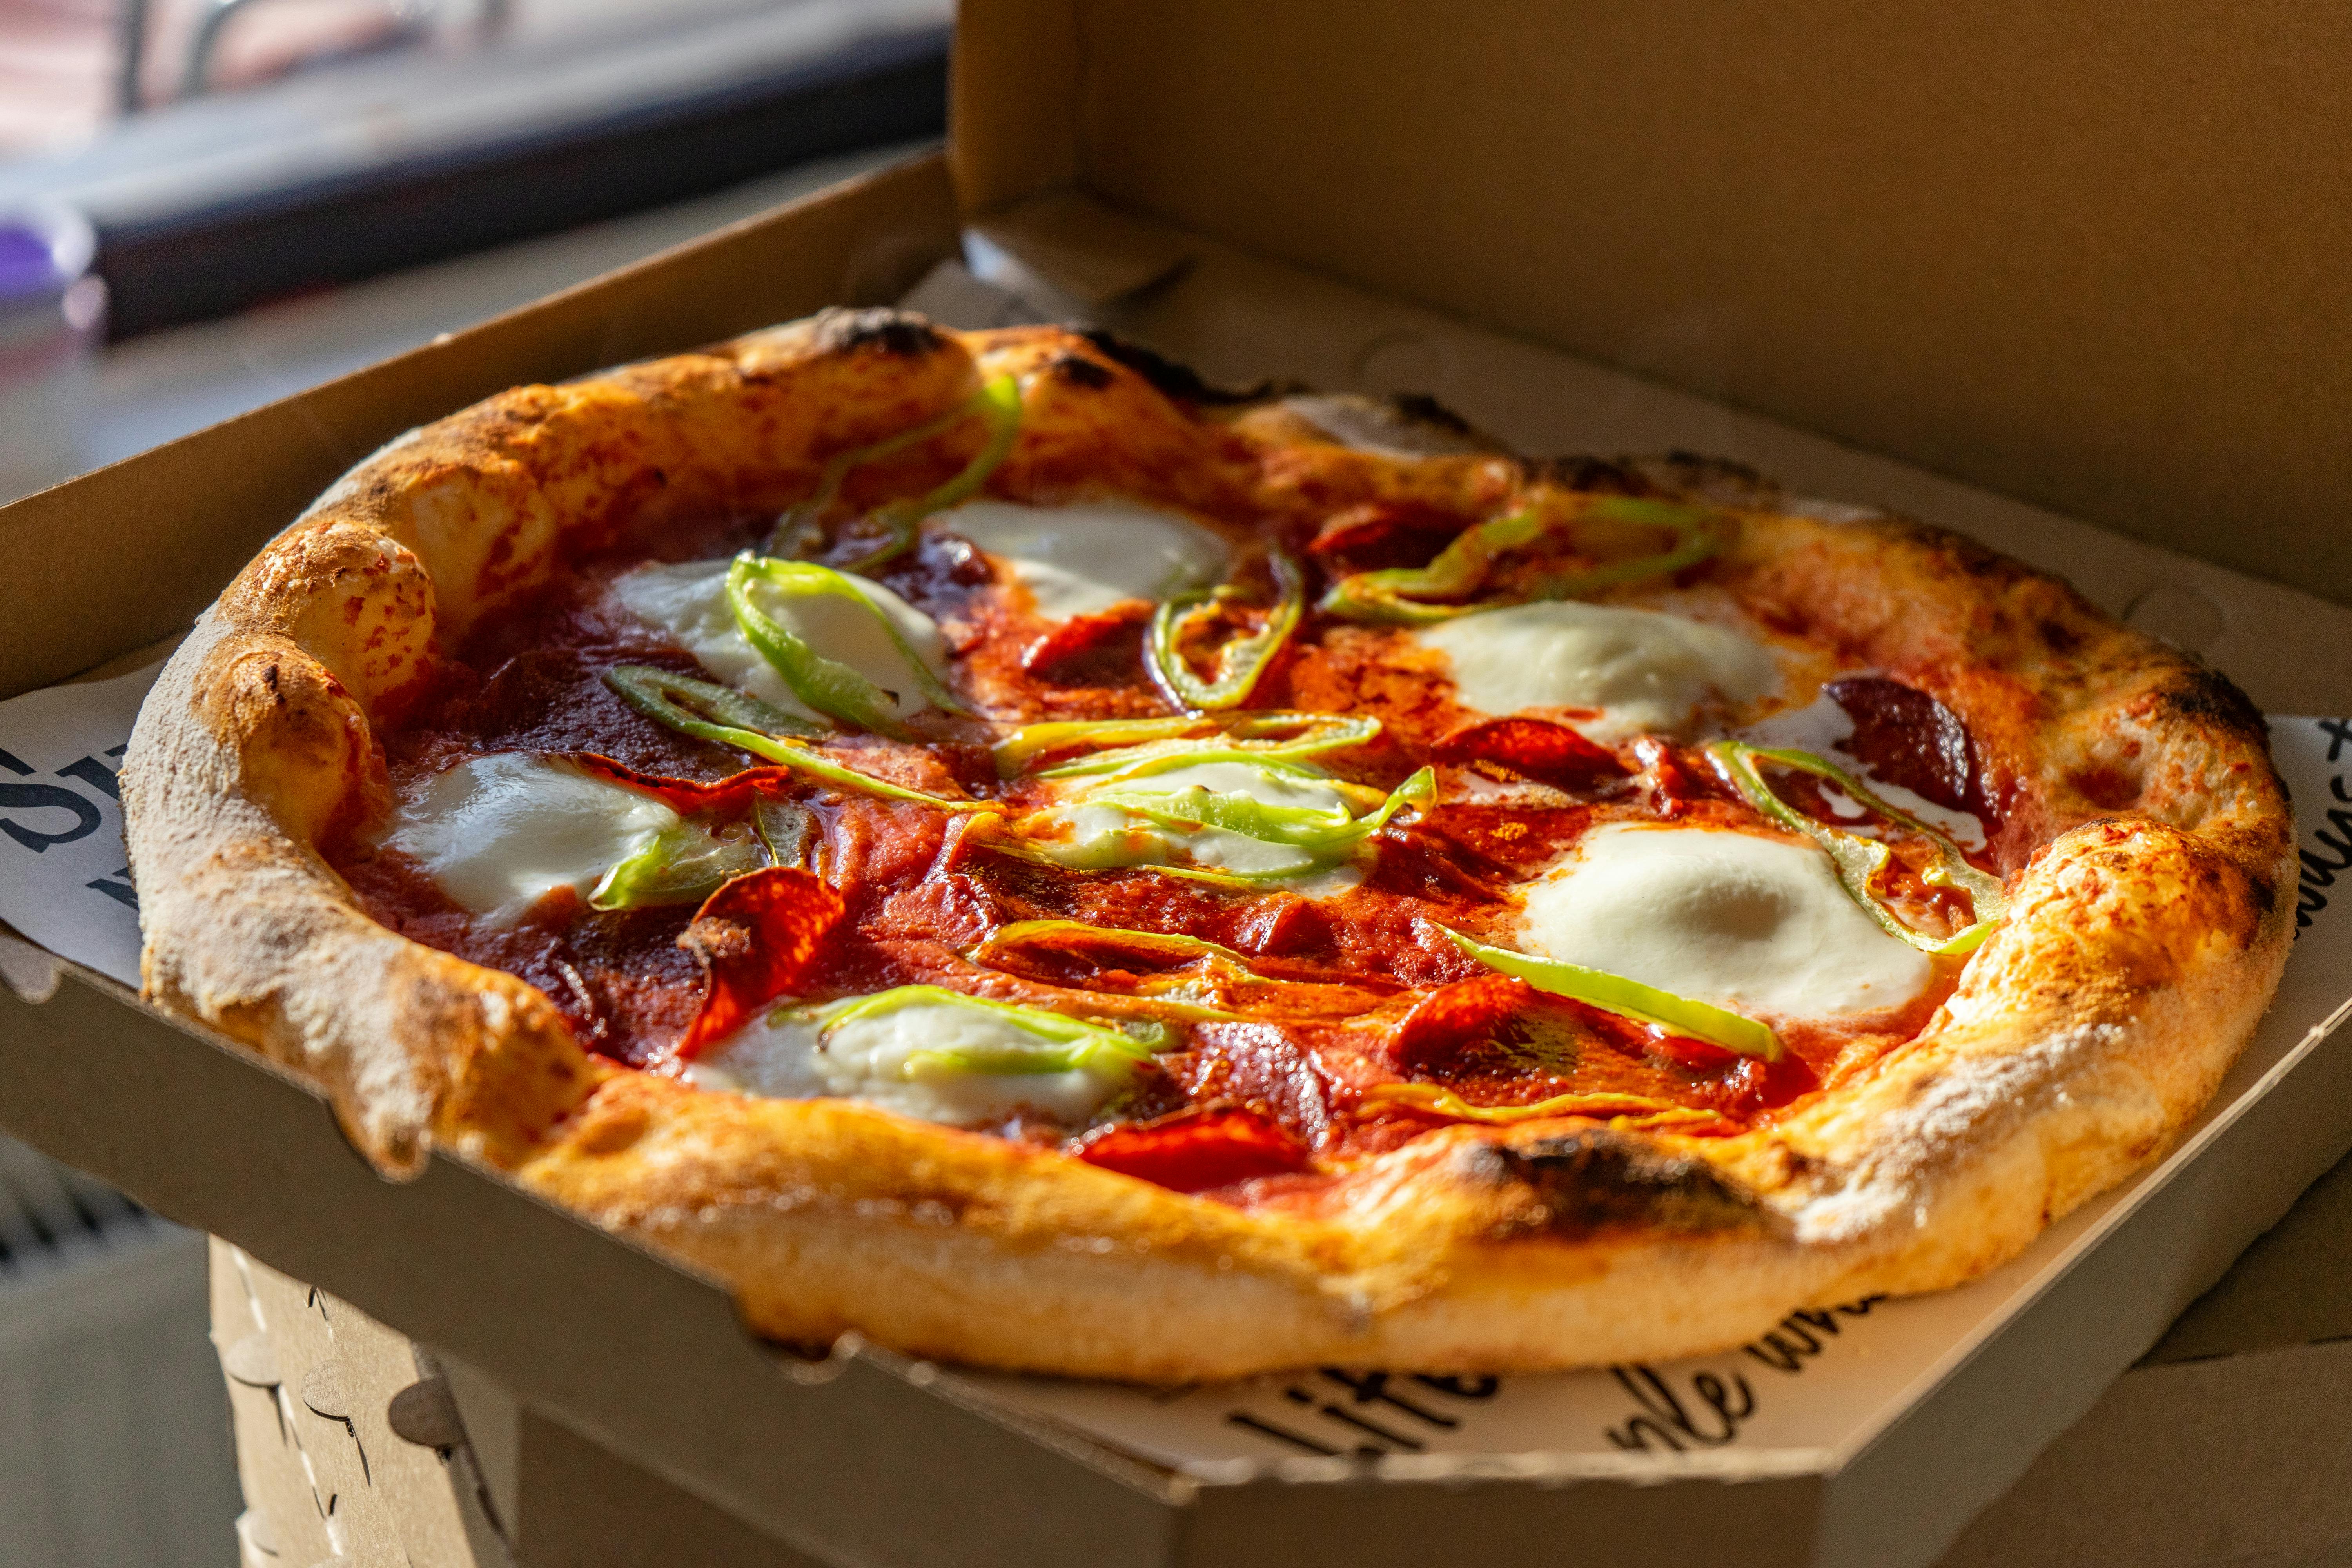
Step 3: Homemade Pizza Making
Who doesn't love pizza? Making homemade pizza is more than just about the food - it's about the experience. It's your chance to handcraft your own pizza dough, play 'Masterchef', and top it with your all-time favorite pizza toppings. Find a perfect Italian pizza recipe, knead the dough, slather that homemade pizza sauce and pop it into the oven. Or, create a unique gourmet pizza recipe that's all your own. The pizza making process gives you the chance to gather round the kitchen, laugh, create, and indulge in a heartwarming meal that's made by you.
Step 4: Indoor Treasure Hunt Game
Lastly, let's set up an indoor treasure hunt game - the crème de la crème of family games. One of the best elements about these games is the boundless creativity they unleash. These DIY games imbue your rooms and hallways with imaginative clues, interactive games, and thrilling discoveries. Whether it's game night or simply an ordinary Tuesday, adding a little bit of adventure into your home can create memories that will last a lifetime. What's more fun than making your own amusement park right in your living room?
Sprinkle some flair into your daily life with these diverse DIY projects, combining practicality with fun.
And there you have it, dear readers!
From tie-dying your own psychedelic shirts, assembling a functional water filter in your kitchen, baking mouthwatering homemade pizza, to creating magic with your indoor treasure hunt game, we've embarked on a thrilling journey showcasing the immense power of DIY. By embracing these projects, you become an artist, a scientist, a chef, and a game master.
Remember...
The beauty of do-it-yourself is rooted in the freedom, creativity, and joy it engenders. So why not take this DIY spirit and run with it? Break away from the ordinary, seize the adventure that awaits and above all, have fun.
Behind every great DIY project...
There is the opportunity for exploration, learning, and boundless fun. So, keep creating, keep exploring, and keep playing – the DIY way! It's not just about the final product, but the exciting journey and proud memories you weave on the way!
You May Also Like These:
DIY Paper Mache Planets Craft
Ingredients
- - Newspaper, torn into small strips
- - Balloons
- - Flour
- - Water
- - Paint (in planet colors)
- - Paint brushes
- - String to hang planets
Instructions
- Blow up the balloons: Inflate balloons to multiple sizes to represent the different sizes of the planets.
- Prepare the paper mache mix: In a large bowl, mix equal parts flour and water until it forms a semi-thick paste.
- Apply paper mache to balloons: Dip each strip of newspaper into the paste, making sure it's fully covered. Place the wet strip onto the balloon and smooth it out with your fingers. Continue this process until the entire balloon is covered. Let it dry completely.
- Paint the planets: Once the paper mache is dry, paint each planet to match its real-life counterpart. Use images from a space book or the internet as a guide.
- Hang the planets: Attach string to each balloon and hang them up to create your own solar system.
DIY Homemade Pretzel Twists Cooking Activity
Ingredients
- 1.5 cups warm water
- 1 packet active dry yeast (2 1/4 teaspoons)
- 1 teaspoon salt
- 1 tablespoon sugar
- 4-5 cups all-purpose flour
- 1 large egg
- Coarse salt, for sprinkling
Instructions
- Pre-warm the oven: Preheat your oven to 450 degrees and line a baking sheet with parchment paper.
- Prepare the yeast mix: In a large mixing bowl, combine the warm water and yeast. Leave it undisturbed for about 5 minutes until it becomes frothy.
- Prepare dough: Add salt, sugar, and 3 cups of flour to the yeast mix. Stir until it forms a smooth dough. Slowly add more flour until the dough is not too sticky and knead for about 5 minutes until smooth.
- Shape pretzel twists: On a lightly floured surface, roll a small piece of dough into a long rope. Twist into a pretzel shape and place onto the baking sheet.
- Prepare egg wash: In a small bowl, beat an egg with a small amount of water. Brush this egg wash over the shaped pretzels.
- Sprinkle salt: Sprinkle the pretzels with coarse salt while the egg wash is still wet.
- Bake: Bake the pretzels at 450 degrees for 20-25 minutes or until golden brown.
Enjoy your homemade pretzel twists, and remember you can get creative with different flavors or dips. Have fun!
DIY Homemade Pretzel Twists
Ingredients:- 1 package of active dry yeast
- 1 1/2 cups of warm water
- 2 tablespoons of brown sugar
- 1 1/4 tsp of salt
- 4 cups of all purpose flour
- 2 cups of warm water
- 2 tbsp of baking soda
- Coarse salt, to taste
- 6 tbsp of butter (melted)
Instructions:
- Activate the yeast: Dissolve the yeast in 1 1/2 cups of warm water. Stir in brown sugar and 1 1/4 tsp of salt. Gradually add in flour.
- Knead the dough: Knead dough on a floured surface until it becomes smooth and elastic (approximately 8 minutes). Preheat your oven to 475 degrees F (245 degrees C).
- Prepare baking soda bath: In a large bowl, combine the 2 cups of warm water and baking soda.
- Shape the pretzels: Divide the dough into 12 equal pieces. Roll each piece into a 3 foot rope, twisting each into a pretzel shape. Dip each pretzel into the baking soda solution and place on a greased baking sheet. Sprinkle with coarse salt.
- Bake the pretzels: Bake in the preheated oven for 8 to 10 minutes, until golden brown.
- Time to enjoy! Brush finished pretzels with melted butter right after removing them from the oven. Enjoy your DIY Homemade Pretzel Twists with your favorite dipping sauces!
Instructions for DIY Cardboard Box Arcade Game Setup
Ingredients:
- Cardboard boxes - Depending on the size of your arcade game, you might need two or three
- Paints - Any colors of your choice for decorative purposes
- Scissors - You need one to cut the boxes
- Ping Pong balls or small plastic balls - For the games, depending on your game design
- Craft glue - for joining parts together
- Tape - to reinforce the box edges and secure the joints
Instructions:
- Plan Your Game: Before cutting the boxes, plan what type of games you want in your arcade, such as maze, bowling alley, or ball toss.
- Prepare The Boxes: Start by opening up the cardboard boxes. You need a flat surface to work on.
- Cut The Boxes: Depending on the design of your game, start cutting the boxes. You could use a scissors for this.
- Paint and Decorate: Once the cutting has been done, start painting and decorating your arcade to give it a cool look.
- Assemble The Arcade: After your paint has dried, it's time to start gluing your arcade sections together. Use the craft glue for this. If necessary, tape can reinforce the edges and secure the parts together.
- Let It Dry: Wait for the glue to dry. It might take a few hours or overnight depending on the amount of glue you used.
- Play Your Arcade Game: Your DIY Cardboard Box Arcade Game is ready. Enjoy the game!
DIY Clay Charms Craft Activity
Materials:- Assorted Oven-Bake Clay (Choose various colours)
- Shape Cutters (Hearts, stars, circles, etc.)
- Jump Rings
- Charms clasps
- Rolling Pin
- Oven-safe Tray
Preparing the Charms:
- Gather your materials: Arrange all your supplies on a clean, flat surface.
- Prepare the Clay: Warm the oven-bake clay by kneading it in your hands. Roll it out to about 1/4-inch thickness with your rolling pin.
- Cut Out Shapes: Use your shape cutters to cut out your desired charm shapes.
- Add Details: You can add details by layering more clay on top, using a toothpick to draw or engrave on it, or by adding bits of other coloured clay.
Baking the Charms:
- Set your Oven: Preheat your oven to the temperature recommended on your clay's packaging (usually around 275°F).
- Bake: Place your unbaked clay charms onto the oven-safe tray and bake. Baking time would depend on the size and thickness of your charms, but usually ranges from 15-30 minutes.
- Cool Down: Let the clay charms cool down completely before touching them. This is to ensure they harden and set properly.
Assembly:
- Attach Jump Rings: Once cool, attach a jump ring through the hole you made in each charm.
- Attach Charms: Attach the charms to bracelets, necklaces, or whatever else you had in mind. Enjoy your DIY Clay Charms!


