


As an affiliate, I earn from qualifying purchases, but this doesn't affect the reviews or recommendations—your trust is important to me!
Exploring : Creating Your Own DIY Floating Water Candle Craft At Home
Today, We're Making:
- - DIY Floating Water Candle Craft
- - DIY Biodegradable Paper Seedlings: Perfect for the June gardening season, parents and kids can engage in making biodegradable paper seedlings. Using old newspapers, they can fold and shape them into pots, and plant seeds inside. Once they sprout, the entire seedling pot can be planted directly into the ground. The newspaper decomposes naturally.
DIY Floating Water Candle Craft at Home
Picture this; the sun has set, your favorite book is in hand, and a DIY floating water candle is casting a serene glow around your room. Creating your own DIY Floating Water Candle Craft at Home has never been so easy and enjoyable. Whether you are a seasoned DIY enthusiast looking for exciting craft ideas or just entering the beautiful world of homemade crafts and home decor DIY, the charm of handcrafted candles will captivate you.
With our candle making guide, you'll see just how simple it is to create a water candle at home that not just lights up your room but also uplifts your spirits. Get ready to turn a regular afternoon into a fun-filled DIY candle project! So, are you ready to bring your personalized candle making magic to life?
Getting all the essentials in place
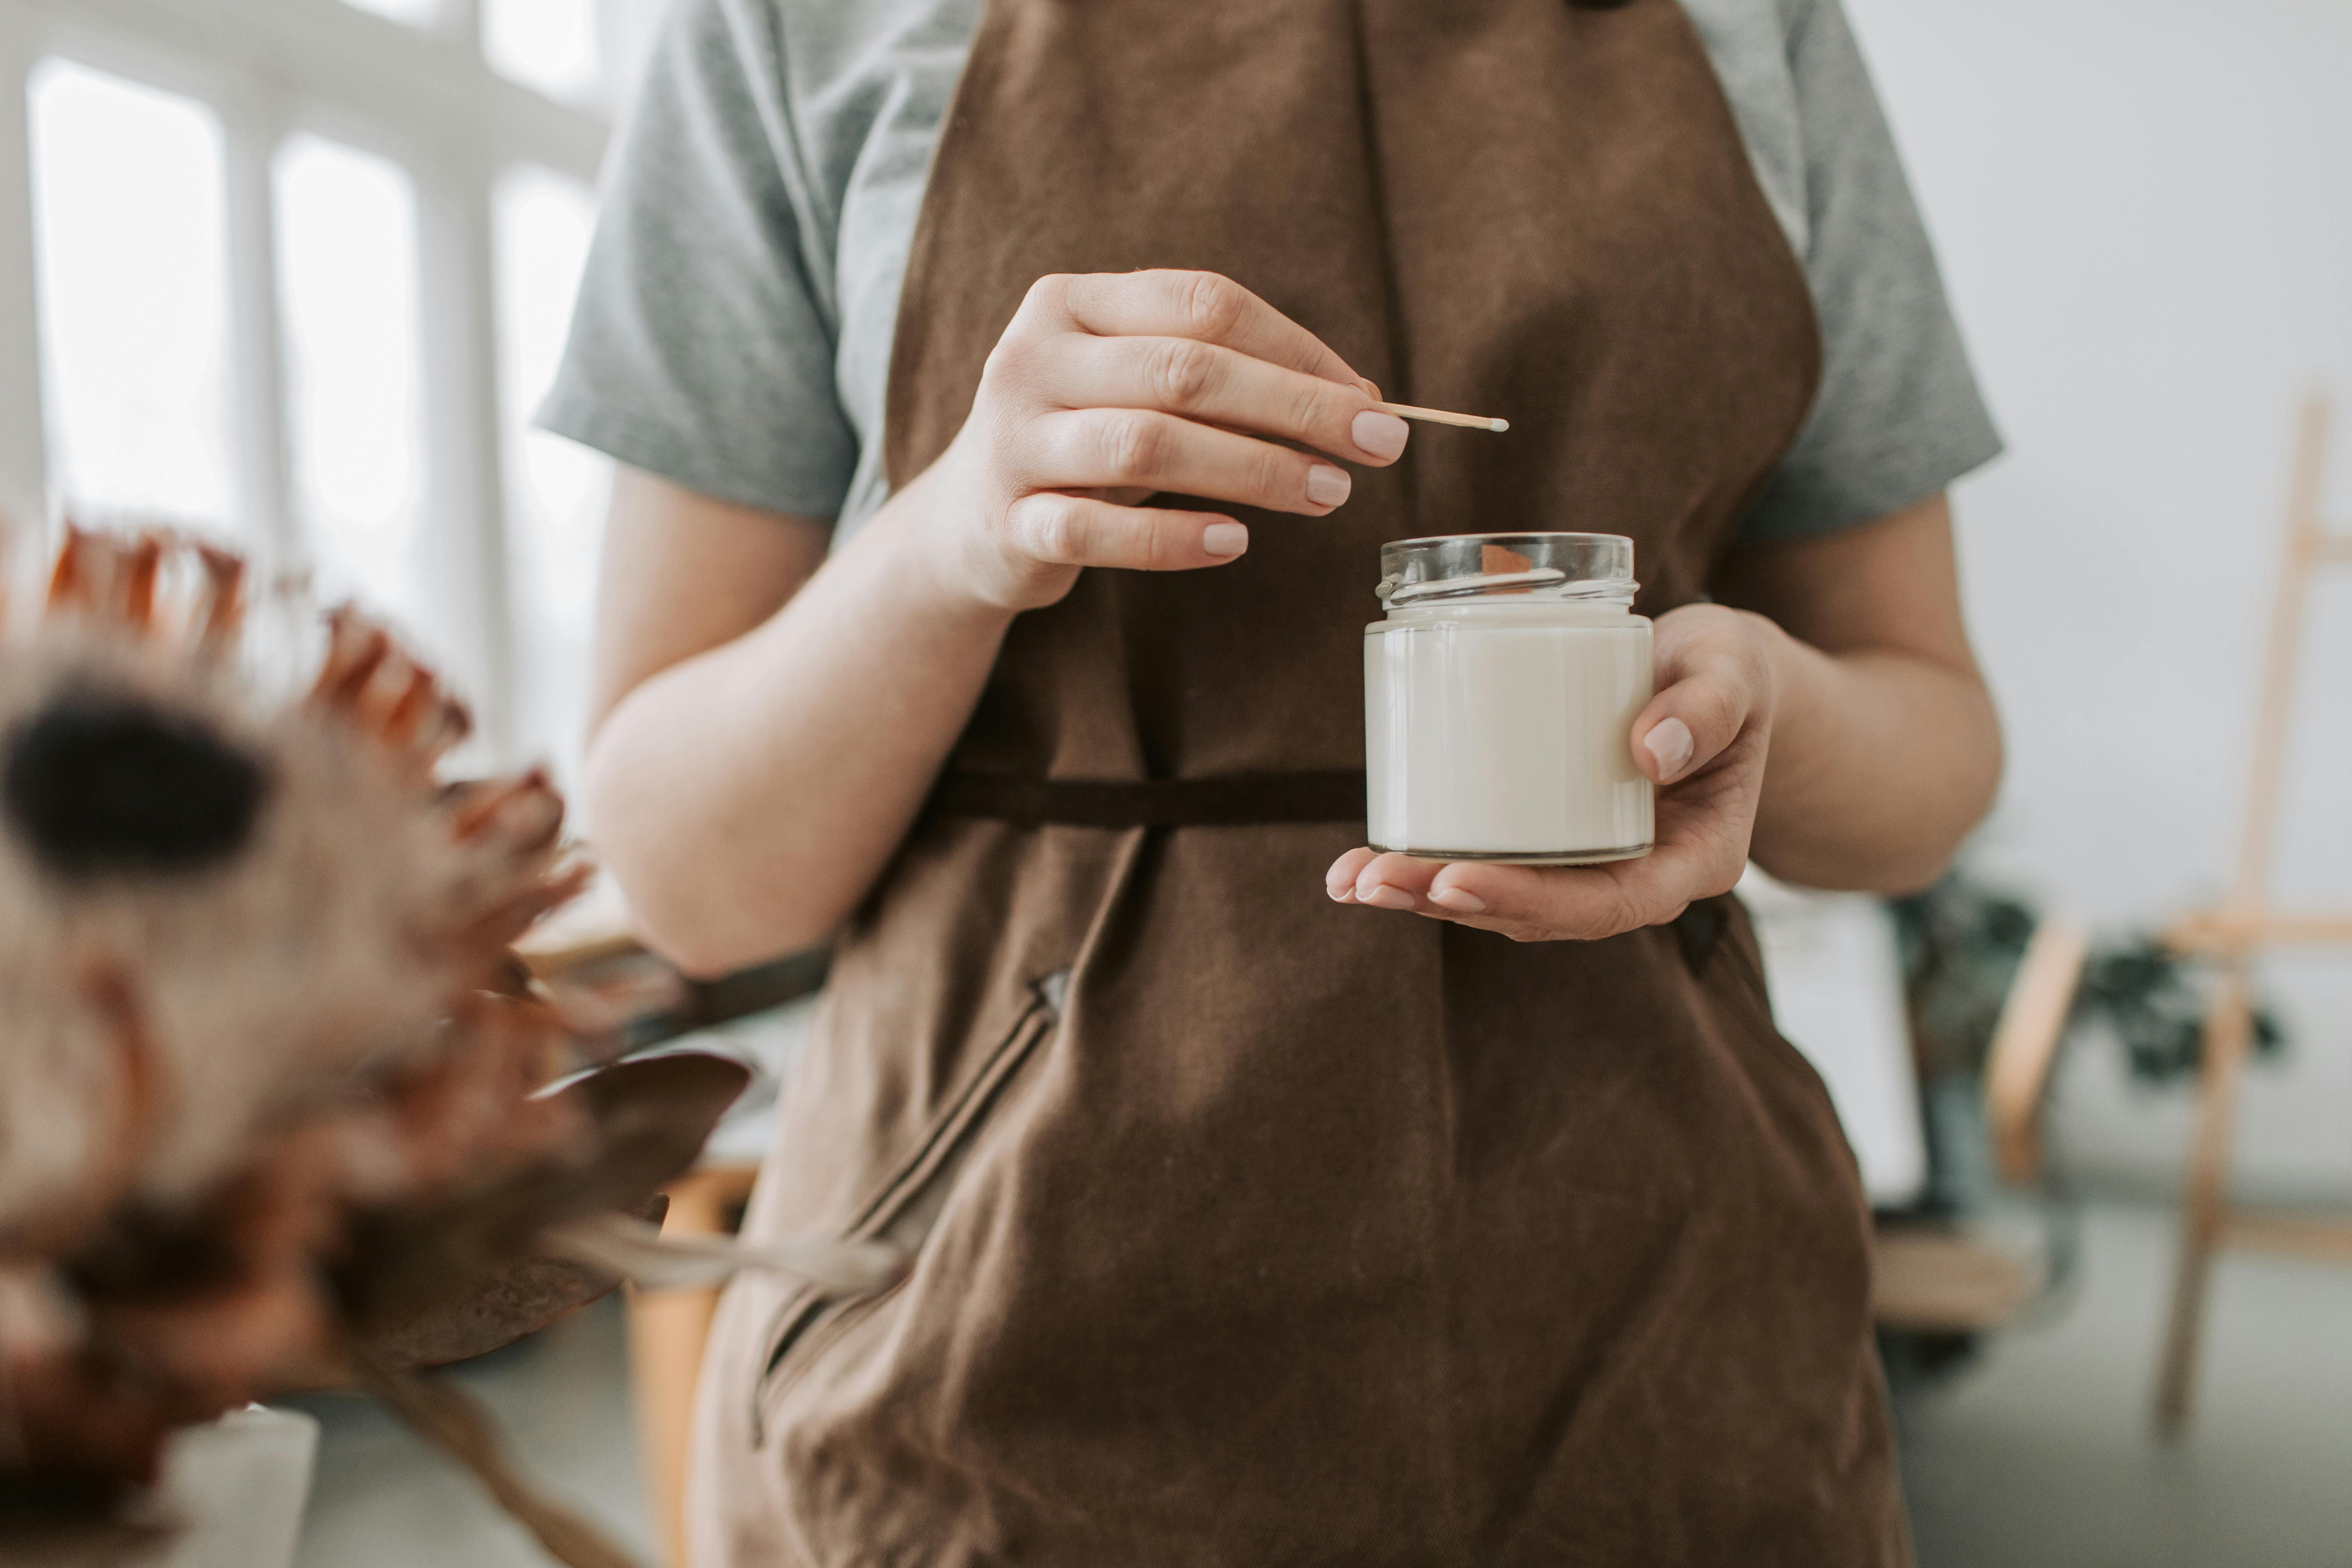
If we're talking about a DIY Floating Water Candle Craft, there are a few must-have materials you'll need to gather before you delve into this exciting DIY project. The best part about candle crafting is, most of these items might already be hiding somewhere in your house. So here's what you're going to need: a transparent glass jar or bowl, a candle wick, paraffin wax, decorative items like colored stones, flowers, and leaves, essential oils for scents, and distilled water. Remember, you have complete creative control. You can choose whatever you want to personalize the floating water candle, making your Candle Craft even more special.
The Thrill of Candle Making
Alright, you've got all your items ready? Fantastic, now let's move on to the most enjoyable part of the process - Candle Making. Start by filling up your chosen glass vessel halfway with decorative items. Don't worry about how random or chaotic it looks. Actually, the more varied it is, the more beautiful your DIY Water Candle will turn out!
To make your own candle, position your wick at the center of your jar and start pouring melted paraffin wax carefully. Make sure your wick stays in place. Once the wax solidifies, it's time to add water, ensuring it covers the wax but leaves room at the top for the wick to ignite. A pro tip here: Always remember to leave a good amount of wick above the water for it to burn properly.
The Charm of DIY Candle Craft
Be patient to witness the DIY Candle Project come alive. As the wax starts hardening, your creative assembly within the jar will become visible; transforming the ordinary glass jar into a beautiful piece of art. The spectacle of a handmade candle glowing in the water is truly magical. Hold on to your excitement, because the best part is yet to come.
Lighting Up Your Floating Candle DIY
There's something unique about home craft projects, and lighting your DIY Floating Water Candle Craft is the crowning glory moment. Ignite your wick with a lighter or match stick and watch as the flame dances above the water. Boom! You've just created an enchanting water candle at home. In the midst of it all, you're not just Creating Candles but also beautiful memories which echo the warmth of your DIY candle.
The radiant shimmer reflecting off the water surface, the scent of your chosen essential oil filling up your room, it's truly a euphoric experience. No digital images or video walkthroughs can match the joy of seeing and feeling the fruit of your DIY Candle Making effort. It's all about those tiny moments where your creation, your masterpiece, starts shining in all its glory.
Keep experimenting with designs and ideas, because the excitement of DIY Crafts is infinite and something as simple as candle crafts, can turn out to be exciting home decor DIY projects too! With every new candle making guide you follow or each new technique you bring to your candle making table, you’re learning, growing, and embracing the beautiful world of handmade crafts.
In Conclusion...
The process of creating your own DIY Floating Water Candle Craft at Home is more than just a pastime, it's a creative excursion. It's not just about making a decorative piece, but about channelling your creative energy into building something that brightens up your space while lifting your spirits.
As you delve into the captivating world of candle crafts, remember that each creation is a reflection of your imagination and uniqueness. So go forth, embrace the joy of DIY, let the artist in you shine, and remember - every candle you craft is a story waiting to burn bright!
You May Also Like These:
DIY Biodegradable Paper Seedlings
Experience the joy of nurturing a seed into a beautiful plant with your own homemade biodegradable paper seedlings! This craft not only supports your gardening activities but also introduces an environmentally-friendly approach to planting. This easy-to-follow guide will set you on the right path.
Ingredients:
- Old newspapers
- Scissors
- A cylindrical object (like a glass bottle or a rolling pin)
- A tray
- Compost/Soil
- Seeds
Instructions:
Step 1: Prepare Your Materials
- Start by cutting your newspapers into strips. The best size is about the same width as your cylindrical object and twice as long.
Step 2: Rolling the Pots
- Place the newspaper strip at an angle on your cylindrical object. Make sure there's a newspaper overhang at the bottom of the cylinder.
- Begin to roll the newspaper around the cylinder, maintaining the overhang at the bottom.
Step 3: Forming the Base
- Once you have created your paper cylinder, fold in the overhanging newspaper at the bottom to create a base for your seedling pot.
- Press firmly on the bottom to secure the base. You may choose to apply a little bit of organic glue to make it stick.
Step 4: Filling and Planting
- With the pot made, fill it almost to the top with compost or soil.
- Place the seeds in the soil at the depth recommended on the seed packet.
- Water gently, then place the pot on a tray and locate it in a well-lit, preferably sunlit spot.
Step 5: Growth and Transplantation
- Once your seedlings have sprouted and grown to a good size, it's time to transplant them.
- The best part of this DIY craft is you can plant the whole pot into the ground. The newspaper will decompose naturally and it eliminates the need for removing the plant and disturbing its roots.
Gardening has never been more engaging! Happy Planting!
DIY Craft: Creating Pots From Folded Paper
Supplies Needed:- Construction or cardboard paper (thicker papers work better)
- Scissors
- Adhesive glue or tape
- Ruler
- Pencil
Instructions:
Step 1: PreparationStart by gathering all the supplies mentioned above.
Step 2: Measure and CutUsing a ruler and pencil, measure and draw a square shape on your construction paper that is 20cm x 20cm. Carefully cut out the square.
Step 3: Fold PaperNext, fold this square diagonally from one corner to the opposite corner, creating a triangle. Fold the triangle in half, corner to corner, creating a smaller triangle.
Step 4: Shape the PotUnfold the small triangle back to the square. There should be lines delineating 4 smaller triangles on the paper. Fold each corner of the square to the center where the lines intersect, creating a smaller square with four layered triangles.
Step 5: Secure the PotHold down the centre and lift each flap created by the corners folding into the center. The edges of the paper will naturally form a pot shape. Secure the pot shape by gluing or taping the edges.
Step 6: Final TouchesPress on the base and the sides to shape the pot. Your DIY paper pot is ready to be used as a pencil stand, decoration, or anything else you want!
DIY CRAFTS: HOW TO CREATE FOLDED PAPER POTS FOR PLANTS
Ingredients:- A4 Size Paper Sheets
- Scissors
- Glue
- Seeds or Plants
- Soil
- Prepare Your Materials: Gather a clean A4 size sheet of paper, scissors, and glue.
- Cut The Paper: Cut the A4 paper into a square. You can make a square by folding one corner of your paper over to the adjacent side.
- Create a Triangle: Fold the square in half diagonally to create a triangle.
- Fold Again: Fold your triangle in half again, so you end up with a smaller triangle.
-
Prepare for The Final Shape:
- Hold the triangle so that the longest side is at the bottom and the right angle is on top.
- Take the bottom left corner and fold it upwards towards the top corner.
- Repeat for the bottom right corner. You should now have a square shape with two flaps sticking out on each side.
- Create The Pot Rim: Now fold the top of each flap down on both sides, this will form the rim of your pot. Fold them so that they meet in the middle.
- Secure The Pot: Secure your pot with some glue. Allow it to dry completely before moving forward.
- Ready for Use: Your folded paper pot is ready. Fill it with soil and plant your seeds or transplant your small plants.
Seed Planting Craft for Kids
Ingredients:
- Paper towel
- Seeds (e.g. beans, sunflowers, or peas are recommended as they sprout quickly)
- Ziploc bags
- Water
- Permanent marker
Instructions:
-
Prepare the Seeds:
- Take a few seeds and rinse them under cool water. This helps to remove any dirt or residue.
-
Prepare the Paper Towel:
- Cut or fold the paper towel so that it fits inside the Ziploc bag without folding over itself.
- Wet the paper towel until it’s damp, but not dripping wet.
- Place 2-3 seeds on the paper towel.
-
Prepare the Bags:
- Open the Ziploc bag and gently place the paper towel with the seeds inside.
- Use the permanent marker to write the date and type of seeds on the Ziploc bag.
- Seal the bag, leaving a little bit of air inside.
-
Nurture and Observe:
- Place the bag in a warm, bright location, but out of direct sunlight.
- Watch as the seeds start to sprout over the next several days. You can keep a journal to keep track of their growth process.
-
Transplant:
- Once the seeds have sprouted, transplant them into a pot with soil, or directly into your garden.
Create a Seedling Pot
Follow these easy steps to create your own seedling pot. The best part about this craft is that the entire seedling pot can be planted directly into the ground, with the newspaper decomposing naturally.
Ingredients:
- Old newspapers
- A small pot or container
- Scissors
- Tape
- Soil
- Seedlings
Instructions:
- Prepare the Newspaper: Cut your old newspapers into strips. Ideal width should be about the height of the container or pot.
- Wrap the Newspaper: Wrap the newspaper strip around the pot.
- Secure the Newspaper: Secure it with a small piece of tape.
- Create the Base: Fold the bottom of the newspaper strip inward to form a base and secure it with tape.
- Remove the Container: Gently take out the container or pot from inside.
- Fill with Soil: Fill the newspaper pot with soil.
- Plant the Seedling: Now your seedling can be put into the soil. Press the soil gently around it to secure.
- Water: Water the seedling appropriately.
- Plant the Pot: When your seedling is ready to be transplanted, plant the whole pot in the ground. The newspaper will eventually decompose on its own. Happy planting!


