


As an affiliate, I earn from qualifying purchases, but this doesn't affect the reviews or recommendations—your trust is important to me!
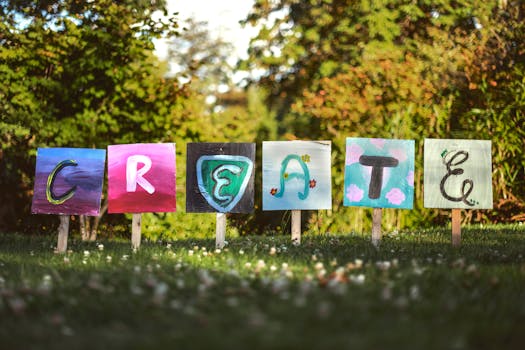
Exploring France: Creating Your Own DIY French Marinière Shirt Design at Home

Today, We're Making:
- - DIY French Marinière Shirt Design
- - Eiffel Tower Papercraft: Using some easy-to-find materials like a printed template, scissors, and glue, craft an adorable mini structure of the Eiffel Tower to pair with your Marinière Shirt project. Kids can learn a great deal about the famous French landmark while having fun painting and decorating it.
- - DIY Mini French Flags: Since Bastille Day might be in recent memory, you could teach the kids a little bit about French history and create miniature French flags composed of painted Popsicle sticks or pieces of paper.
- - Homemade French Croissants Clay Craft: Using non-toxic air-dry clay.
Bonjour Fashion Enthusiasts!
Have you ever been bitten by the French fashion bug, lured by the simplicity and elegance of the iconic French Marinière shirt design? The timeless, nautical-striped shirt that whispers an understated 'chic' with every thread! Or perhaps you've wondered how you could inject a bit of French style into your own closet without breaking the bank?
DIY Project: French Marinière Shirt
Well, my dear reader, our DIY project today is going to take you on an exciting journey into the heart of fashion DIY. We'll unlock the secrets of creating your own personalized, homemade Marinière style shirt from the comfort of your home.
So dust off those sewing kits and stitch your way into the realms of at-home fashion trendsetting with our straightforward, simple DIY French Marinière shirt design guide.
Zut alors! Let's get crafting!
Gathering Your Materials for Your DIY French Marinière Shirt
Knocking together your DIY French Marinière Shirt design begins with gathering the right materials. At the heart of this French fashion-inspired project is a plain shirt - a blank canvas of possibilities! Get your hands on a white round or v-neck cotton shirt, primed for your creativity. This homemade shirt will soon be transformed with iconic stripes representing classic Marinière style.
Next, make sure you have fabric paint in the colors of your choice. Traditional French Marinière shirts feature navy blue or black stripes, but this crafting journey is all about personalizing and infusing your own style. Feel free to experiment with different colors. Be sure to also have thin and thick paint brushes handy to create a genuine striped design. A ruler and tailor's chalk will be your best friends to guide those precise lines for a clean, stylish DIY outcome. Lastly, don't forget a cardboard piece to slide inside your shirt to prevent the paint from seeping through and spoiling the DIY shirt design.
Crafting Your DIY French Marinière Shirt in Steps
Embarking on this DIY project, it's essential to remember that patience is key. Crafting your homemade Marinière shirt is a labor of love and shouldn't be rushed. To create an authentic nautical shirt, you need those striking lines to be even and straight. You'll achieve this by measuring and drawing your lines lightly with the tailor's chalk, defining the boundaries of your nautical fashion piece.
Here are simple, straightforward steps to guide you:
- Step 1: Spread the shirt on a flat surface, ensuring it is smooth and straight. Slide in the cardboard piece to serve as a protective layer.
- Step 2: Start drawing horizontal lines using your chalk and ruler. Traditional Marinière shirts have a specific line style – one broad band followed by a thin one. But remember, this is your custom shirt, and you're the fashion DIY maven! Draw the stripes to reflect your personality and style.
- Step 3: It's painting time! Following your chalk-outlined guides, carefully paint in your lines, alternating between the thick and thin brushes depending on the line width. Remember to let each line dry before proceeding to the next to avoid smear and blend.
- Step 4: Once the paint is dry, erase any visible chalk marks.
Voilà! You’re well on your way to creating your own DIY French Marinière Shirt at home. Your homemade shirt is coming to life, threading together your personal style with traditional French fashion.
And there you have it, mes amis!
With a bit of patience and creativity, you've just woven a touch of French elegance into your wardrobe with your DIY French Marinière shirt. Now you can strut with pride, knowing every stripe on your unique piece tells the story of your personal touch. Go ahead, share a picture of your masterpiece or flaunt it on a breezy day out.
With your newfound DIY prowess, there's no French fashion trend you can't conquer from the comfort of your home. This isn't just a shirt – it's a symbol of one thrilling fashion journey that awaits you. The world of DIY is your oyster. Allez, continue exploring!

You May Also Like These:
Eiffel Tower Papercraft for Kids
Materials Needed:- A printed Eiffel Tower template (available online)
- Sturdy card stock
- Glue
- Scissors
- Ruler
- Download an Eiffel Tower template from a reliable online source. Print it out on your sturdy card stock.
- Using your scissors, carefully cut out the Eiffel Tower parts from the printed card stock. Remember, attention to detail is key here to make it visually appealing and correct.
- Now, take your ruler and use it to neatly fold along the dotted lines on each part. This will give your Eiffel Tower the correct 3D shape. Be sure all the edges align well for a perfect fit.
- It's time to glue it together! Gently apply the glue to the tabs on each part and stick them together in accordance to the numbers provided on each tab. It is important to allow the glue to dry before moving on to the next part.
- Continue gluing the parts together, piece by piece. Starting from the base, work your way up to the top of the tower. Remember, patience is necessary for a great final product!
- Fantastic! You have now completed your very own Eiffel Tower. Display it proudly on your desk or shelf!
How to Complete Crafts with Kids
Materials Needed:
- Construction paper
- Colored pencils or crayons
- Scissors
- Glue
- Stickers
- Googly eyes (optional)
- Glitter (optional)
Instructions:
- Clear a Work Area: Make sure you have a clean and large enough area to work on. Cover with newspaper if you're worried about messes.
- Choose Your Shapes: Decide on what shapes you want to use for your craft and draw them on the construction paper with the colored pencils or crayons.
- Cut Out Your Shapes: Carefully cut out your shapes with the scissors. If your child is old enough, they can help with this step. Always supervise closely.
- Glue Your Shapes: Arrange your shapes on another piece of construction paper and use the glue to stick them down. Allow to dry.
- Decorate: This is the fun part! Use the stickers, googly eyes, and glitter to decorate your craft.
- Clean Up: Remember to clean up your work area when you're finished and put away all materials.
DIY Crafts for Kids: Sparkle Stardust Glitter Jars
Ingredients:
- 1 Glass Jar with Lid
- 1-2 Tubes of Glitter (colors of your choice)
- Warm Water
- Clear Glue (like Elmer’s)
- Glitter Glue (optional)
Instructions:
- Prepare the Jar: Make sure your jar is clean and dry. If it’s not, wash and dry it first.
- Glue Layers: To begin, pour glitter glue into the jar. This is optional and just to add more thickness to the glitter. Then pour clear glue until you've filled about one-third of the jar.
- Add Glitter: Now sprinkle your glitter into the jar. You can choose one color or mix-and-match multiple colors. For an extra sparkling effect, use different sizes of glitter.
- Add Water: Pour warm water into the jar, leaving a little space at the top so you can shake it without spilling.
- Secure Lid: Tighten the lid. For added security, you may also choose to superglue the lid closed to avoid any unexpected spills.
- Shake It Up: Now, it’s time for the fun part! Shake the jar and watch as the glitter swirls around like stardust.
- Optional Decoration: If you like, you can now decorate the outside of your jar with paints, stickers, or other craft supplies.
DIY Mini Eiffel Tower Step-by-Step Instructions for Kids
Materials Needed:- Cardboard
- Scissors
- Pencil
- Glue
- Printout of Eiffel Tower template
- Paint (preferably gray and white)
- Small paint brushes
- Print out an Eiffel Tower template and trace it onto a piece of cardboard.
- Use your scissors to cut out the Eiffel Tower shape from the cardboard. This will be the base for your mini structure.
- Place the base on another piece of cardboard and trace around it. Cut this shape out as well.
- Repeat the process until you have four identical Eiffel Tower shapes.
- With help from an adult, use the glue to stick these four shapes together, making sure the edges align perfectly. This will create a sturdy and solid base for your mini Eiffel Tower.
- Set your Eiffel tower base aside to dry.
- Once the glue has dried, it's time to paint your tower! You may want to use a picture of the real Eiffel Tower for reference as you work. Generally, the Eiffel Tower is a lovely shade of gray, but feel free to get creative!
- Allow the paint to dry completely before moving on to the next step.
- Finally, it's time to add some authentic French details. Use a smaller paintbrush and the white paint to carefully add elegant stripes and patterns to your Eiffel Tower, just like the real one in Paris!
- Let your tower dry completely before you pick it up or start to play with it.
DIY Mini French Flags:
Materials Needed:- Blue, white, and red construction paper
- Scissors
- Glue
- Popsicle sticks
- Cut a rectangle out of the blue paper. This will be the backdrop for your flag.
- Cut a slightly smaller rectangle out of the white paper, and an even smaller one out of the red paper. These will be the middle and left stripes of your flag.
- Glue the white rectangle onto the larger blue one, taking care to center it.
- Glue the red rectangle onto the white one, again making sure it is centered.
- Attach the popsicle stick to the back of the flag using glue. This will turn your flag into a useful handheld model!
Homemade French Croissants Clay Craft
Give kids a taste of French history and culture with this fun and educational craft project. Introduce them to the world-famous French croissant using non-toxic air-dry clay. Follow this step-by-step guide to create your own miniature croissants with your kids!
Materials Needed:
- Non-toxic air-dry clay
- Clay rolling pin or a bottle
- Clay shaping tools or a small knife
- Waxed paper
- Brown acrylic paint
- Small paint brush
Instructions:
- Start by kneading the air-dry clay until it is soft and pliable.
- Roll the clay into a small round ball then flatten it using the rolling pin or bottle.
- Cut the flat clay into triangles using the clay shaping tools or a small knife.
- Take one triangle and roll it from the base to the point to create the shape of a croissant.
- Repeat this process with the rest of the triangles.
- Let the clay croissants air dry according to the clay's package instructions. Ensure they are completely dry before you continue to the next step.
- Once the croissants are dry, use the small paintbrush to paint them with the brown acrylic paint, replicating the golden-brown crust of a real croissant.
- Let the paint dry.
Enjoy your educational and creative Homemade French Croissants Clay Craft! Bon appétit!