


As an affiliate, I earn from qualifying purchases, but this doesn't affect the reviews or recommendations—your trust is important to me!
Exploring France: Creating Your Own DIY French Mime Puppet Craft at Home

Today, We're Making:
- DIY French Mime Puppet Craft
- DIY Miniature Eiffel Tower: Use Popsicle sticks to create your own miniature replica of the iconic Eiffel Tower. Kids can learn about this iconic French structure and paint it to bring it to life.
- French Chef Hat Craft: Using simple items like white paper or fabric,children can make their own French chef hats. This is a great craft relating to French culture,especially if combined with a French cooking lesson.
- Easy Parisian Street Art Mosaic: Teach kids about the vibrant street art culture in Paris. Help them create easy French-inspired mosaics using colored paper,glue,and a simple cardboard backing.
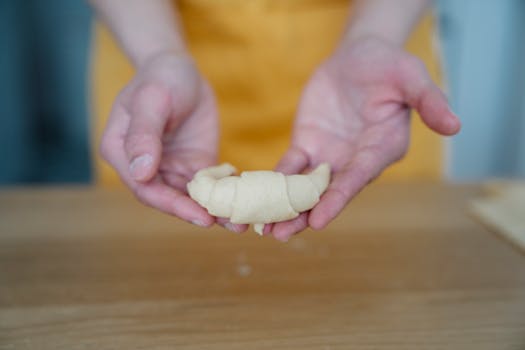
- Felt Croissant Sewing Craft: Kids can hand-sew small felt croissants.
Do you remember the hush that fell over you the first time you watched a French mime?
Mesmerized by the silent story unfolding right before your eyes? Well, today you don't need to travel to a bustling French boulevard to experience that magic. Welcome to an enchanting world of dance and drama, where silence speaks volumes and imagination knows no bounds!
With just a modicum of creative crafts materials and a fair bit of DIY zeal, you can bring the captivating artistry of a French Mime to life within the comfort of your own home.
This DIY French Mime Puppet Craft
Not only an engaging home craft for children and adults alike, but also your golden ticket to a petite slice of France's Puppet Theatre heritage.
So, are you ready to make your own puppet and delve into the expressive and often comedic world of mime puppets?
Let's begin this wonderful crafting adventure at home!
Getting Started with Your DIY French Mime Puppet Craft
To kickstart this enchanting DIY project, gather all your craft essentials at one place. The list includes a few socks to serve as the base material for your puppet, buttons or googly eyes for a candid look, yarn for hair, felt or fabric scraps for clothing details, a hot glue gun, and a needle and thread to bring it all together. One of the most gratifying elements of indulging in home crafts is the ability to personalize. Give your French Mime a classic striped top or perhaps a red scarf, the choice is entirely yours! Remember, this isn't just about puppet making, but also about travelling to the heart of French Mime craft, right in your comforting home ambience.
Embarking on the Puppet Craft Journey
Once your craft toolkit is ready, it's time to start creating your mime puppet. A simple sock can turn into a delightful character with just a bit of sewing, gluing, and cutting. Start with drawing and cutting out the outline of the French Mime's costume from your chosen fabric. This step is a great way to involve children, it's an easy home craft that can turn into a fun, collaborative effort. Experiment with bright colors and different patterns to make your puppet seem lively and charismatic, just like a real French Mime!
Comedy in Every Stitch
As you're piecing together the DIY French Mime Puppet, every stitch andEvery dollop of glue adds personality. Whether it's the painted-on white face, the exaggerated expressions, or the tiny hat atop the yarn hair, each component falls in line to translate the classic charm of acting puppets into your hand-crafted creation. This isn't merely a children's craft. It's a process that offers a sense of achievement to crafters of all ages.
Mastering the Art of French Puppet Theatre
Immerse yourself in the nuances of French Puppet Theatre as you animate your DIY French Mime Puppet. It isn’t just a crafting tutorial; it’s a journey into the world of mime puppets. Puppetry crafts are a time-honored tradition in France, with mime puppets playing critical roles in storytelling. Historically, these silent performers used their vivid looks and expressive body language to portray various characters and narrate tales, sans any spoken words. As you make your own puppet, you're reviving this beautiful art form, gifting it a touch of your personal style.

Crafting Your DIY French Mime Puppet
In creating your own DIY French Mime Puppet, you've not only crafted a unique, personalized piece of art, but you've also discovered an enriching fusion of hands-on creativity, comical charm, and French cultural heritage, right in the cozy corners of your own home. This isn't just a delightful sock puppet, it's a tangible story, woven by your hands and bursting with character.
Embarking on A Creative Journey
With this journey, you've transcended the realms of mere puppet-making, plunging headfirst into the vibrant world of French Mime and traditional puppet theatre. So here's to the tales your lovable mime puppet will narratively dance to, to the giggles it will inspire, and the magical craft-adventures that await you in the future.
This is the pure beauty of DIY and the ageless charm of puppets.
Until Our Next Crafting Rendezvous...
Keep the creativity flowing, and remember, your home is the stage where your stories come to life!

You May Also Like These:
DIY Miniature Eiffel Tower
Ingredients:- Popsicle sticks (approx. 100 sticks)
- Non-toxic glue
- Paint (preferably silver or bronze)
- Paintbrush
- Place two Popsicle sticks in the shape of the letter ‘V’. Add a Popsicle stick across the top to connect the two. Repeat this step to create 4 V-shaped structures. These will be the base of the Eiffel Tower.
- Using the glue, connect all four V-shaped structures at the base and top to form a pyramid.
- Repeat the first two steps but reduce the size each time to create smaller layers on top of the base layer.
- Finally, make the top of the Eiffel Tower by gluing two Popsicle sticks in the shape of a smaller ‘V’ and attach it to the top of the structure.
- Allow the structure to dry completely.
- Once dry, paint the structure to resemble the Eiffel Tower.
French Chef Hat Craft
Ingredients:- White paper or fabric (approx. 2-yard length)
- Scissors
- Tape or glue
- Stapler
- Cut the paper or fabric into a rectangle shape. The width should match the circumference of the child’s head and the length should be at least 12-15 inches.
- Fold the fabric or paper in an accordion style (like a fan), ensuring that each fold is around 1-inch wide.
- Wrap the folded paper or fabric around the child's head to get the correct size. Then remove the hat, ensuring to keep the shape, and staple the ends together to secure it.
- Unfold the top part of the hat, pinching it slightly at the base to make it appear puffy. This creates the typical “chef’s hat” look.
- Tape or glue any loose ends to keep the hat secure.
Easy Parisian Street Art Mosaic
Bring the Parisian street art to your home and spark creativity in your little ones with this easy and fun craft project! Feel the magic of vibrant French culture while creating these colorful mosaics.
Ingredients:
- Coloured paper: Assortment of shades will bring your mosaic to life.
- Scissors: For cutting paper into different pieces.
- Glue: To attach your pieces together.
- Cardboard or thick paper: As a base for your mosaic.
Instructions:
- Cut the coloured paper:
- Arrange your design:
- Glue down your design:
- Let it dry:
Start by cutting the coloured paper into small squares. Make sure the pieces are roughly the same size, but they don't need to be perfect. The irregularity can add some character to your mosaic.
Before gluing, arrange your design on the cardboard or thick paper base. This way, you can make sure you're happy with the colors and the layout before it's permanently stuck down.
Once you're happy with your design, it's time to glue it down. Start from one corner and work your way to other areas, sticking each piece down securely.
Leave your mosaic to dry flat for a few hours before displaying your work.
Bonuses Tips:
- Use this project as a starting point for discussing French culture and street art with your kids.
- Consider adding additional elements like glitter or sequins for an extra touch of Parisian glamour!
With these simple steps, you and your child can create a beautiful Parisian Street Art Mosaic to adorn your home. Be prepared for a fun-filled, educational, and creative afternoon.
Easy Parisian Street Art Mosaic
Teach your kids about the vibrant street art culture in Paris. Help them create easy, French-inspired mosaics using colored paper. This fun and educational activity is perfect for a family crafting session at home, following a delightful French cooking lesson.
Ingredients
- Colored paper (Assorted colors)
- White cardstock paper
- Scissors
- Glue stick
- Parisian Street art images for inspiration (Optional)
Instructions
- Get Inspired: Begin by exploring the colorful world of Parisian street art. Look up some images together or browse through a book, focusing on the mosaic-like designs.
- Plan Your Design: Let each child choose a simple design to recreate. Stars, hearts, swirls, and abstract patterns are all excellent places to start.
- Cut Colored Paper: Have each child then cut the colored paper into small mosaic-like pieces. Ensure they maintain a range of shapes and sizes to inspire creativity and mimic the irregularity of real mosaic art.
- Arrange Your Mosaic: Arrange these colored pieces on the white cardstock paper. Encourage your child to experiment with colors and placement until they're happy with their design.
- Glue It Down: Once your child is happy with their layout, use the glue stick to secure each piece to the cardstock. Ensure every piece is glued down tightly.
- Let It Dry: Once completed, set your mosaic artwork aside to dry. Once it's dry, it's ready for display. Show off your homemade Parisian Street Art Mosaic!
This craft captures the essence and vibrancy of Parisian street art, providing a fun and practical way to teach kids about French culture. It's easy, affordable, and perfect for all ages. Enjoy your crafting time!
Materials Needed:
- Glue (any kind, but white glue like PVA works best)
- Construction paper
- Scissors
- Markers or crayons
- Glitter (optional)
- Additional decorations like sequins or stickers (optional)
Instructions:
Step 1: Decide on a craft project. This could be a card, a paper collage or a paper mâché project, among others.
Step 2: Gather all of your materials.
Step 3: Use the scissors to cut out shapes or designs from the construction paper. Be imaginative! Younger children might need assistance with this step.
Step 4: Use the glue to stick the pieces of construction paper together. Make sure you leave the glue to dry a little before moving onto the next step.
Step 5: Once the glue has dried, you can use markers or crayons to add details or decorate your project further.
Step 6: If you're using glitter or additional decorations, apply a second layer of glue where you want the decorations to stick, then sprinkle or place them onto the glue. Remember, a little glitter goes a long way.
Step 7: Leave your project to dry. This might take a few hours, depending on how much glue was used.
Step 8: Once dried, your craft project is done! Well done!
Tips:
- Always supervise young children when using scissors.
- Keep a damp cloth handy for sticky fingers or accidental glue spills.
- Use recycled materials like newspaper or empty toilet paper rolls for eco-friendly crafting.
Felt Croissant Sewing Craft
This easy and fun craft project is perfect for little ones to learn basic hand sewing skills and make adorable felt croissants at the same time!
Ingredients:
- Felt Sheets in Croissant and Cream Colors
- Embroidery floss in coordinating color
- Embroidery needle
- Scissors
- Straight Pins
- Poly-fill Stuffing
- Croissant Template (You can easily find these online or draw one yourself!)
Instructions:
- Print and Cut Template: Print your chosen croissant template. Place it on your chosen felt and trace around it. Then, carefully cut out your felt croissant shape.
- Prepare to Sew: Thread your needle with the embroidery thread, and knot one end.
- Sew the Croissant: Start at one end of your croissant, and sew around the edge using a straight stitch, leaving a small opening for stuffing. Remember to keep stitches evenly spaced and an equal distance from the edge.
- Stuff the Croissant: Lightly stuff your felt croissant with poly-fill stuffing until it holds its shape. Take care not to over-stuff as it may make it challenging to sew closed.
- Finish the Croissant: Once your croissant is stuffed, sew the opening close. Make sure to secure your stitching at the end, so it doesn't come undone.
And there you have it, adorable homemade felt croissants perfect for pretend play or as fun decorative items in your kid's room!