


As an affiliate, I earn from qualifying purchases, but this doesn't affect the reviews or recommendations—your trust is important to me!
Creating a DIY Miniature Greenhouse Experiment Step by Step

Today, We're Making:
- - DIY Miniature Greenhouse Experiment
- - 'Time Capsule Treasure': A project where kids can create a mini time capsule,incorporating aspects of archaeology and item preservation. They can fill the capsule with current-day artifacts relevant to 05-03-2025,and aim to bury it in a safe place,to be opened a year later.
- - 'Plant Growth Calendar': A project that combines botany with mathematics. Kids can plant a seed in the miniature greenhouse and keep a log of its growth every day or week over a course of a certain period (say 3 months from 05-03-2025). They can then create a growth graph based on data gathered about the plant's height,number of leaves.
DIY Miniature Greenhouse Experiment: A Step-by-Step Guide
Have you ever wondered about the magic that happens inside a greenhouse? Or thought about the difference it makes in the growth and health of plants? Well, you're not alone! Many of us gardening enthusiasts and eco-friendly project lovers have had our curiosity piqued.
Now, what if I told you that you could witness this horticultural wonder right in your own living room? Yes, that's right! Welcome to our comprehensive step-by-step greenhouse building guide that will walk you through a fun, easy, and engaging DIY Miniature Greenhouse Experiment.
This home science project is not just an excellent way to understand how greenhouses work, but also a fantastic introduction to indoor gardening. So, whether you're a seasoned green-thumb or a doting parent looking for science projects for kids, get ready to dive into this magical world of DIY horticulture and transform your living space with your very own small-scale greenhouse.
Materials You'll Need to Launch Your DIY Miniature Greenhouse Experiment
Launching into this DIY project doesn't require you to be a seasoned horticulturist or a DIY whiz. All you need is a little enthusiasm, some basic materials you probably have lying around your house, and a bit of our encouragement. So, let's begin by discussing what materials you'll need to build your own miniature greenhouse.
- An old clear plastic container: If it's transparent, it's perfect! This could be anything that originally housed bakery items or salads. The key is finding a container with a lid that can create a controlled atmosphere, the essence of a true greenhouse.
- Small pots or little biodegradable seedling trays: These will house your plants. Remember, this is a DIY miniature greenhouse experiment, so keep the sizes appropriate.
- Seeds of your choice (herbs, flowers, vegetables): Opt for plants that love humid conditions as they will thrive in your new little ecosystem!
- Potting soil: A good potting mixture rich in organic matter will be perfect for your seeds to sprout and grow.
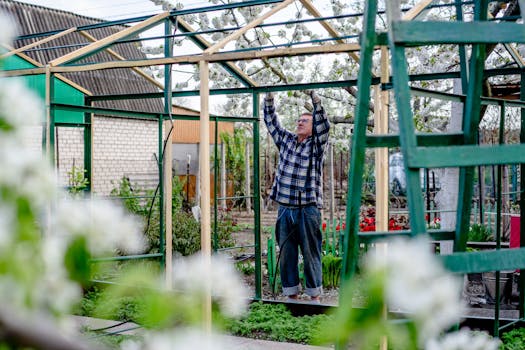
A Peek Inside Greenhouse Construction
Now that we have our materials ready, let's dive into the process of building our miniature greenhouses. I was as excited as you are right now when I assembled my first greenhouse setup. So, let's explore our greenhouse construction journey, step by step.
First, clean your container and make sure it's completely dry. Next, fill your small pots or seed trays with potting soil. Moisten the soil slightly with water but don't saturate it. Make a small hole in the center of each pot or seedling tray and gently plant your seeds. Cover the seeds with a thin layer of soil – they love to snuggle under the earth!
Finally, arrange your planted seeds inside the clear plastic container. Now here's where the magic begins! Simply close the lid and voila! You’ve built your very own DIY Miniature Greenhouse.
Caring for Your Indoor Garden
Building the DIY Miniature Greenhouse was fun, wasn't it? Now let’s talk about something just as exciting - caring for and observing plant growth experiments inside your indoor garden. Greenhouses create a warm and damp environment that provides optimal conditions for seeds to germinate and grow.
Place your greenhouse in a sunny area as sun exposure increases the internal temperature of the mini greenhouse, simulating the warmth of a real, large-scale one. However, keep an eye out for too much condensation. If you notice the drops running down the inside walls of your container, give it a little open-window 'ventilation' by cracking the lid until the drops have evaporated.
Remember, the success of your miniature greenhouse depends greatly on the minimal disturbance of its environment. So, sit back, observe, and enjoy the beauty of your DIY indoor gardening project unfold before your eyes.
Include Variety in Your DIY Projects
Ready for more? Once you've got the hang of creating a basic DIY Miniature Greenhouse, you might want to build more. Add variety by choosing different types of plants and larger containers. Maybe consider turning this into an ongoing science project for kids or a new hobby to develop your green thumb skills.
The joy of gardening doesn't only lie in tending to large garden beds but also in watching a tiny seed sprout into a beautiful plant within your personal space. By building miniature greenhouses, you can enjoy this beautiful process up-close, even in the coziest of apartments!
So there we have it – a magical journey into the world of miniature greenhouses.
A world that showcases the power of life, the cycle of growth, an everyday science marvel that you’ve created right there on your living room coffee table. Hopefully, this experiment will spark an enduring love for gardening and an appreciation for the delicate balance of Mother Nature.
Nurture your little ecosystem and watch it flourish. Go on, sit back with a hot cup of tea in hand, and enjoy the view of your DIY Miniature Greenhouse – the tiny oasis you’ve brought to life, right in your home sweet home.
Here's to the joy of creation and the simple pleasures of everyday observations.
Happy gardening, my friends!

You May Also Like These:
Time Capsule Treasure STEM project
Create a time capsule together with your children and make capturing memories fun and exciting. It’s a great project that incorporates elements of science, technology, engineering, and math (STEM), all while boosting your memory-making experiences as a family.
Ingredients
- An empty container: It could be an old shoe box, an empty coffee can, or a plastic container. Make sure it’s something you don’t mind using for this project and it's big enough to hold all of your family's treasured items.
- Packing materials: You'll need things like bubble wrap or newspaper to secure fragile items in the time capsule.
- Select items: Choose a variety of mementos (notes, pictures, tickets from a special event, small toys, etc.) to put into the time capsule.
- Art supplies: Crayons, markers, stickers, or whatever you need to decorate the outside of your time capsule.
Instructions
- Choose your time capsule container: Select a sturdy container that will hold up over time. It should be easy to open and close, but also strong enough to protect the items inside. Make sure it’s a size that’s reasonable to store in your home.
- Safeguard the time capsule: Wrap fragile items in packing materials to keep them safe. If you're going to include papers or photos, consider putting them in plastic sleeves to protect them from possible water damage.
- Select time capsule contents: As a family, choose the items you want to put in the time capsule. These should be things that represent your family and the time period you are currently in.
- Decorate your time capsule: Let the kids decorate the outside of the container. They could draw pictures, write their names, or put stickers. This also adds a personal touch to your time capsule.
- Close the time capsule: Once everything is packed, close your time capsule, and decide together when you will open it. This could be in a few months, a year, or even several years. Write the date on the outside to remind everyone when it's time to open and enjoy.
Building a Time Capsule: A Fun and Educational STEM Project
Overview:This project is aimed at teaching kids about the passage of time as a concept, as well as the principles of preservation and archaeology. It can be split into various stages spread out over a month or so, providing ongoing fun and learning opportunities.
Ingredients:
- A sturdy, waterproof box
- Assorted personal items to include in the time capsule
- Writing materials for a message to the future
- A safe place to bury the capsule
- A marker or something to remember where the capsule is buried
Instructions:
Step 1: Finding a Box
Find or purchase a sturdy, waterproof box. This could be anything from a simple plastic food storage tub to a more elaborate custom-made capsule.
Step 2: Choosing Items to Include
Think about what items to include. These should be small, personal items that represent the present time – they could include photographs, small toys or trinkets, a write-up of current events. Ensure these items are safe to bury and won't degrade over time.
Step 3: Writing a Message
Write a message to whoever opens the capsule in the future. This could be a future self, or someone else who might find it. The message could include information about who is making the capsule, what their life is like, and why they are doing this project.
Step 4: Burying the Capsule
Choose a safe place to bury the capsule. This should be somewhere that isn't likely to be disturbed, and where the capsule can be left for a long period of time. Remember to mark the location in some way, so the capsule can be found again later!
Step 5: Waiting
Wait for a pre-determined period of time. This could be anything from one year to a decade! When the time comes, dig up the capsule and enjoy the memories.
Note:Burying a time capsule is a fun way of capturing a moment in time, but remember it is very important not to include anything valuable or irreplaceable, as there's always a chance that it might not be found again.
STEM Project: Time Capsule
Follow these simple steps to create and bury a Time Capsule with your kids as a fun and educational STEM activity:
Ingredients:
- Durable, weatherproof container - This will house the items you wish to preserve. It must be sealed and waterproof.
- Items for the capsule - These can include pictures, letters, a newspaper clipping, or small trinkets. Be imaginative and think about what would be interesting to uncover in the future.
- A safe, suitable location - Choose a spot where the capsule can be safely buried and won't be disturbed.
- A shovel - For burying your time capsule.
Instructions:
- Gather your items: Start by gathering all of the items you want to put into your time capsule.
- Prepare your container: Make sure your container is clean and dry before placing your items inside.
- Pack your capsule: Arrange your items carefully inside the container. If you’re including paper items, you might want to keep them in a plastic zip-lock bag for extra protection.
- Seal your capsule: Seal your container, making sure it’s tight enough to prevent moisture from getting in.
- Choose a location: Choose a safe spot in your backyard or another place where it won’t be disturbed. Be sure to mark or remember the spot so you can find it in the future!
- Bury your capsule: Dig a hole that’s deep enough to totally cover your capsule. Place the capsule in the hole and cover it up. Congratulations, you’ve created and buried a time capsule!
Plant Growth Calendar - STEM Project Instructions
Objective:
This project adopts an interesting combination of botany and mathematics to encourage kids to observe, measure and document the growth of a plant over a certain period. For instance, we suggest a period of three months starting from 05-03-2025. They will keep a log of growth and eventually create a growth graph using the data gathered.
Ingredients:
- Miniature greenhouse or clear plastic container
- Soil or potting mix
- Seeds of a plant (fast-growing ones like beans or sunflowers are ideal)
- Ruler or measuring tape
- Journal or logbook
- Pen or pencil
- Graph paper
Steps:
Setting up the Miniature Greenhouse:
- Fill the miniature greenhouse or clear plastic container with the soil or potting mix.
- Add some water to moisten the soil.
- Plant the seed as per the instructions given on the seed packet.
- Place the greenhouse in a location where it will get adequate sunlight.
Keeping the Growth Log:
Kids need to observe the plant every day or at least once every week, documenting the changes in the plant's growth in the logbook. They should measure and note down the height of the plant using the ruler or measuring tape.
Creating the Growth Graph:
At the end of the observation period, kids need to plot the plant's growth on graph paper. The horizontal axis will represent time (in days or weeks), and the vertical axis will denote the height of the plant.
STEM Project - Counting Leaves
Objective: Understanding mathematical concepts through real-world applications by counting leaves.Supplies:
- 1 Sheet of Paper
- 1 Pencil
- Sundry Leaves (assorted types)
- 1 Cloth Bag
Instructions:
Step 1: Prepare your MaterialsGather everything you need: pencil, paper, and a bag to collect leaves. Have these items ready.
Step 2: Collect LeavesGo on a leaf collecting expedition. Collect different shapes, sizes and types of leaves. Make sure to collect a substantial amount to create a good sample size.
Step 3: Group LeavesOnce you’re back, empty your bag and sort the leaves into different groups. They can be grouped by type, size, color, or any other characteristic you choose.
Step 4: Counting and RecordingCount the number of leaves in each group and record the data on your sheet of paper.
Step 5: Analyze the DataAnalyze your data. Ask questions such as: Which group had the most leaves? Which had the least? What does this tell you about the area where you collected your leaves?
Bonus: For an extra challenge, try expressing your counts as percentages or fractions. For example, if you collected 100 leaves and 20 of them were oak leaves, that would mean 20% of your leaves were oak, or that oak leaves made up 1/5 of your total collection.


