


As an affiliate, I earn from qualifying purchases, but this doesn't affect the reviews or recommendations—your trust is important to me!
Creating DIY Kits and Games for Engaging Educational Fun

Today, We're Making:
- - DIY Terrarium Kit
- - Homemade Bubble Gum
- - Edible Chemistry Kit
- - DIY Pizza Board Game
- - Lego Bridge Building Challenge
- - DIY Spring Time Bookmarks
- - Make Your Own Veggie Popsicles
- - Solar-Powered Smores Oven Project
- - DIY Marshmallow Shooters Game
- - Balloon Powered Car STEM Project
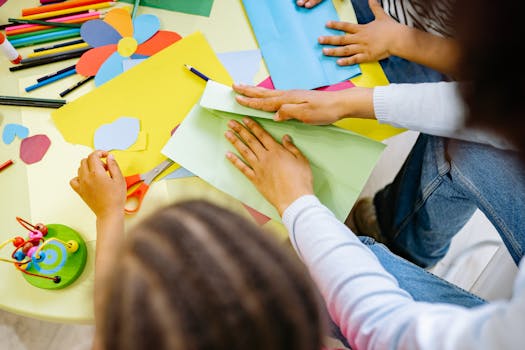
Do you ever marvel at the sheer creativity and ingenuity of a DIY Terrarium Kit or the thrilling anticipation that comes from a game of DIY Pizza Board Game?
These fun, engaging activities can capture a child's imagination while stealthily teaching them essential concepts. As parents and educators, we are constantly seeking fresh, interactive learning kits and educational fun activities to foster a love for learning.
With the rise of the digital age, the challenge rests in creating hands-on education experiences that can effectively compete with the allure of ever-evolving technology, and a DIY approach might just be the answer.
So, let's dive into the captivating world of Do-It-Yourself educational resources that blend both fun and learning in unparalleled measures.
From homemade bubble gum to edible chemistry kits, we have a universe of creative learning strategies to explore that make education as enjoyable as child's play.
The joys and benefits of a DIY Terrarium Kit
One standout tool that grabs kids' interests is the wildly enticing DIY Terrarium Kit. Terrariums, often described as 'windowsill greenhouses,' offer children a unique, hands-on education experience. The process of creating their very own ecosystem cultivates an understanding of life cycles, the environment, and the delicate balance of nature. As they meticulously arrange layers of rocks, soil, and plants within their terrariums, they unknowingly become horticulturists engaged in an engaging educational science project. What's more, this DIY educational kits venture subtly imbibes important virtues such as patience, sustainability, and stewardship.
Bite into learning with Homemade Bubble Gum
Who can resist the sweet appeal of the Homemade Bubble Gum kit? A favourite among the Fun Learning Tools, the Do-It-Yourself bubble gum kit allows kids to create their tasty treats. Amidst the fun of flavours and colours, they delve into the chemical reactions that transform simple ingredients into delightful bubble gum. This hands-on experience with scrumptious candy science upholds learning as a sugar-coated fun-fest attracting both taste buds and curious young minds.
Fizzing fun with the Edible Chemistry Kit
Eager to add a bit of a 'zoom' and a 'whiz' to your teaching resources? Why not try out an Edible Chemistry Kit? These science kits for kids are a carnival of chemical reactions, transporting your little ones into the mini-laboratories of their kitchen. Kids can watch in amazement as baking soda and vinegar fizz or gelatin solidify to form edible worms, making it an excellent tool for presenting STEM Craft Kits in the most engaging ways. While running these delicious experiments, children not only develop a taste for science but also understand basic chemical properties and observe firsthand how different elements interact.
Piecing together the DIY Pizza Board Game
The DIY Pizza Board Game is another excellent example of interactive learning kits bridging the gap between education and entertainment. Children can build their pizzas piece by piece while simultaneously grappling with fractions, addition, and problem-solving. An enjoyable way to serve up mathematics, this game injects a slice of fun into learning, changing the perception that math is tedious or difficult.
Constructing Knowledge: Lego Bridge Building Challenge
Lastly, taking a 'building block' approach to learning is the Lego Bridge Building Challenge. This fun, creative learning strategy offers a platform for kids to experiment with architectural designs, learn about physical forces, weight distribution, and engineering concepts. This Hands-on education project remarkably transforms every Lego piece into a potent teaching resource, further demonstrating that interactive learning isn't just about engaging pleasure; it's about building blocks of knowledge and fostering a love of learning.

DIY Educational Fun: More Than Just Play
So, as our exploration of these unique DIY kits and games concludes, we come away with a greater understanding of how explicit hands-on activities can be a powerful tool in encouraging a lifelong passion for learning. Whether your child is concocting bubblegum in their kitchen-turned-science lab, nurturing a mini-ecosystem in their terrarium, constructing architectural marvels with LEGO or satiating their mathematical appetite through a pizza-themed board game, the learning experience is always infused with fun.
A Screen-Free Alternative
In a world increasingly dominated by screens, these educational resources demonstrate an alternative way to teach, engage, and inspire curious minds. Let's look forward to transforming teaching not just into a task, but an adventure that's addictive and exciting.
Calling Parents and Educators
So, parents and educators, are we ready to take the paintbrushes of creativity to our classrooms and homes? Let's get building, learning, and laughing together as we embrace the delightful world of DIY educational fun!

You May Also Like These:
DIY Spring Time Bookmarks
Materials Required:
- Cardstock paper (different colors)
- Scissors
- Hole puncher
- Ribbon or string
- Acrylic paint & paintbrushes
- Glue
Instructions:
- Cut the Cardstock: Begin by cutting your cardstock into rectangular shapes approximately 2 inch by 6 inch. These will be the bodies of your bookmarks.
- Decorate the Bookmarks: Use your acrylic paints to decorate each bookmark. Opt for bright spring colors or paint spring themed pictures such as flowers, bugs, or the sun.
- Let Them Dry: Allow your bookmarks to dry completely before moving on to the next step. This may take a few hours.
- Punch a Hole: Use your hole puncher to make a hole in one end of each bookmark.
- String the Ribbon: Cut a small length of ribbon or string, thread it through the hole in your bookmark, and tie it in a knot.
- Use or Gift Your Bookmarks: You can now use your bookmarks when reading or make them as lovely DIY gifts this spring!
This DIY Spring Time Bookmarks project allows parents and kids engage in a fun, creative activity, and also encourages children's love for reading. These vibrant and cheerful bookmarks are perfect to mark the coming of spring and are equally useful and beautiful for avid readers!
Solar-Powered Smores Oven Project
This project is an awesome way of combining the power of the sun and the deliciousness of smores. Kids will love this as a fun summer STEM project that ends with a tasty treat!
Materials
- Cardboard pizza box
- Foil
- Black construction paper
- Clear plastic wrap
- Tape
- Stick
- Graham crackers
- Chocolate bars
- Marshmallows
Instructions
- Prepare your Oven: Cut a flap in the top of the pizza box, leaving about an inch of border on the sides and front. Cover the inside of this flap and the inside bottom of the box with foil.
- Create Insulation: Place the black construction paper in the bottom of the box, over the foil.
- Create the Window: Cover the opening created by the flap with plastic wrap and secure this with tape.
- Set Up your Oven: Use the stick to prop open the flap at an angle that will catch the sun’s rays.
- Prepare your Smore: Arrange your graham crackers, chocolate, and marshmallow on top of the black paper and close the box (without crushing the window).
- Let It Cook: Position your oven where it will get plenty of sunlight and let nature do the rest. The heat trapped inside by your window will warm up and eventually melt your Smore.
Solar-Powered S'mores Oven Project
Ingredients:
- Cardboard pizza box
- Aluminum foil
- Cling wrap
- Black construction paper
- Tape
- Ruler
- Pencil
- Wooden skewers or straws
- Paintbrush
- Marshmallows
- Graham crackers
- Chocolate bars
Instructions:
- Prepare the pizza box:
- Clean the pizza box thoroughly.
- Draw a square on the top of the box, leaving a 1-inch border from the edges of the box.
- Carefully cut along three edges of the square, leaving one side as a hinge to create a flap.
- Line the box with aluminum foil:
- Open the rectangular flap you have created and cover its inner side with aluminum foil. This will act as a reflector of sunlight.
- Secure the foil with tape, making sure it’s tight and smooth.
- Prepare the oven window:
- Take the cling wrap and secure it over the hole you created when you opened the flap. This will let sunlight into your oven while keeping the heat inside.
- Secure the cling wrap on the inside with tape.
- Prepare the oven base:
- Cover the inside base of the box with black construction paper, this will absorb more heat.
- Install the cooking skewers:
- Take two skewers or straws and insert them through the sides of the box under the flap so that the flap can be propped open at an optimal angle for reflecting sunlight into the box.
- Make S'mores:
- Assemble your s'mores - cracker, chocolate, marshmallow, cracker - and place them into the box.
- Prop the box open at an angle where it can catch and reflect the most sunlight into the box.
- Adjust the box as needed to follow the path of the sun for optimal heating. It may take up to an hour to melt the marshmallows and chocolate.
```HTML
DIY Marshmallow Shooters Game
Ingredients:
- 1 pack of mini marshmallows
- PVC pipes - (3) 2ft pieces cut into (2) 6in pieces, (1) 3in piece, and (1) 4in piece
- PVC connectors - (2) elbow connectors, (2) T-connectors
- 1 balloon
- Scissors
Instructions:
Step 1: Prepare the PVC pipe
Take your PVC pipe pieces and assemble them. Connect two 6in pieces to the T-connector and put an elbow connector on each end. Add the 4in piece to the top and the 3in piece to the bottom of the other T-connector. Connect the two T-connectors with the remaining 6in piece.
Step 2: Prepare the Balloon
Cut off the top of the balloon (the part that you would blow into). Stretch the bottom part of the balloon (the part you would tie) over the top of your 4in PVC pipe piece. This creates your launcher.
Step 3: Ready the Marshmallow
Place a mini marshmallow in the open end of the PVC pipe that is attached to the balloon.
Step 4: Launch!
Pull back on the balloon, let go, and watch your marshmallow fly!
Notes:
This DIY project combines fun and learning as it applies areas of STEM such as science (force and motion) and engineering (building the shooter). Always supervise young children when they are using the marshmallow shooter to ensure safety.
``` ```Balloon Powered Car STEM Project
Ingredients:
Materials Needed:
- 1 balloon
- 1 long straw
- 1 short straw
- 4 bottle caps for wheels
- Sturdy cardboard or old CD's for the car body
- Scissors
- Glue or tape
Instructions:
Step 1 - Build the Car Body:
- Cut a rectangle out of your cardboard, or use old CDs to form the body of your car.
Step 2 - Attach the Wheels:
- Glue your bottle caps to the bottom four corners of your car body, using a generous amount of glue or tape for stability. Allow the glue to dry.
Step 3 - Position the Short Straw:
- Place the short straw in the opening of the balloon. Make sure it fits snugly and won't fall out.
Step 4 - Position the Long Straw:
- Slide your long straw inside your short one. The long straw will stick out, providing a place to inflate the balloon once your car is built.
Step 5 - Attach the Balloon Straw Assembly to the Car:
- Attach the balloon straw assembly to your car body. Position it so the balloon is on top of the car and the long straw extends to the back.
Step 6 - Test Your Balloon Powered Car:
- Blow into the long straw to inflate the balloon, then set your car down and watch it go!
Remember to always supervise your children during this project and have fun!


