


As an affiliate, I earn from qualifying purchases, but this doesn't affect the reviews or recommendations—your trust is important to me!
Create Your Own Twine and Bead Plant Hanger Craft

Today, We're Making:
- DIY Twine & Bead Plant Hanger Craft
- DIY Mini Time Capsule: Parents can help their kids create a time capsule using an old mason jar or tin box. They can write a letter to their future selves, include a few small toys, pictures, or other memorable items. The fun part is deciding on when to reopen it!
- Upscaled CD Crafts: Instead of throwing away old CDs, use them to create sparkly CD mosaics. Draw a fun design onto a piece of cardboard.
Imagine turning a few simple materials into a unique plant hanger
not only the talk of all your indoor gardening friends. Yes, it's possible! With a little creativity and time on your hands, you can transform your house plants setup into an enchanted indoor garden.
In this blog post, we're going to guide you through an easy-yet-creative DIY Twine & Bead Plant Hanger Craft
This natural decor piece not only adds a touch of bohemian decor to your home but also allows your beloved greens to thrive—and for the plant lover in you, what could be more rewarding? So hang tight (pun very much intended) as we dive into crafting with twine and beads to make your very own homemade plant hanger! Whether you're thinking about a DIY gift idea, balcony decor or just a weekend fun project, this twine craft is just what you need.
Materials You Need
As we embark on this DIY Twine & Bead Plant Hanger Craft journey, the first thing you need to do is gather your materials. The good news? The list of items you need for this Homemade Plant Hanger is quite short, and mostly things you already have lying around the house! Here's what you need:
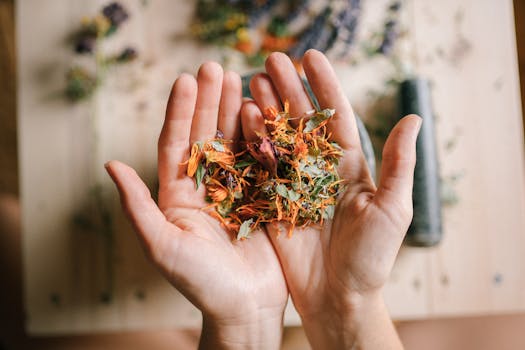
- Twine: A sturdy twine is essential for this project. You can find it in most craft stores. Besides, it is an eco-friendly option that goes well with your indoor plants.
- Beads: You can choose different beads for this Bead Craft. Be creative and experiment with different colors and sizes. Remember; these beads will add an aesthetic element to your DIY craft, making your plant hanger aesthetically pleasing and personally rewarding.
- Hook: A small hook will be used to hang your new plant hanger.
- Scissors: A sharp pair of scissors to cut your twine.
- Plant pot: Ideally, a somewhat shallow pot works best for this Plant Hanger Craft.
- House Plant: Last but not least, you will need a medium-sized indoor plant. Snake plant, Spider plant, or a Pothos plant can be a great choice for this.
Step-by-Step Process
Now that you have all your materials, it's time to get started. Here are the craft instructions to create your unique plant hanger.
- Cut your twine: The length of the twine for your Twine Plant Hanger will depend on where you plan to hang your creation, plus the size of your pot. Our suggestion is to measure twice, cut once.
- String your beads: Here's the fun part—getting those beads onto your twine. Slip one end of your twine into the bead and move it along until it is in the desired location.
- Getting your hands dirty: Once you've strung all your beads, gently place your house plant into the pot. Make sure to provide proper plant care to keep your green buddy smiling!
- Hanging up: Finally, tie a knot at the top of your twine lengths, set your pot in the center of the base, then hang your natural decor creation in your chosen location. Your indoor plants will now enjoy their cozy, new home.
Voila! You are well on your way to completing your DIY Twine & Bead Plant Hanger Craft. Add this homemade touch to your indoor garden or gift it to a dear plant lover. This project is not just a decor craft, but also a representation of your love for nature and your knack for creating beautiful, eco-friendly decor. So, keep crafting with twine and crafting with beads to keep your creative juices flowing!

And there you have it!
A simple, yet beautiful twine and bead plant hanger. By breathing life into a few mundane materials, you've cultivated a piece of art with your very own hands.
A creation that's not just a charming addition to your home, but a perfect nook for your favorite green buddies. Isn't it a splendid feeling when the ordinary transforms into the extraordinary?
This is proof that with a sprinkle of creativity, a dash of patience, and a love for all things green, we have the ability to create our own enchanted indoor gardens.
And remember, your DIY journey doesn't end here.
There's an entire world of twine and beads waiting for you to weave your magic. So why stop at just a plant hanger? The possibilities are endless.
Keep crafting, keep exploring, keep shining!
You May Also Like These:
DIY Mini Time Capsule
Materials Needed:- An old mason jar or tin box
- Assorted construction papers
- Pens or markers
- Additional personal items (photos, small mementos, etc.)
- Glue or adhesive tape (optional)
- Find or purchase an old mason jar or tin box. This will serve as the container for your time capsule.
- Decide what you want to put in your time capsule. Consider including a letter to your future self, photos, small mementos or anything else that is significant to you. Don't forget to date your items!
- On construction paper, write a letter to your future self. Make sure to use pens or markers that won't fade over time. Discuss your current life, your hopes for the future, and any predictions you have.
- Select personal items such as photos or small mementos to include in the time capsule. These items should be able to fit inside the mason jar or tin box.
- Optionally, you may want to include small objects that represent your current interests or hobbies. This could be anything from a piece of a favorite outfit, a coin from your current year, or a popular product or item from today.
- Once you have collected all your items, place them carefully in the mason jar or tin box. You can use tape or glue to secure them, if necessary.
- Seal the time capsule and decide on a date to open it in the future. Store it in a safe place until that date arrives.
Craft Instructions for Parents: Creating a Family Photo Collage
Ingredients:
- Several family photos, varying sizes
- A large piece of poster board or canvas
- Adhesive (photo squares, glue sticks, or Mod Podge works best)
- Scissors
- An array of decorative items such as stickers, markers, colored paper, etc.
Instructions:
- Step 1: Gather all your ingredients. Choose family photos that represent wonderful memories. The photos can be different sizes to give your collage diversity.
- Step 2: Arrange your photos on your poster board or canvas, varying the angle and direction of each photo. This process is purely based on your creativity. Keep in mind that you can overlap photos to create depth.
- Step 3: Once you have found a satisfying arrangement, start attaching your photos using the adhesive. Always start from the center and work your way towards the perimeter.
- Step 4: After all the photos are attached, it's time to use your decorative items. You can use markers to add captions or draw decorations around your pictures. Let your imagination run wild and add colors to the collage with colored paper and stickers.
- Step 5: Let your collage dry completely before hanging or moving it.
Crafts for Pictures
Follow these easy steps to complete these crafts using pictures. Perfect for creating memorable keepsakes and gifts.
Ingredients Needed
- Blank canvas or cardstock
- Assorted pictures
- Glue or tape
- Scissors
- Optional: sequins, glitter, paint
Instructions
Step One: Gather Your Pictures
Collect a selection of your favourite photos. You can use prints or digital pictures - make sure to get them printed out if you're using digital ones.
Step Two: Layout Your Design
Before you start adhering anything, layout your photos on your canvas or card in the pattern you'd like them. This way you can play around with design before making it permanent.
Step Three: Start Adhering
Begin sticking your pictures using your chosen adhesive. Apply glue or tape to the back of your pictures and press them onto your canvas. Make sure they are secure and allow any glue to dry completely before moving to the next step.
Step Four: Add Embellishments
Add any extras you want like sequins, glitter, or paint. Make sure to allow for any drying time required.
Step Five: Display or Gift Your Craft
Display your new photo craft in your chosen location or wrap it up to give as a thoughtful, homemade present.
Upscaled CD Crafts: Create a Stunning Mosaic Mirror
Ingredients
- Old CDs or DVDs
- Around 30cm Diameter Mirror
- High-quality glue
- Cardboard
- Pair of scissors
- Marker
A step-by-step guide to creating your own CD mosaic mirror:
- Preparation: Collect your old CDs or DVDs. The more colorful, the better!
- Cutting the CDs: Using the scissors, carefully cut the CDs into small pieces. Be mindful as the shards can be sharp.
- Creating the Base: Mark the size of your mirror on the cardboard and cut out the circle. Make sure the mirrors fit perfectly.
- Sticking the CDs: Begin gluing the CD pieces onto the cardboard around the mirror. Spread them evenly and let your creative juices flow!
- Allow to dry: Once you're satisfied with your design, allow the glue to fully dry. This may take a few hours.
- Final steps: Once the glue is completely dry, your mosaic mirror is ready to hang!
Enjoy your stunning upcycled mosaic mirror!
Sparkly CD Mosaic Craft Instructions
This is a fun and creative way to recycle old CDs into beautiful pieces of art. Follow the step-by-step instructions below to create your own stunning CD mosaic.
Ingredients
- Old CDs
- Piece of Cardboard
- Pencil
- Scissors
- Craft Glue
Instructions
- Prepare your CDs: Start by cutting the CDs into small pieces. Try to create a variety of shapes and sizes for a unique mosaic.
- Draw your design: On the piece of cardboard, sketch out the design you want for your mosaic. You can make it as simple or as intricate as you like.
- Test your layout: Before applying, arrange the cut CD pieces on your drawn design. This will allow you to visualize and make adjustments to your mosaic before making it permanent.
- Adhere the CD pieces: Start gluing the CD pieces to your design. Apply a small amount of glue to the back of each piece, pressing it firmly onto the cardboard. Allow for it to dry before proceeding to the next.
- Finish your artwork: Once all your CD pieces are glued and dried, it’s time to showcase your masterpiece! Find the perfect spot at home to display your sparkly CD mosaic.


