


As an affiliate, I earn from qualifying purchases, but this doesn't affect the reviews or recommendations—your trust is important to me!
Creating Fun DIY Projects: Wind Chimes, Lava Lamps, Sushi, Games
Today, We're Making:
- - DIY Wind Chime Craft
- - Homemade Lava Lamp Experiment
- - DIY Sushi Roll Recipe
- - Backyard Scavenger Hunt Game
- - DIY Sun Dial Craft Project
- - Simple Water Filtration System Experiment
- - Homemade Solar-Energy Oven Baking
- - DIY Origami Calendar Making
- - Tabletop Miniature Garden Game
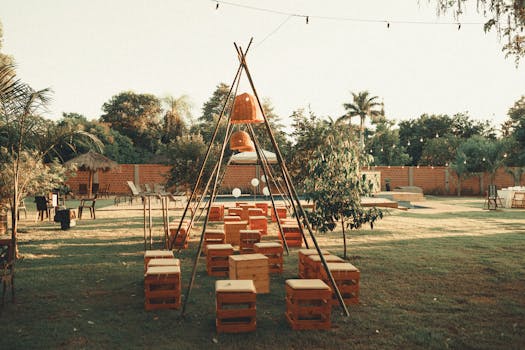
Welcome Aboard, Creative Souls!
Who doesn't dream of the nostalgic chimes of a DIY wind chime craft, the mesmerizing glow of a homemade lava lamp experiment, and the gratifying pleasure of enjoying a DIY sushi roll recipe fresh from your own kitchen? Or maybe it’s the exhilaration of a backyard scavenger hunt game that gets your family laughing and competing together?
This blog serves as your ultimate guide, brimming with unique and engaging craft ideas such as wind chime designs, step-by-step lava lamp instructions, interactive DIY projects, and much more. Diving into do-it-yourself or DIY projects is an excellent opportunity to unleash your creativity, save money, and transform your downtime into an exciting, fun-filled experience.
From making wind chimes that stir the soul to building lava lamps that light up your room to cooking sushi at home for a culinary delight, we've got you covered. Stay tuned to discover an exciting world of creating, crafting, and celebrating your achievements.
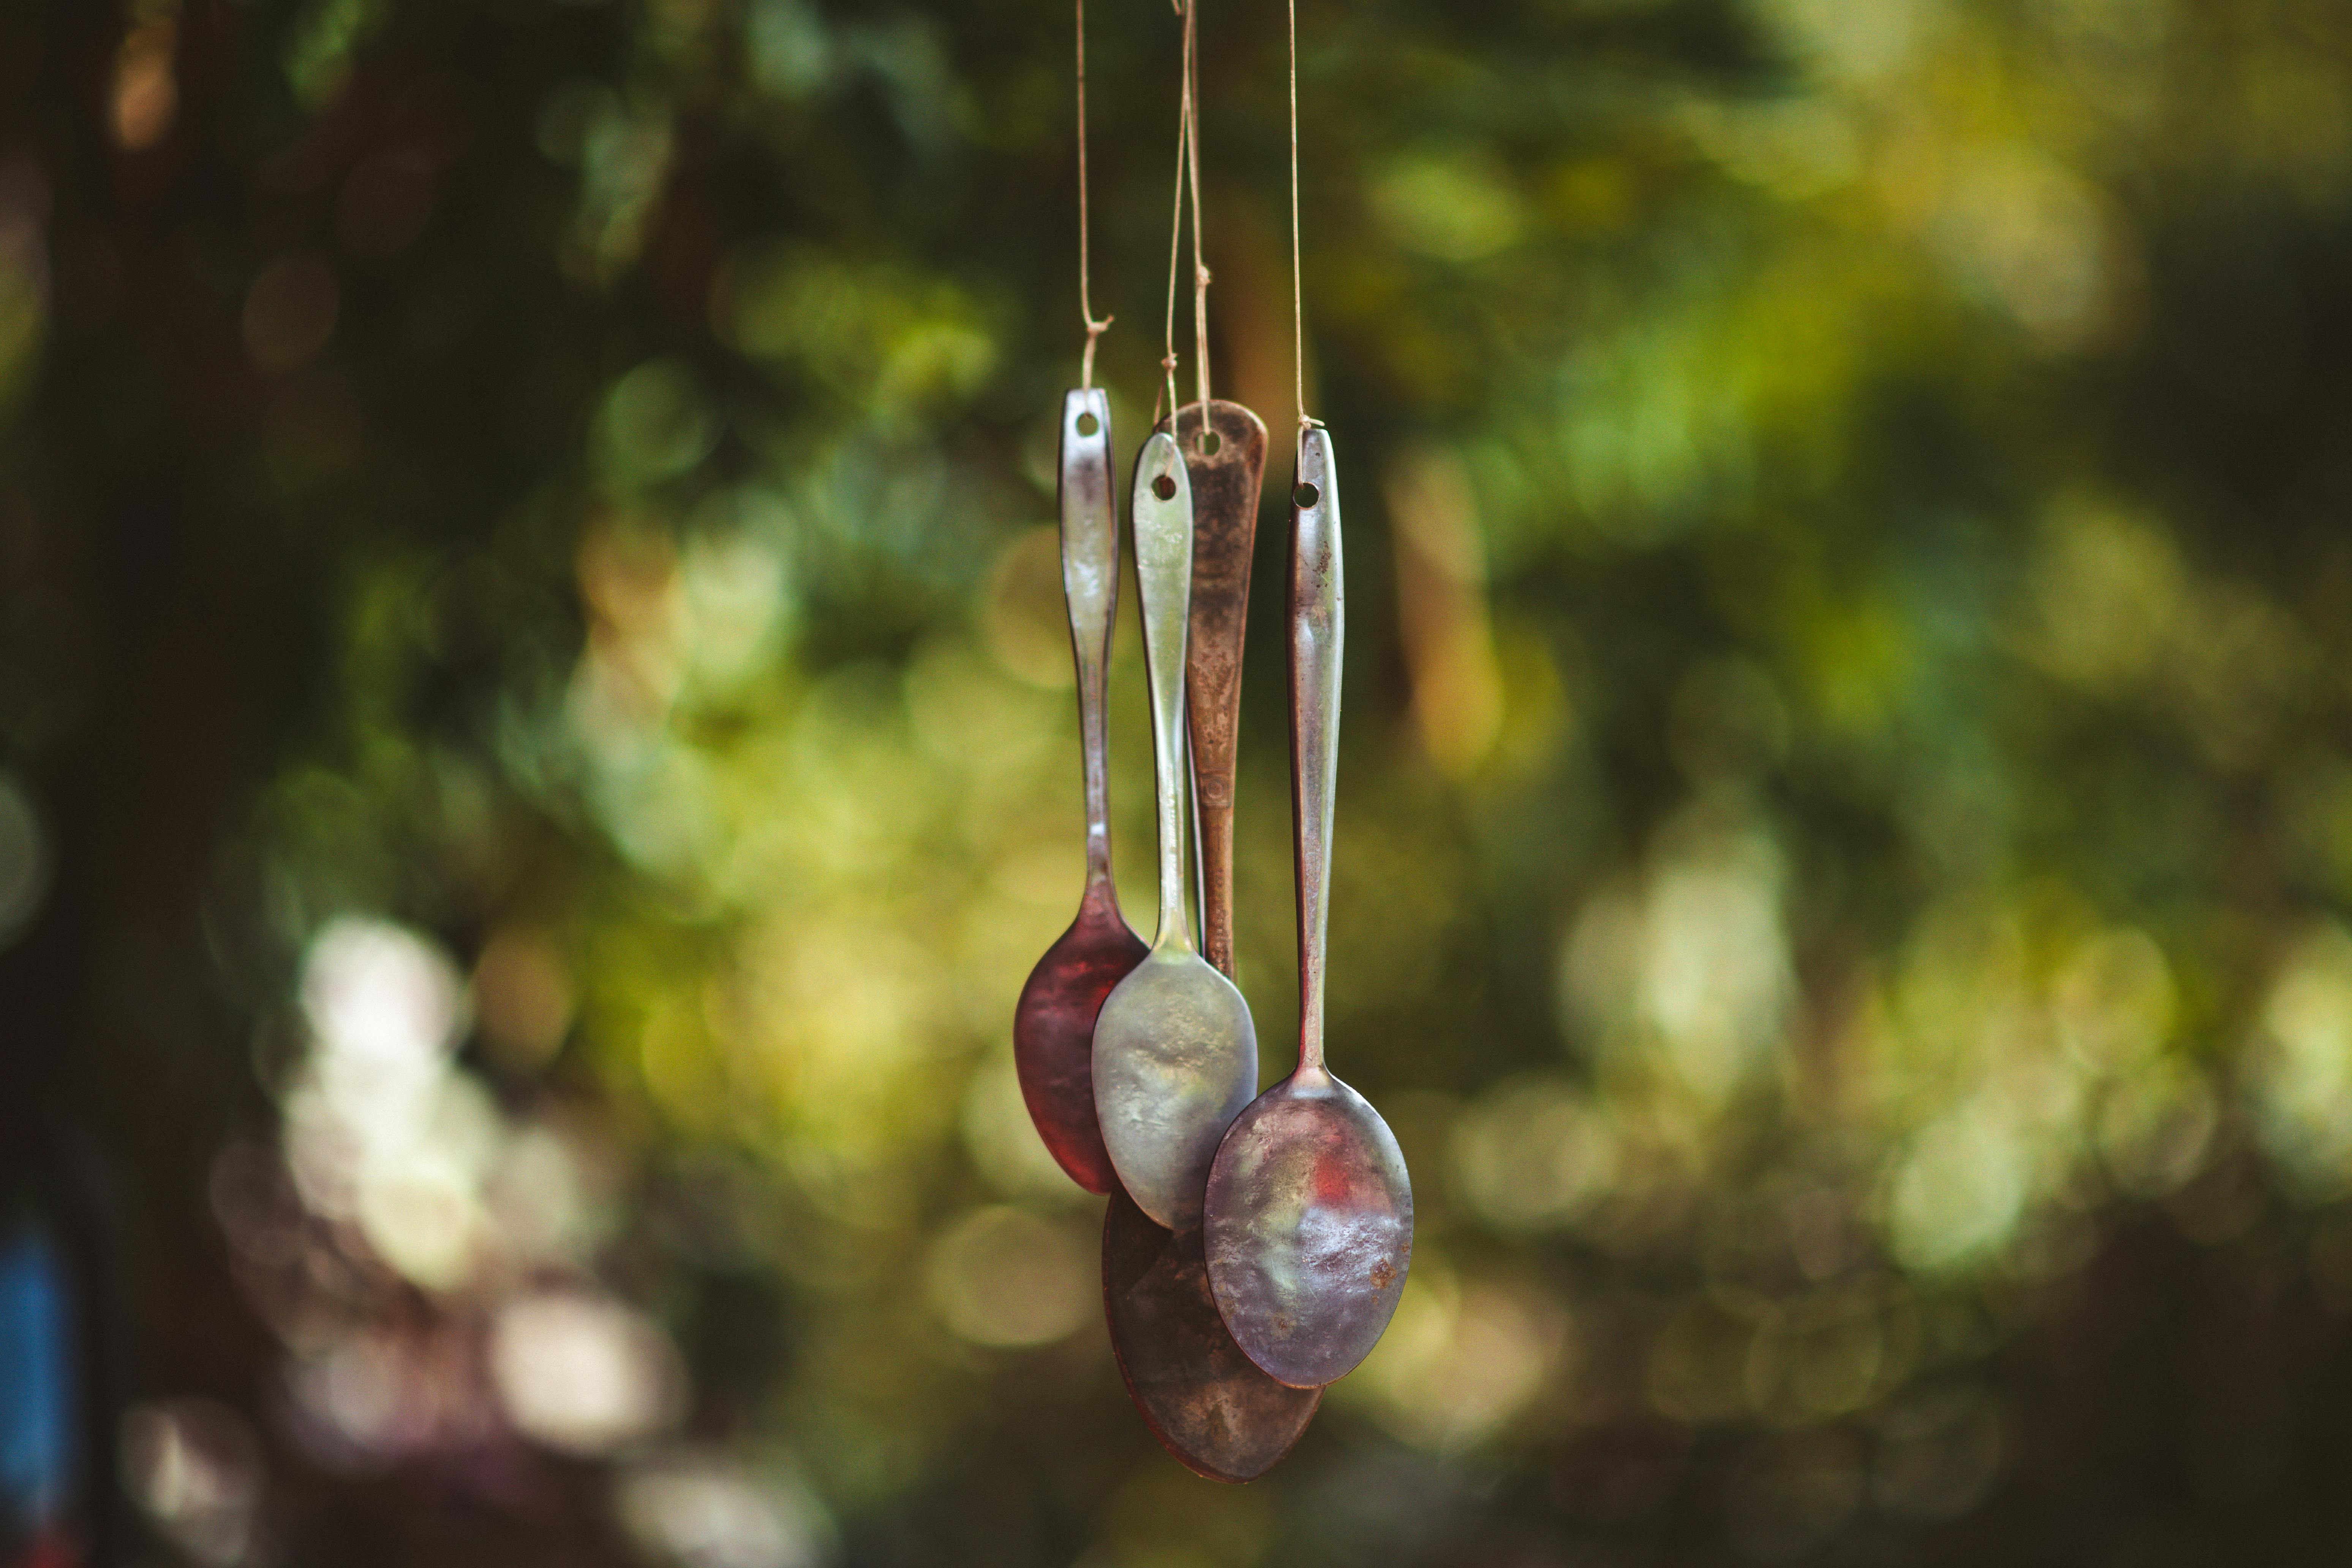
Unleash Your Creativity with a DIY Wind Chime Craft
We often yearn for the gentle, calming sound of wind chimes as we sit in our backyard. Crafting whimsical wind chimes by yourself can not only be a delightful way to spend your afternoon but also an easy task to undertake. To embark on your wind chime design journey, you don’t need an extensive list of materials. With just a few simple items such as keys, cutlery, seashells, or even small pieces of driftwood, you can create your own handmade wind chimes. The variety is truly endless. It's about letting your creative juices flow and coming up with innovative patterns. So, pick up those unused items around your house and get set for some wind chimes making tips that will guide you through creating beautiful, soothing melodies in your space.
Light Up Your World with a Homemade Lava Lamp Experiment
Next, take a journey into the captivating world of lava lamps. They add a bit of vintage charm and fun to any space, and making them at home is a fascinating experience. This homemade lava lamp experiment can be accomplished using household elements like water, oil, food coloring, and an effervescent tablet. Lava lamp making guide is a fun and interactive DIY project for both beginners and experienced DIY enthusiasts. Plus, these lamps aren't just for aesthetics. Observing the lava-like blobs travel up and down inside the lamp can be a relaxing and calming activity. So, let's roll up your sleeves and dive into the process of building your own lava lamp and decorate your living space with your personalized, mesmerizing glow.
Serve up Fun with a DIY Sushi Roll Recipe
Switching gears now from crafts to culinary treats – we're heading to the kitchen. If you're a sushi lover and have always wanted to try your hand at preparing sushi at home, this might be your chance to achieve your DIY culinary goals. Sushi home recipe guide will show how to prepare your sushi rice perfectly, how to select and prepare your fish, and finally, put together ingredients to roll your DIY sushi. By following our step-by-step DIY Sushi rolls guide, you can impress your family and friends with your culinary prowess, and tick another creative project off your DIY list.
Turn Your Backyard into a Playing Ground with a Scavenger Hunt Game
The last project we have for you is an exciting DIY games project for the whole family to enjoy. A backyard scavenger hunt game is a perfect way to soak up the sun and get everyone in the family involved. You don't need fancy equipment or a grand setup for this. All you need is a list of items to find, a sprinkle of adventurous spirit, and you have an engaging, interactive DIY project ready for an energetic weekend. DIY board games like these nurture creativity and competitiveness, and this step-by-step DIY games guide will help you build a memorable day for your entire family.
And there you have it, creative spirits - your ultimate guide to exploring and enjoying the world of DIY
Encompassing the soothing symphony of wind chimes, the retro cool of lava lamps, the delectable artistry of sushi, and the family fun of backyard games. Whether you're a novice or experienced DIY-er, these projects promise to stimulate your creativity, deepen your skills, and add fun and beauty to your life.
So go ahead, dive into these wonderful projects. Celebrate the joy of creating something with your own hands, and savor the fulfillment that comes from ticking off these creative projects from your DIY list. Happy crafting!

You May Also Like These:
DIY Sun Dial Craft Project
Materials:
- 1 large paper plate
- A wooden dowel or sturdy stick (approximately 6 inches long)
- Pencil for marking
- Compass or a watch to help with initial set up
- Glue or tape
Instructions:
- Push the dowel through the center of the paper plate leaving a few inches above the plate and the rest below. Secure it firmly with glue or tape.
- Place the sundial outside in an area where it will get sun most of the day and where the dowel will cast a shadow on the plate.
- Use a compass or a watch to determine true north. Position the sundial accordingly for accurate readings.
- Mark the position of the shadow on your paper plate at hourly intervals. Specifically note where the shadow falls at 12 noon as this is your baseline for other calculations.
- Repeat for a few days until the markings are well understood.
- Decorate your sundial as you wish.
Congratulations, you've created your own sun dial and this will serves as a fun and educational tool for you and your kids to learn about astronomy and timekeeping.
Materials Needed for the Solar Oven:
- Cardboard pizza box
- Aluminium foil
- Black construction paper
- Clear plastic wrap
- Tape
- Wooden skewer
Steps to Construct the Solar Oven:
- Step 1: Carefully cut a three-sided flap out of the top of the pizza box. Leave about an inch of border around the three sides.
- Step 2: Wrap the bottom (inside) of the flap and the inside of the pizza box lid with aluminum foil. Smooth out any wrinkles and secure with tape.
- Step 3: Lay black construction paper in the bottom of the pizza box to attract and absorb solar heat.
- Step 4: Tape two layers of clear, plastic wrap over the opening you cut in the lid to create heat trap.
- Step 5: Prop the flap open at an angle that allows it to most effectively direct sunlight into the box. You can use a wooden skewer or other stick for this.
Food Preparation and Baking:
Easy Solar Oven S'mores
Ingredients:
- Graham crackers
- Large marshmallows
- Chocolate bars
Instructions:
- Step 1: Arrange half of the graham crackers on the bottom of your solar oven.
- Step 2: Place a marshmallow on top of each graham cracker.
- Step 3: Place your solar oven in direct sunlight. Prop open the lid with a skewer.
- Step 4: Allow the marshmallows to heat and expand, this could take 30 mins to an hour depending on the sun's intensity.
- Step 5: Once the marshmallows are soft, carefully open the oven lid (it will be hot), place a piece of chocolate on top of each marshmallow followed by the other half of the graham cracker.
- Step 6: Allow the oven to heat for a few more minutes to melt the chocolate.
- Step 7: Using a spatula, transfer the s'mores to a dish and allow them to cool.
How to Make a Homemade Solar Energy Oven
Materials Needed:
- 1 large cardboard box
- 1 smaller cardboard box
- Aluminum foil
- Glue stick
- Clear plastic wrap
- Black construction paper
- Craft knife
Instructions:
- Line the inside of the larger box with aluminum foil. This will reflect the sunlight into the box.
- Glue black construction paper to the bottom of the smaller box. Black absorbs heat, cooking your food faster.
- Put the smaller box inside the larger box.
- Cover the top of the larger box with plastic wrap and seal the edges. This creates a greenhouse effect in your oven.
- Cut a flap on the top of the larger box, leaving a 2 inch border on all sides. Make sure the flap reflects sunlight into the box when opened.
Baking with Your Solar Oven
What You'll Need:
- Cookie dough, made from your favorite recipe
- Thermometer
Instructions:
- Preheat your oven. Place the solar oven outside in direct sunlight, aiming the flap to catch and reflect the most sun into the box.
- Prepare your cookies. Place round scoops of cookie dough onto a baking sheet that fits inside the smaller box.
- Put the baking sheet into the oven.
- Bake the cookies. Check the temperature inside the box regularly. It might take a while to heat up, and baking time will be longer than in a regular oven. Start checking your cookies after about an hour.
DIY Origami Calendar
Materials Needed
- 12 sheets of square origami paper
- Marker pen
- Ruler
- Glue
- Card stock
Instructions
Step 1: Fold the Origami Paper
Take a square piece of origami paper. Fold in half horizontally, then vertically, unfolding each time to create crease lines.
Step 2: Create the Origami Pockets
Next, fold up the bottom of the paper to the center crease. Then, fold both the bottom left and right corners toward the middle crease to form an envelope shape. Secure with glue.
Step 3: Repeat and Write the Months
Repeat Step 2 with the remaining papers. Use a marker pen to write the name of each month on each pocket.
Step 4: Prepare the Card Stock
On the card stock, mark 12 even sections with the ruler. Glue your month pockets on these sections.
Step 5: Add the Days
Finally, add the days for each month using the marker pen. Keep in mind that the number of days changes depending on the month.
Congratulations! You've created your very own DIY Origami Calendar.
Tabletop Miniature Garden Game
This do-it-yourself project is a creative and enjoyable game for children of all ages! Below, you'll find detailed, easy-to-follow instructions for parents to create a miniature garden tabletop game from scratch.
Materials Needed
- 1 large, deep tray or container
- Soil
- Moss
- Small plants
- Tiny decorative items, such as miniature houses or figurines
- Spay bottle
Instructions
Step 1: Prepare the Tray
Ensure that your tray or container is clean and dry before beginning. It needs to be deep enough to hold the soil and plants.
Step 2: Add the Soil
Fill your tray or container about halfway with soil. Make sure the soil is loose and not compacted. This will allow your plants to establish a good root system.
Step 3: Arrange the Plants
Start planting your mini plants in the soil. You can be as creative as you want with the arrangement. Just be sure to leave room for the decorative items!
Step 4: Add Moss
Add moss in between the plants. Not only does this enhances the look of the garden, it also helps to keep the soil moist.
Step 5: Place Decorative Items
Now for the fun part! Arrange your mini houses, figurines, or any other decorations as you see fit. Remember, it's your miniature world!
Step 6: Watering
Finally, lightly water the garden using a spray bottle. Be careful not to waterlog your garden; the soil should be moist, not wet.
Game Time!
Once all the steps are completed, the game can begin. The kids can move around the miniatures and create their own stories. It's a fun, engaging, and creative play for both indoors and outdoors.


