


As an affiliate, I earn from qualifying purchases, but this doesn't affect the reviews or recommendations—your trust is important to me!
Creating Terrariums, Ice Cream, Veggie Rolls, and Scavenger Hunts
```html
 ```
```
DIY Garden Terrarium and Fun Experiments Blog
Exciting DIY Projects
Creating a Happier Life through Creativity

Galaxy DIY Notebook Craft
Homemade Slime Science Experiment
Today, We're Making:
- - Rainbow Mason Jar Terrarium
- - Homemade Ice Cream Science Experiment
- - Veggie Pizza Roll-ups
- - Scavenger Hunt Bingo Game
- - Galaxy DIY Notebook Craft
- - Water Cycle STEM Activity
- - Fruit Kebab Rockets
- - Story Starters Board Game
- - Homemade Slime Science Experiment
Discover the Pleasure of DIY: Garden Terrariums, Homemade Ice-cream, and More
Is there anything more satisfying than creating beautiful and sustainable pieces of art with your own hands? Garden terrariums are a prime example of this. Yet what if I told you that the pleasure of DIY extends beyond even the most picturesque rainbow mason jar terrarium, reaching as far as the delicious world of homemade ice cream science experiments and the fun-filled land of indoor scavenger hunts?
Welcome, fellow creative souls, to a blog dedicated to harnessing your imagination and inner scientist. Whether it's creating terrariums from moss and miniature plants, mastering the art of crafting delectable veggie pizza roll-ups, concocting summer-perfect vegan ice cream flavors in your own kitchen, or designing an exciting backyard scavenger hunt bingo game, there's a world of adventure waiting to stimulate your senses and challenge your craftiness.
So, buckle your seat belts, and prepare for a delightful exploration into the brilliant blend of art, science, culinary delights, and game-filled fun!
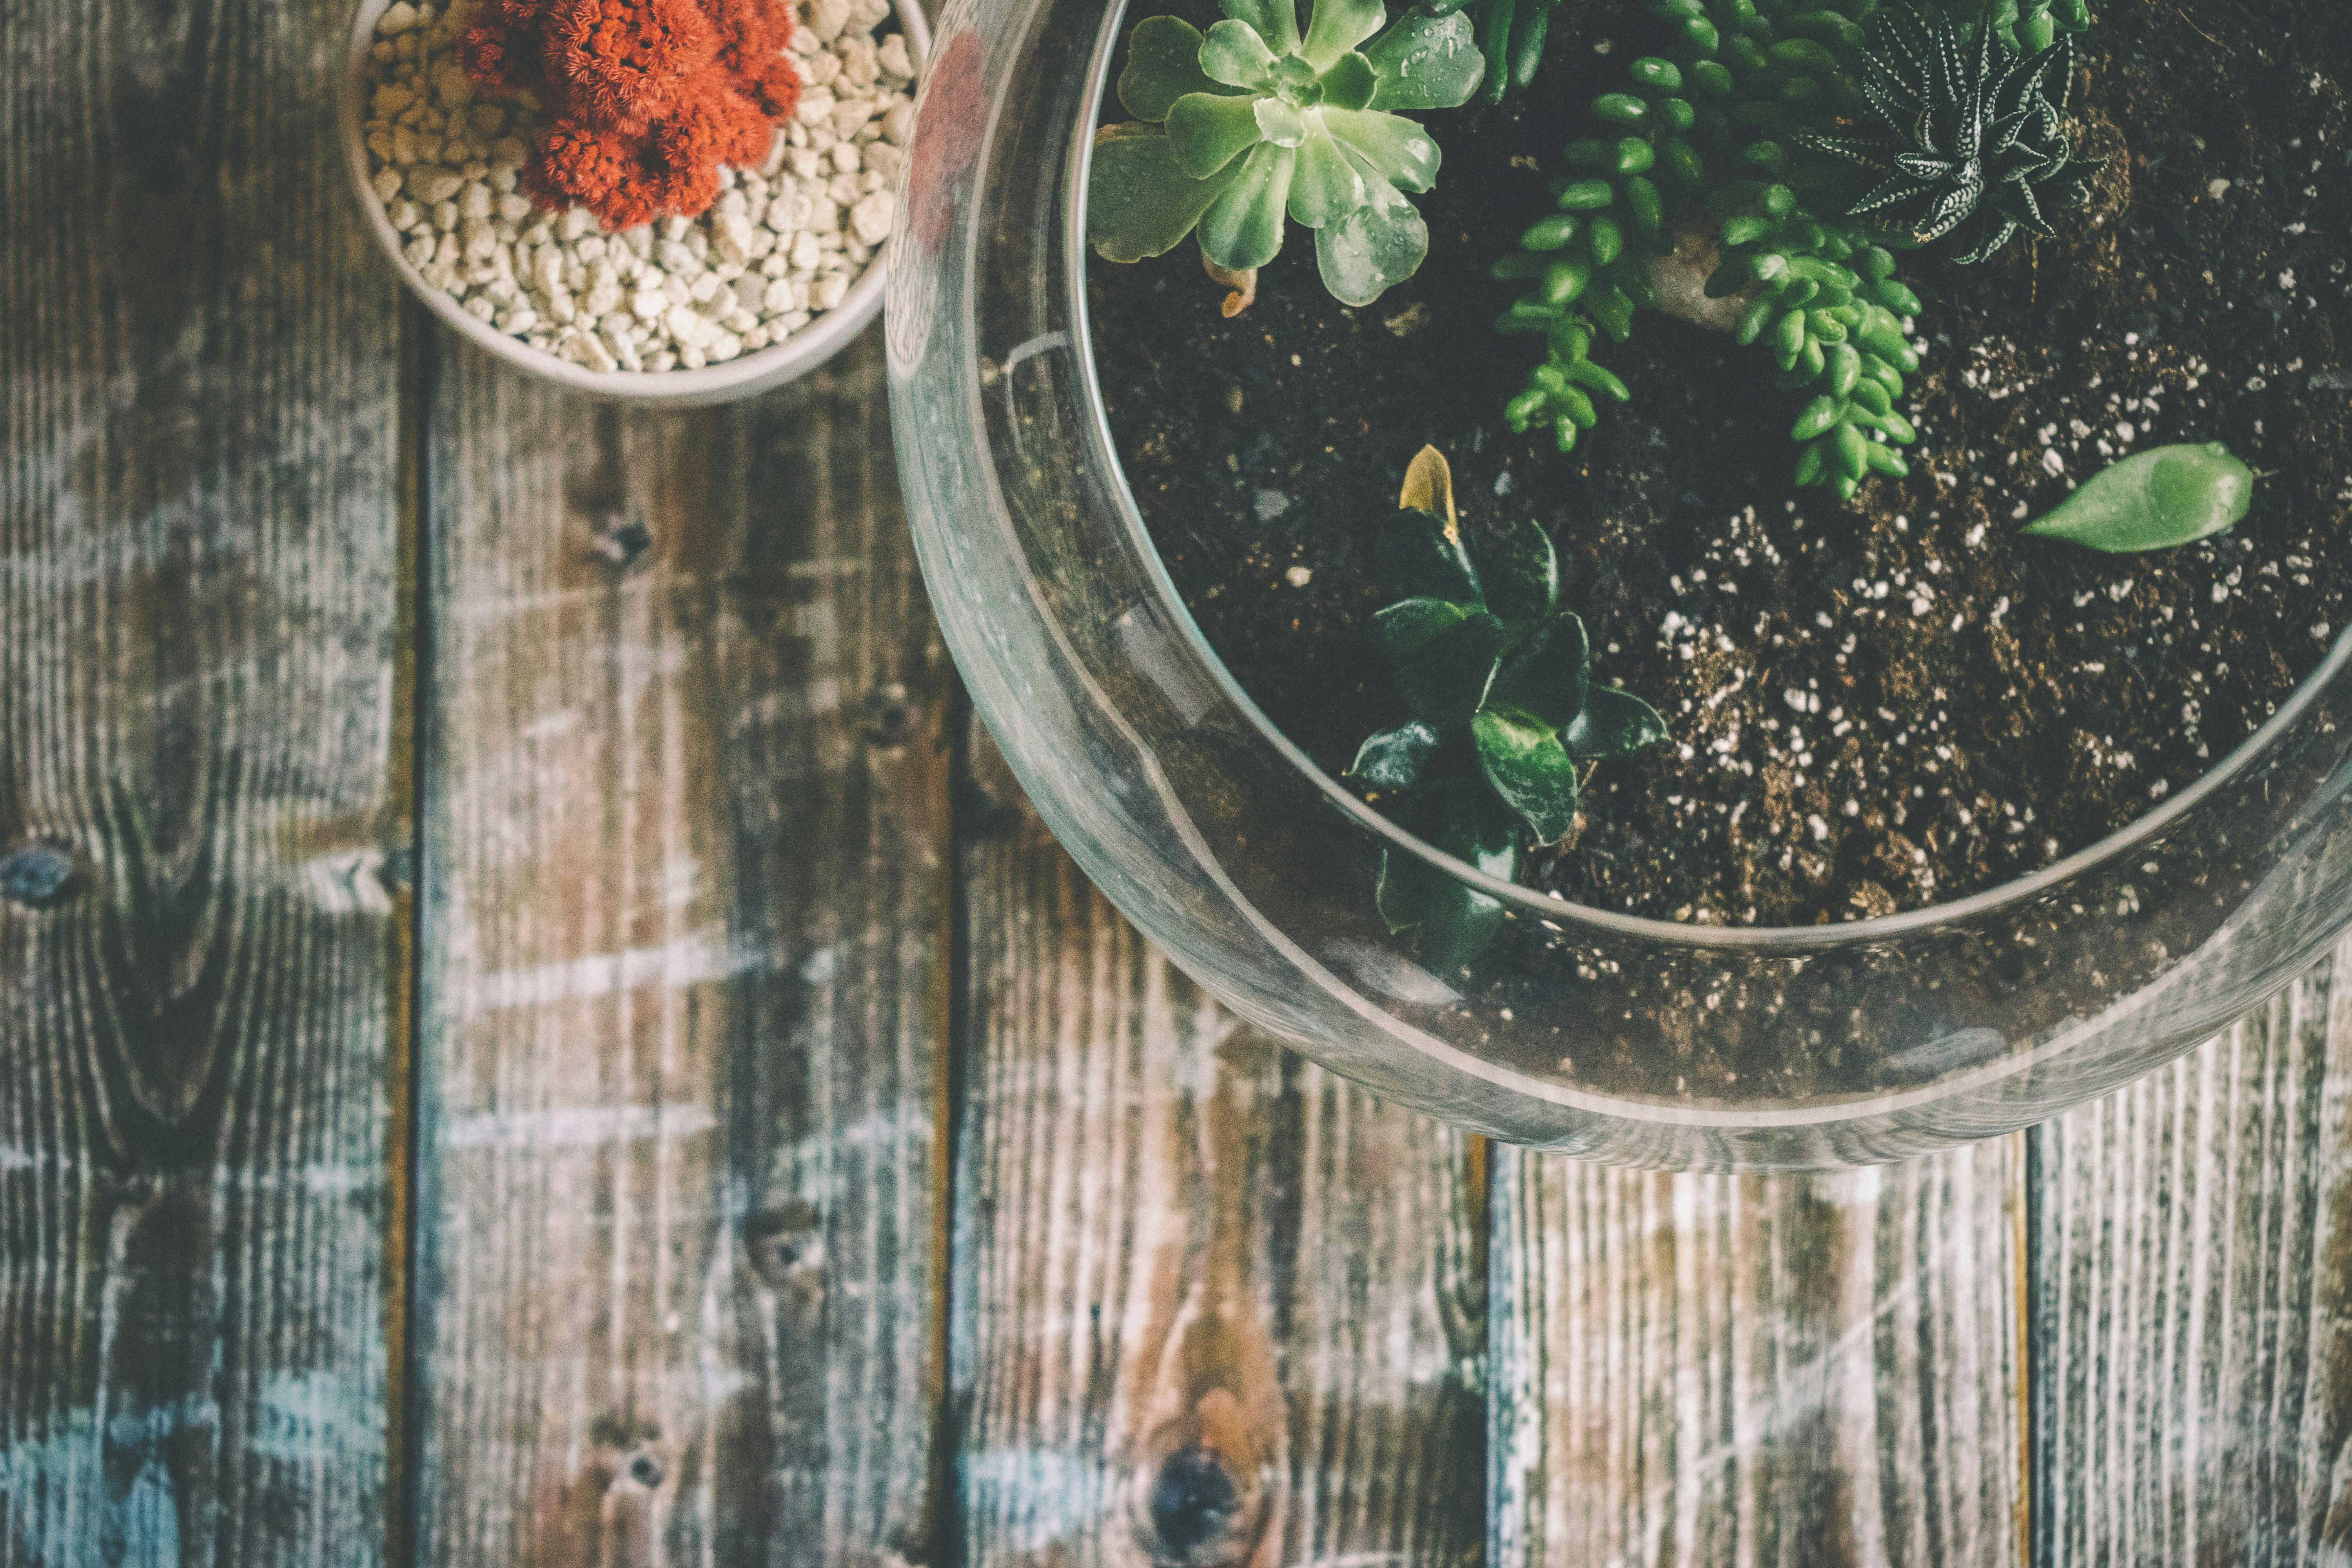
Rainbow Mason Jar Terrarium: A Miniature Forest in A Jar
Creating terrariums is a deeply satisfying activity. Imagine this: a picturesque, self-sustaining ecosystem cradled delicately in a glass jar, thriving on little more than occasional sunlight and humidity. A garden terrarium allows you to interact with the natural world in a wholly unique, intimate way. Your miniature terrarium, replete with moss, pebbles, and pint-sized sprouts of green, becomes an oasis, a microcosm teeming with life in the palm of your hand. The colors of the different layers can playfully mimic a rainbow shedding light on the intricacies of life and growth, explained in our comprehensive DIY terrarium guide. Armed with this guide, you will be able to understand each component's purpose and why it matters in this tiny biosphere.
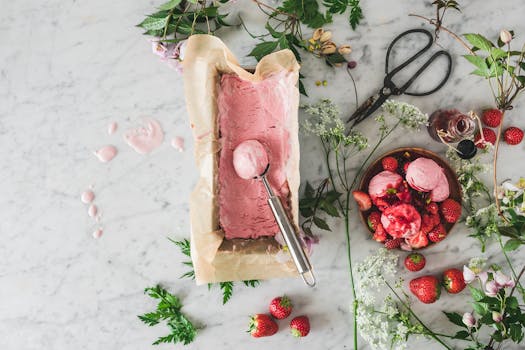
Homemade Ice Cream Science Experiment: Creamy Indulgence Meets Chemistry
Let's shift our focus from jars brimming with green miniature life and delve into the chilly, delightful realm of homemade ice cream science experiments. Have you ever wondered, 'how can I make my own ice cream?' The answer is, it’s surprisingly easy with some basic ingredients and a dash of science. Savoring a scoop of homemade ice cream not only hits the sweet spot but also tickles your scientific curiosity. As the sugars, fat, and ice interact, the concoction gradually turns from a liquid mixture into a creamy, frozen, mouth-watering delight. Discover the magic of transforming everyday ingredients into summer-perfect vegan ice cream flavors. And remember, there's no pleasure comparable to crafting your dessert and enjoying it too!
Veggie Pizza Roll-ups: Creativity Wrapped in Healthy Goodness
Speaking of culinary pursuits, veggie pizza roll-ups are an enticing, savory venture that caters to both the taste buds and your health. These are not just an easy veggie roll snack; they are a way to engage with your food creatively. From picking colorful vegetables to crafting the roll-ups, every step provides aesthetic and culinary satisfaction. The result is a rainbow of tasty, nutritious veggie summer rolls that both adults and children will relish, thus leading the way towards a healthier, happier, and creative life!
Scavenger Hunt Bingo Game: Exciting Expeditions at Home
Last but not least, we trek into the thrilling land of scavenger hunt bingo games. Picture a regular weekend metamorphosing into a day filled with suspense, fun, and learning - all within the confines of your own home or backyard! Designing a DIY scavenger hunt brings out the imaginative storyteller in you. From developing clever scavenger hunt clues to constructing an engaging scavenger hunt list, you'll be pulling at the very threads of curiosity. This isn't just about kids' scavenger hunts, it's about interesting scavenger hunt ideas can make any mundane evening a treasure hunt adventure that sparks enthusiasm in both young and old.
Exploring the World of Creativity
After exploring the world of homemade terrariums, ice cream science experiments, veggie pizza roll-ups, and backyard scavenger hunts, it's clear that the key to a happier and more fulfilling life is, simply, to create. To engage your senses, wake up your curiosity, and touch your imagination in the deepest, most authentic ways.
As you delve into these creative adventures, remember, every sprout, spoonful, roll-up, or riddle solved is not just a momentary thrill, but a testament to the extraordinary joy and profound satisfaction that comes from creating.
So, here's to a journey brimming with fun-filled, taste-bud-tingling, awe-inspiring exploits. Let's create, enjoy, and savor these wonderful moments of our marvelously crafty life.
You May Also Like These:
Galaxy DIY Notebook Craft
Ingredients
- Notebook with a plain cover
- Acrylic Paints (Colors: Black, Purple, Blue, White, Silver)
- Paint Brushes (Different Sizes)
- Sponge
- Water
- Interceptor Craft Sealant
Instructions
- Step 1: Begin by covering your craft area. This project can get a bit messy, and acrylic paint can be tough to remove from certain surfaces.
- Step 2: Using your black, purple, and blue paint, create your galaxy background. Mix and blend your colors together to create a natural, space-like look.
- Step 3: Dip your sponge in a little bit of white and silver paint. Dab it onto your notebook to create the starry effect.
- Step 4: Use a fine-tipped brush to create bigger, more noticeable stars. You can even add a couple of shooting star effects.
- Step 5: Allow your notebook to dry fully. Acrylic paint can take anywhere from 30 minutes to an hour to dry, so be patient.
- Step 6: Once dried, seal your notebook with a craft sealant to protect your design. Again, allow it to dry before use.
Fruit Kebab Rockets - Fun and Healthy Snacks for Kids
Ingredients:
- A selection of favorite fruits: strawberries, grapes, bananas, apples, etc.
- Marshmallows (optional)
- Long wooden skewers
- Star-shaped cookie cutter
Instructions:
- Have your child wash their hands thoroughly before starting.
- Prepare the fruit by washing it and cutting it into bite-sized pieces. For a fun twist, use the cookie cutter to turn your apples into star shapes.
- Have your child construct each rocket by sliding the fruit onto the skewer in whatever order they choose. Encourage them to make a pattern or sort by color to incorporate a learning element into the crafting.
- If using, add a marshmallow at the top of the skewer to act as the 'cloud' at the top of the rocket.
- Once they've finished, place the fruit rockets in the fridge to cool before consuming. They make the perfect fun and healthy treat for a sunny day!
Tips: Always monitor your child while they handle the skewers, particularly if they are very young. Alternatively, you can prepare the skewers in advance and just let them add the fruit.
Fruit Kebab Rockets
Engage with your children through this fun DIY activity that incorporates both feeding and playing. Create these Fruit Kebab Rockets as a delightful food game!
Ingredients
- 1 Watermelon
- 1 Honeydew Melon
- 1 Cantaloupe
- Assorted Berries (Strawberries, Blueberries, Raspberries)
- Skewers
- Star-shaped Cookie Cutter
Instructions:
- Prepare the Ingredients: Wash all the fruits thoroughly. Cut the watermelon, cantaloupe, and honeydew into cubes. Keep the berries aside.
- Make the Rocket Base: Take a skewer and begin by sliding a cube of watermelon at the base.
- Layer the Fruits: Alternating between the different types of fruits, slide them onto the skewer. Make sure to hold the skewer at the base to avoid injury.
- Top with a Star: Use the star-shaped cookie cutter to cut out a slice of watermelon. This will act as the rocket's top. Slide it onto the top of the skewer.
- Repeat the Process: Repeat the process with the remaining skewers.
- Enjoy! You have now created a fun and healthy snack. These Fruit Kebab Rockets can be used to teach kids about healthy eating habits and can also be incorporated into playtime activities.
Story Starters Board Game
Materials needed:
- Index cards
- Pencils or markers
- Die or spinner
- Game pieces
Instructions:
- Write a different story starter on each index card.
- Place the index cards in a pile face down.
- Each player picks a game piece and places it at the start.
- The first player rolls the die or spins the spinner and moves their piece the corresponding number of spaces.
- The player then picks up an index card and begins a story using the starter written on the card.
- The next player then rolls the die or spins the spinner and continues the story based on the new story starter card they pick up.
- Continue until all players have had a turn. The game ends when the story has come to a logical end, or the board has been circled.
Pretzel and Raisin Butterflies
Ingredients:
- Pretzel sticks
- Raisins
- 2 tablespoons of peanut butter
- Wax paper
Instructions:
- Spread a tablespoon of peanut butter onto a pretzel stick.
- Attach four raisins along one side of the pretzel stick.
- Repeat the process with another pretzel stick and align this next to the first one on the wax paper to form the butterfly's wings.
- Place a third pretzel stick in between the winged pretzel sticks to form the butterfly's body.
Homemade Slime Science Experiment
Ingredients
- 1/2 cup of school glue (white or clear)
- 1/2 cup of water
- 1/2 cup of liquid starch
- Food coloring (optional)
- Glitter (optional)
Instructions
- In a bowl, mix together the school glue and water until they are thoroughly combined.
- Add a few drops of your chosen food coloring. If you want to make your slime extra sparkly, add in some glitter as well.
- Add the liquid starch to your glue mixture. Stir it in slowly, and watch as your liquid mixture turns into a blob of slime!
- Once the slime has formed, it’s time to get your hands dirty. Knead your slime for a few minutes until it’s not sticky anymore. If the slime is still too sticky, add more liquid starch a little bit at a time.
- Your homemade slime is now ready for play! Remember to store it in an airtight container when not in use.


