


As an affiliate, I earn from qualifying purchases, but this doesn't affect the reviews or recommendations—your trust is important to me!
Creating Your Own Galaxy Tie Dye T-Shirt Craft Masterpiece

Today, We're Making:
- - Galaxy Tie Dye T-Shirt Craft
- - Shooting Star Paper Mache Piñata: In theme with the galaxy tie-dye t-shirt craft,kids will love creating this unique piñata using newspaper,cardboard,glue,and paint. Once it's done.
Are you ready to embark on a cosmic journey in the comfort of your own home?
Cast aside any apprehension of mess or complexity - with my easy tie-dye project guide, you'll transform a humble white tee into a stunning Galaxy Tie Dye T-Shirt Craft masterpiece.
Diving into the mesmerizing world of homemade t-shirt artwork, you'll discover the magic of creating your own galaxy-inspired fashion.
It's more than just a DIY clothing project; it's a ticket to explore the cosmos, manifesting swirling nebulae and distant star clusters right onto your very own custom t-shirt creation.
Welcome, crafters and fashion explorers alike, as we journey into the creative universe of tie-dye techniques.
Trust me, you won't need a spaceship for this adventure!
Choosing your materials for your Galaxy Tie Dye T-Shirt Craft
It all begins by setting out your materials. A regular white cotton t-shirt serves as your canvas. Working with a white tee allows the galaxy-inspired fashion colors to take center stage. For the coloring medium, stock up on your favorite tie-dye colors - vibrant purples, blues, and a dash of white or silver for the stars would make an incredible visual impact. Don't forget your essentials like gloves, squeeze bottles, rubber bands, and plastic bags. And as an optional touch, have a few white fabric paint splashes at hand to simulate distant stars!
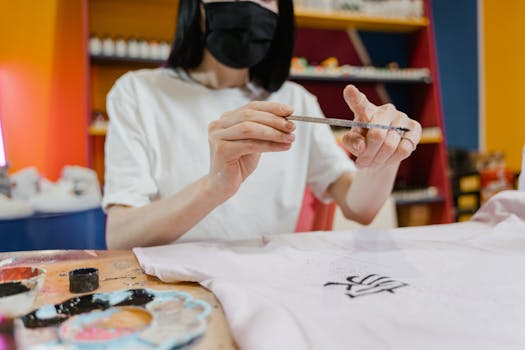
DIY Galaxy Tie-Dye: The Artistic Process
As with every unique clothing design, planning is key. First, dampen your t-shirt and lay it flat. Now here comes the fun part - creating the spiral. Pinch the center of your t-shirt and twist it, securing the spiral with rubber bands. Apply the dye according to your mapped out galaxy design. Remember, it’s your universe, so feel free to mix and match different colors until you achieve that desired nebula-like effect on your DIY t-shirt designs. Bundle your creation into a plastic bag, leaving it overnight to let those mesmerizing galaxy colors fully soak in.
Untwisting your Galaxy Masterpiece
The excitement really ramps up when it’s time to reveal your homemade t-shirt artwork. After a 6-8 hour waiting period, giving ample time for the colors to truly set, carefully remove the rubber bands and unfold your t-shirt. You'll be met with an artistic t-shirt design that looks akin to a majestic spiral galaxy. Rinse the t-shirt under cold water until it runs clear and then simply pop it in the wash.
Adding the Star-Studded Touch to your Galaxy Tie Dye T-Shirt Craft
Finally, let’s not forget those twinkling stars! Dab tiny bits of fabric paint to mimic stars far, far away in the galaxy print. This is where your galaxy tie-dye instructions allow for some compelling customization, with the ability to sprinkle as many stars as you’d like across your cosmic clothing. And voila! Your tie-dye tutorial journey has led you to not merely a custom t-shirt, but to your very own Galaxy Tie Dye T-Shirt Craft masterpiece.
The process of home crafting your own cosmic wardrobe customization piece can be quite a rewarding experience, not to mention an entertaining weekend activity or a project to enjoy with friends. Experimentation with the galaxy-tie dye techniques is a creative project, and your results will surely be a conversation piece, sparking interest wherever you rock your new galaxy print apparel.

My Cosmic Crafters - A Roadmap To Creating A Galaxy Tie Dye T-Shirt Masterpiece
So there it is, my cosmic crafters - your roadmap to creating a Galaxy Tie Dye T-Shirt masterpiece. Let's remember, this is more than just a craft; it's an invitation to explore your creativity and blend it with the majestic universe.
You've set out on this journey with a simple white tee and returned with a galaxy all your own. Take pride in your personal nebula, for not every wardrobe can boast a showstopping touch of the cosmos.
Now, get out there and shine bright in your custom-made galaxy t-shirt and let the world know that you don't just wear fashion, you create it. Until our next creative adventure, keep crafting and keep exploring!
You May Also Like These:
Shooting Star Paper Mache Piñata
Creating this cosmic-themed piñata will be great fun and a fantastic addition to any party. Let's dive right in!
Materials Needed:
- Cardboard: for making the star shape.
- Masking Tape: to fix the star shape.
- Newspaper: cut in strips, for the paper mache.
- Paper Mache Paste: usually a mix of flour and water.
- Acrylic Paints: Blues, purples, white for the galaxy theme.
- Paint Brushes: for painting your star.
- String: to hang your piñata.
- Candies and Small Toys: to fill your piñata.
Instructions:
- Cut your cardboard into a star shape. You will need two identical pieces. Size depends on how big you want your pinata to be.
- Tape your cardboard star shapes together at the edges leaving a small hole for the sweets and toys.
- Dip your newspaper strips into your paper mache paste and layer them onto your star shape. Let it dry.
- Paint your dry, paper mache star with your selected colors to create a galaxy effect. Allow the paint to dry completely.
- Once dry, fill your piñata with sweets and small toys. Make sure to close the filling hole properly.
- Finally, attach a string to the top of your star for hanging the piñata.
Reminder:
Always remember, safety first! Supervise young children when they are cutting and shaping the cardboard.
Fun Cardboard Crafts For Kids
Transform your recyclables into fun activities with these easy cardboard crafts! Follow along as we make a Cardboard Castle and a Cardboard Dinosaur.
Ingredients:
For the Cardboard Castle you will need:- A large cardboard box
- Scissors
- Paint (any color you like!)
- Brushes
- Several pieces of cardboard
- Scissors
- Paint (green, or any color you wish)
- Brushes
- Glue
Instructions:
Cardboard Castle- Flatten your cardboard box.
- Cut out windows and a door.
- Assemble your castle by standing the cardboard up and folding it into a square.
- Paint your castle any color you desire. Let it dry.
- Enjoy your new Cardboard Castle!
- Cut out dinosaur parts from your cardboard: a head, a body, legs, and a tail.
- Paint each part of your dinosaur. Let them dry.
- Glue the dinosaur pieces together. Let it dry.
- Enjoy your new Cardboard Dinosaur!
Let your kids’ imagination take flight as they have fun crafting and playing with their creations. Remember, it's not the finished product, but the process that counts!
Cardboard Crafts for Kids: Simple and Fun Projects
Turn your cardboard boxes into a fun and exciting craft project with your kids! Here's a step-by-step guide on how to make a Cardboard Dream House for your child's favorite action figures or dolls.
Ingredients
You will need:
- A large cardboard box
- A ruler
- A pencil
- A craft knife
- Glue
- Paint
- Art supplies for decorating (sequins, glitter, colored paper, markers)
Instructions
Follow these steps to create your Cardboard Dream House:
- Plan Your House: Draw a rough sketch of how you want your Cardboard Dream House to look. Define where you want to place the windows, doors, floors etc.
- Mark the Layout: Using a ruler and a pencil, mark out the layout on your cardboard box based on your sketch.
- Cut Out the Layout: With adult supervision, use a craft knife to cut along the marked lines to create your windows, doors, floors, and other elements.
- Paint Your House: After cutting, paint your Cardboard House in the color of your choice. You can also paint the floors and ceilings in diverse colors to make it more vibrant and interesting.
- Decorate Your House: Once the paint has dried, start decorating each room with sequins, glitter, colored paper, stickers, and any other art supplies you have. Use your creativity to make each room unique!
Remember, the key here is creativity and fun. Don't stress over perfect lines or colors. The main goal is to have a great time creating something new with your child!
Crafting with Glue: A Step-by-Step Guide for Parents
Ingredients:
- Construction paper (assorted colors)
- Non-toxic white glue
- Glitter (optional)
- Scissors
- Box of crayons or markers
Instructions:
- Prepare the workspace: Clear a flat surface and cover it with scrap paper or a table cover to protect it from glue.
- Cut out paper shapes: Use the scissors to cut out shapes from the construction paper. These can be circles, squares, hearts, etc.
- Decorate the shapes: Use the crayons or markers to add details to your paper shapes. Let your child's creativity run wild!
- Apply the glue: Here comes the fun part! Have your child apply the glue to the decorated shapes. They can create patterns with the glue, write their names, or simply apply a thin coat all over.
- Add glitter (optional): While the glue is still wet, sprinkle some glitter over it for that extra sparkle.
- Let the glue dry: Place the shapes somewhere safe where they can dry. This should usually take a couple of hours.
- Enjoy: After they're dry, your child can use their creations to decorate their rooms or give them as gifts!
Materials Needed
- Watercolor Paints: A set of quality watercolor paints.
- Brushes: Different sized paintbrushes are ideal for variety.
- Water and Towels: For cleaning brushes between colors.
- Art Paper: Thick, preferably watercolor paper, is best.
- Palette or Mixing Tray: To mix your colors on.
- Clear Sealant Spray: To protect your finished artwork (optional).
Instructions
- Set Up Your Space: Lay out your materials on a protected surface where you can comfortably paint.
- Prepare Your Paints: Squeeze a small amount of each paint color onto your palette or mixing tray.
- Ready Your Brush: Dip your brush in water and mix with paint to get the desired hue.
- Start Painting: Use your brush to apply paint to the paper. Explore various techniques like color blending and texturing.
- Clean Between Colors: Clean your brush with water and dry with towel before switching to a new color.
- Let it Dry: Once complete, allow your painting to thoroughly dry.
- Seal Artwork (Optional): For added longevity, spray a clear sealant over your dry painting.


