


As an affiliate, I earn from qualifying purchases, but this doesn't affect the reviews or recommendations—your trust is important to me!
Creating Your Own Homemade Lava Lamp Science Experiment

Today, We're Making:
- - Homemade Lava Lamp Experiment
- - Solar System Experiment Project: Since May 26,2025,is near summer,the sky is clear to learn about space. Kids can use accessible materials like balls of different sizes,paints.
Bring Back the Joy of Science Projects with a Homemade Lava Lamp Experiment
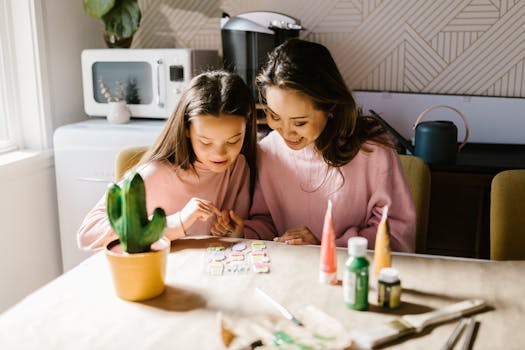
Remember when you were a kid and science project day was your favorite part of the week? How about we bring back those good old times with a fun science experiment that sparks creativity and learning? Today, we're walking down nostalgia lane by creating homemade lava lamp experiments.
There’s something undeniably fascinating about watching globs of oil float through water, changing and morphing like little glowing creatures. And guess what? It’s not just an exciting visual spectacle - it's a fantastic way to teach kids about the basic principles of density and viscosity. So, whether you're looking for DIY projects for kids or simply wish to indulge in some good old-fashioned science experiments at home, this classic homemade lava lamp promises new discoveries, learning, and bucket loads of fun.
Let's get started!
Get Your Ingredients and Tools Ready
To get started with your Homemade Lava Lamp Experiment, you'll need to gather a few essential ingredients and tools. Remember, the goal is to create a fun, educational experiment at home, so it's crucial the materials you need are easy to find. Let's take a look at what’s needed for your DIY Lava Lamp:
- Clear container: Any clear, glass container will work. A mason jar or even a clear soda bottle is perfect for this experiment!
- Food coloring: Your choice of hue to give your lava lamp some style.
- Vegetable oil: This is going to make up a large part of your lava lamp, so make sure you have enough!
- Water: You probably have plenty of this at home.
- Fizzy tablet (like Alka-Seltzer): This will create the fun, bubbly action in your lava lamp!
- Glitter (optional): For an extra magical touch, you can add in some glitter.
Let's Get Creating a Lava Lamp
Now that we're equipped with our lava lamp ingredients, let's dive into the DIY Lava Lamp instructions. Remember, the key goal is to learn about science principles but also have fun!
Firstly, fill the container with approximately two-thirds full of vegetable oil. Following this, add water until the container is nearly full but leave some space at the top. You’ll notice the oil and water separating - a perfect representation of the principle of density in action!
Next, turn your clear mixture into a vibrant spectacle! Add 10-20 drops of your chosen food coloring - though these droplets might initially plunge through the oil, they'll eventually blend in with the water. Lastly, if you choose to go the extra mile, add some glitter to make your homemade lava lamp even more exciting.
Congratulations, you're all set up to take the plunge into this easy science experiment! With your oil and water science experiment assembled, you're ready to move on to the exciting part- making your lava lamp come alive. But how? Just wait for the following paragraph!
Watch Your Homemade Lava Lamp Come to Life
Now comes the fun part, watching your homemade lava lamp come to life. To make the magic happen, break your fizzy tablet into a few pieces and drop them into your container. Stand back and marvel as your homemade lava lamp springs into action, releasing bubbles in a mesmerizing dance. It's an awe-inspiring moment where children can see science principles play out before their very eyes!
Ensure to explain the science behind your experiment; this is a fantastic Science project at home. The fizzy tablet creates a gas as it dissolves, which rises through the oil in the form of beautiful, colorful blobs, all thanks to differences in density and viscosity.
In essence, this Homemade Lava Lamp Experiment is a fun, engaging and hands-on way to educate and entertain. From assembling the ingredients to witnessing the magic unfold, it's a wonderful blend of creativity, learning, and amusement - perfect for kids and kids at heart.
And there you have it, folks!
You've just crafted the delight of your childhood - a mesmerizing homemade lava lamp. However, remember, this experiment is not just about harking back to simpler times or indulging in a sparkly spectacle, it's about understanding the world around us just a little bit better.
There's more to it than just whimsy
So, the next time you marvel at your lava lamp, you'll realize there's more to it than just whimsy. It's a celebration of science, a testament to the magic of learning, and a toast to creative curiosity.
Keep experimenting, keep asking questions!
Till then, keep experimenting, keep asking questions, and most importantly, keep having fun because learning never really stops, does it?
So, what's your next DIY science adventure going to be?
You May Also Like These:
Solar System Experiment Project
Ingredients/Items Needed:
- A set of 10 inflatable balls of varying sizes (to represent the Sun and 9 planets).
- Acrylic paint (in a variety of colors).
- Paint brushes.
- String.
- A hanging mobile frame or a hanger.
Instructions:
- Inflate the Balls: Start by inflating the balls. The biggest ball will represent the Sun. The rest varies in sizes representing the 9 planets.
- Paint the Balls: Paint the balls to represent each heavenly body. Use images of the solar system as a painting guide.
- The Sun: Bright yellow.
- Mercury: Grey.
- Venus: Yellowish-white.
- Earth: Blue with green continents.
- Mars: Reddish-brown.
- Jupiter: Orange-white with brown belts.
- Saturn: Pale gold.
- Uranus: Light blue.
- Neptune: Deep blue.
- Pluto: Brownish-grey.
- Dry the Balls: Once painted, let each ball dry completely.
- Attach the Strings: After each ball is dry, attach a string to each one.
- Assemble the Solar System: Attach each planet to the mobile frame or hanger, arranging in order of their distance from the Sun. The order is as follows: Sun, Mercury, Venus, Earth, Mars, Jupiter, Saturn, Uranus, Neptune, and Pluto.
- Fine-Tuning: Make sure to adjust the length of string for each planet to create a tiered effect, clearly showing the planets' positions in relation to the Sun. You now have your own homemade 3D solar system!
DIY Solar Oven STEM Project
Ingredients
- 1 pizza box
- Foil
- Plastic wrap
- Black construction paper
- Wooden skewer or a straw
- Ruler
- Marker
- Scissors
- Glue
Instructions
- To begin, close the lid of the pizza box and draw a square on the top, leaving a 1-inch border from the edge of the box.
- Using the scissors, cut along three sides of the square, leaving the side that runs along the top of the pizza box uncut.
- Bend the flap up along the uncut edge to create a flap.
- Cover the inside of the flap and the inside of the box below it with foil. Make sure to smooth out any creases or wrinkles in the foil.
- Glue the black construction paper to the inside of the bottom of the box.
- Cover the opening created by the flap with plastic wrap and secure it down with tape, making sure it is air-tight.
- Use the wooden skewer or straw to prop the flap open at an angle that will catch the most sunlight.
- Finally, place your food on the black construction paper and close the box lid. Your solar oven is now ready for use!
Note: You need to adjust the angle of the flap periodically to catch the maximum sunlight at different times of the day. The solar oven works best from 11 am to 2 pm.
STEM Projects for Summer Fun
Project 1: DIY Sundial
Ingredients:
- A straight stick or dowel
- An open area that gets lots of sunlight
- Chalk or stones
Instructions:
- Stick the dowel straight into the ground in your open, sunny area.
- Every hour, mark the end of the dowel’s shadow with a stone or a draw a line with chalk.
- Label each stone or line with the corresponding hour of the day.
- Now you have a sundial! Watch the shadow move throughout the day.
Project 2: Homemade Birdhouse
Ingredients:
- Untreated wood
- Saw
- Nails and Hammer
- Drill
Instructions:
- Cut out the front, back, sides, bottom, and roof pieces of the birdhouse from your wood.
- Nail together the sides, front, and back.
- Nail the bottom into place, followed by the roof.
- Drill a small hole (1–2 inches in diameter) on the front piece, and a few tiny holes on the bottom for drainage.
- Place in a protected area and watch for bird visitors!
Solar System Model Project
Materials Needed:- Different sized balls (10 in total, to represent the sun and 9 planets)
- Acrylic paints (various colors)
- Paint Brushes
- String
- Scissors
- Strong adhesive/glue
- Pick your Planets: Choose balls of different sizes to represent each planet and the sun. The sun should be the largest while the planets should decrease in size based on relative scale for the project.
-
Paint your Planets: Using your acrylic paints, paint each ball to represent each planet or the sun. Here is a color guide:
- Sun - Bright Yellow
- Mars - Red
- Earth - Blue & Green
- Jupiter, Saturn, Uranus - Various shades of brown, beige, and blue (for stripes)
- Venus, Mercury, Neptune - Shades of blue and grey
- Pluto - Grey
- Drying: Allow each planet and the sun to dry thoroughly. This might take from a few hours up to a day.
- Preparing the Hanging System: Once the paint is dried, use a long piece of string and your strong adhesive to attach each planet and the sun. You might want to use a spacer (like a small piece of wood or plastic) to keep the right distance between the different celestial bodies based on your scale.
- The Final Step: Checking the Model: Once all string is attached and the adhesive is dry, experiment with hanging your model to see how it looks. You might need to adjust the length of string or positioning of the planets for it to hang correctly.
Note: Parent supervision is recommended throughout this project. While safe and non-toxic, the materials can become a choking hazard for children below three years old.
STEM Projects with Paint: Instructions for Parents
Project 1: Density Tower
Ingredients:
- Food Coloring
- Several Liquids (Honey, Dish Soap, Water, Vegetable Oil, etc.)
- Tall, Transparent Container
- Spoons or Droppers
Instructions:
- Color each liquid using different food coloring.
- Pour each liquid carefully into the container. Start with the densest liquid at the bottom (honey) and end with the least dense (vegetable oil).
- Use spoons or droppers to pour the liquids so as to avoid mixing them up.
- Observe how the liquids sit on top of each other without mixing, forming a clear density tower.
Project 2: DIY Lava Lamp
Ingredients:
- A Clear Container
- Water
- Vegetable Oil
- Food Coloring
- Alka-Seltzer Tablets
Instructions:
- Fill the container up to a quarter with water.
- Fill the rest of the container with vegetable oil, leaving some space at the top.
- Add a few drops of food coloring (choose any color you like).
- Break the Alka-Seltzer tablet into a few pieces and drop them into the container.
- Watch as the colored water bubbles up through the oil, creating a mesmerizing lava lamp effect.


