As an affiliate, I earn from qualifying purchases, but this doesn't affect the reviews or recommendations—your trust is important to me!
Exploding Baggie Experiment: Exciting and Simple Science

Today, We're Making:
- 'Exploding Baggie'
- 'Colorful Chemical Eruptions' - You can make the exploding baggie experiment more interesting by adding food colorings. This not only makes the process visually dynamic but also introduces concepts related to color mixing.
- 'Temperature Twist' - Experiment with hot and cold water to see how the temperature affects the rate of the reaction causing the bag to explode. This will help understand the impact of temperature on chemical reactions.
- 'Balloon Blast' - Try using a small balloon instead of a baggie to perform the chemical reaction. This models the energy produced by a chemical reaction in a more three-dimensional way.
- 'Exploded Art' - Place a thin piece of paper or a canvas over the exploding baggie (with added food coloring) to create a beautiful and colorful art piece. It will create a perfect amalgamation of Science and Art!
- 'Reaction Rate Experiment' - Change the concentration of vinegar and baking soda and observe how the speed and force of the reaction varies with different concentrations. The aim of this experiment is to understand the effect of concentration on the rate of reaction.
Remember when you were hooked on your first explosive, yet easy science project?
You don't? Well, let's change that with an eye-opening and educational activity – the Exploding Baggie Experiment! Prepare for thrills, spills, and a few life-changing scientific truths as we delve into this simple science experiment, perfect for kids and adults alike. Whether it's the weekend or a regular school night, transforming your kitchen into a thrilling, interactive learning space has never been more exciting.
Who knew experimenting with a baggie could be so engaging and affordable? So let's spark a love of hands-on chemistry at home and get ready to scream 'Eureka' with this fun, family-friendly science project!
Exploding Baggie Experiment: A Fun and Educational Activity for Kids
For this Exploding Baggie Experiment, you will need some common household ingredients: a baggie (any sandwich bag), baking soda, vinegar, and a tissue. There's nothing like seeing the delight in a child's eyes when they too realize that some exciting science takes place right in your pantry! This experiment with a baggie is not only affordable but also introduces the concepts of chemical reactions in a safe and engaging way. It’s highly recommended to perform this experiment outdoors or in a bathtub for easy clean-up.
Science Behind the Pop!
Naturally, you're curious about what makes the Exploding Baggie pop. It all boils down to chemistry at home! When you mix baking soda (a base) and vinegar (an acid), they interact to create carbon dioxide gas. The gas inflates the baggie until it can't hold any more - and that's when you get your baggie explosion! Did you ever consider that such innovative science projects could be tackled with daily-use items?
Time for Action
Now, the fascinating part of any DIY Science is the doing itself. Carefully pour about a quarter cup of vinegar into the baggie. Next, dump the baking soda onto the center of a tissue, fold it up like a little book, and get ready to run! Quickly but cautiously, put the baking soda-filled tissue in the baggie and zip it shut. Quickly step back and enjoy the suspense that is such an essential part of fun educational experiments. Don't forget that timing is critical here, and speed adds to the thrill!
Take Note!
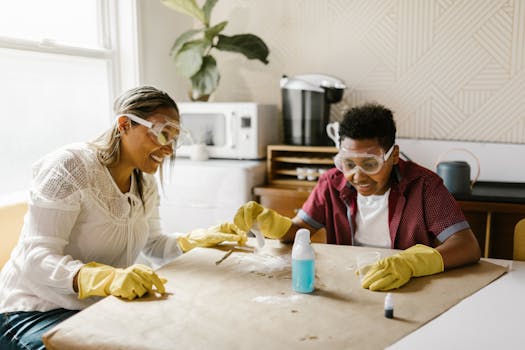
Remember though, while our Exploding Baggie Experiment is safe science experiments, there's always a 'POP!' involved. So don't be leaning over it, and kiddos should wear some eye protection. Let's transition simple science experiments into engaging science experiments and elevate their learning while they are having ultimate fun. Plus, children love the suspense and the exciting science that comes with a home-made volcano-like explosion!
Your Ticket to Fun & Learning
By following this Experiment guide, anyone can make learning science fun. It is a versatile activity that fits into various categories such as STEM activities, kids science experiments, easy chemistry experiments, indoor science experiments, and so much more. You've successfully elevated your average Tuesday afternoon to a thrilling learning playground with experiments like these. Simple, safe, practical science experiments like this are not just about the fun but also about instilling a deep love for scientific exploration and understanding.

Transformational Learning Through Experiments
So there you have it! A transformational learning experience wrapped up in an explosive baggies experiment. It’s exciting, it’s easy, and it sparks curiosity.
Isn't it thrilling to know that you can make such a big bang with something as simple as a baggie and a few kitchen ingredients? You've witnessed first-hand that science doesn’t have to be complex to be impactful.
A Journey into Science
It's experiment times like these that create lifelong learners, eager to explore more and question more. Go ahead, don your scientist cap, and remember your first captivating science experiment.
Science is Everywhere
Science is everywhere, even in a humble little baggie. This is what makes learning so thrilling, and life, an everlasting experiment!
Embrace the Adventure
So embrace the mess, explore the unknown and make each day a whole new fun scientific adventure! Baggies will never seem the same again, will they?

You May Also Like These:
Colorful Chemical Eruptions
Ingredients:- Small baggie
- Baking soda
- Vinegar
- Food coloring (assorted colors)
- Firstly, put 1 tablespoon of baking soda into the baggie.
- Next, add 3-4 drops of food coloring of your choice into the baggie.
- Then, add 2 tablespoons of vinegar into the same baggie.
- Quickly seal the bag and watch as the baggie expands and erupts into colorful foam!
- Discuss with your child how the color mixing occurs.
Temperature Twist
Ingredients:- Small baggie
- Baking soda
- Vinegar
- Ice-cold water
- Hot water
- Put 1 tablespoon of baking soda and 2 tablespoons of vinegar into the baggie.
- Add ice-cold water into the baggie and observe the reaction.
- Repeat the same process but with hot water.
- Compare how temperature affects the rate at which the baggie expands and erupts.
Balloon Blast
Ingredients:- Small balloon
- Baking soda
- Vinegar
- First, pour 1 tablespoon of baking soda into the balloon.
- Then, fill a bottle with 2 tablespoons of vinegar.
- Attach the balloon to the bottle (without letting the baking soda drop into the bottle).
- When ready, lift the balloon allowing the baking soda to mix with the vinegar below.
- Watch as chemical reaction fills up the balloon.
Exploded Art
Ingredients:- Small baggie
- Baking soda
- Vinegar
- Food coloring (assorted colors)
- Piece of canvas or white paper
- Place your canvas or white paper on a flat surface.
- Prepare the eruptive blend by putting 1 tablespoon of baking soda, 2 tablespoons of vinegar, and food coloring into the baggie.
- Quickly seal the bag and place it on the canvas.
- Wait for the explosion that will create a colorful art on your canvas.
Reaction Rate Experiment
Ingredients:- Several baggies
- Baking soda
- Vinegar
- Place different concentrations of vinegar and baking soda into each baggie.
- Seal the bags and observe how the speed and force of the reaction changes with each concentration.
- Discuss the effects of concentration on the rate of a chemical reaction.
Make Your Own Lava Lamp STEM Experiment
Ingredients:
- 1 clear, clean glass container
- Water
- Vegetable oil
- Food coloring (any color of your choice)
- Effervescent tablets (like Alka-Seltzer)
Instructions:
- Fill the Jar: Fill up about 1/3 of your container with water.
- Add Oil: Pour vegetable oil into the container until it's almost full. You may want to wait for a few moments till the water and oil separate.
- Add Color: Add several drops of food coloring (be creative with your choice of colour!). Notice how the food color only colors the water and not the oil.
- Add the Tablets: Break the effervescent tablet in half and drop it in the water. Watch your homemade lava lamp come to life!
Note: The oil and water do not mix because they have different densities. The tablets create gas bubbles which rise taking some colored water along for the ride. When the gas bubbles reach the surface and pop, the colored water falls back down.
Enjoy this fun and simple STEM-based activity!
Parent Guide - Easy Water Density Experiment
Overview:
This experiment aims to teach children about the concept of density in a fun and engaging way. We will be using simple ingredients which can be found around the house.
Ingredients:
- Three glasses of equal size
- Sugar
- Water
- Food Coloring (3 different colors)
- Pipette/Dropper
Instructions:
Step 1: Begin by filling each glass with an equal amount of water. Step 2: Next, add a different amount of sugar to each glass. For example, add 1 teaspoon to the first glass, 2 to the second, and 3 to the third. Step 3: Stir each glass until the sugar has completely dissolved. Step 4: Now add a different color of food coloring to each glass (one color per glass), and stir. Step 5: Using the pipette or dropper, take some of the solution from one glass, and carefully drop it into another glass. Step 6: Watch how the colors interact. The solution with the most sugar (and hence, the highest density) should sink to the bottom while the solution with the least sugar should float at the top. Step 7: Try exchanging fluids between different glasses and see how the colors move and interact!Conclusion:
Through this experiment, children will learn the basic concept of density and how different levels of density can impact how substances interact with one another.
```html
Colourful Celery Experiment
This exciting STEM experiment is perfect for teaching kids about how plants absorb water through their stems. Plus, it leaves you with some beautiful, vibrantly coloured celery afterwards:
Ingredients:
- Celery stalks (preferably ones with the leaves still attached)
- Food coloring (a few different colours)
- Glasses or clear jars
- Water
Instructions:
- Fill each glass or jar halfway with water.
- Add a few drops of food coloring to each glass. Try to use a different color for each one.
- Cut the ends off of your celery stalks, and place one in each glass.
- Wait and observe. Over the course of a few hours or days (depending on the strength of your food coloring), the colour should start to appear in the leaves of the celery stalks as the water is absorbed up through their stems.
Try experimenting with different types of plants and food coloring to explore how this process works in different scenarios.
```STEM Experiment: Homemade Lava Lamp
Ingredients
- A Clear Glass Container
- Vegetable Oil
- Water
- Food Colouring
- Alka-Seltzer (or similar antacid tablet)
Instructions
- Fill the Container: Fill about 3/4 of the clear glass container with vegetable oil.
- Add Water: Pour water into the container until it's nearly full. Leave some space at the top.
- Add Colour: Add a few drops of food colouring of your choice. (Be mindful that darker colours might make it harder to see the experiment at work).
- Alka Seltzer: Break the Alka-Seltzer tablet into a few pieces (small enough to fit through the top of your container), then drop them into the container one at a time and watch your homemade lava lamp come to life!
The Science Behind
The oil and water you added to the bottle separate from each other, with oil on top because it has a lower density than water. The food colouring falls through the oil and mixes with the water at the bottom. The piece of effervescent tablet creates a gas. As the gas bubbles rise, they take some coloured water with them. When the blob of water reaches the top, the gas escapes and down goes the water back to join the rest at the bottom, starting the process all over again, just like a real lava lamp! Pretty cool, isn't it?


