


As an affiliate, I earn from qualifying purchases, but this doesn't affect the reviews or recommendations—your trust is important to me!
Exploring : Creating Vibrant DIY Tie-Dye Canvas Art at Home
Today, We're Making:
- - DIY Tie-Dye Canvas Art
- - DIY Time Capsule: Given the date, you could have kids create their own time capsule that they can open in the future. They can decorate a small box or container with paint, markers, stickers, or glitter.
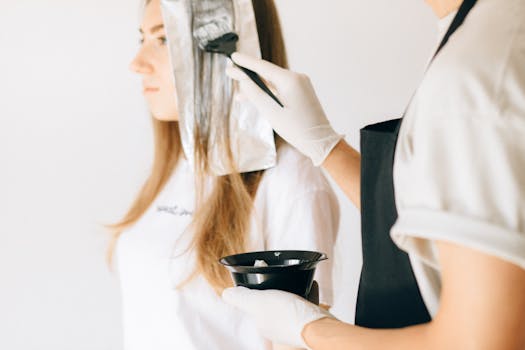
Imagine the Sheer Thrill of DIY Tie-Dye Canvas Art
Swirling vibrant colors on a fabric, blending and merging in an infinite array of patterns and hues - a symphony of visual delight right at your fingertips. This electrifying world of DIY Tie-Dye Canvas Art is far more attainable and enjoyable than you'd imagine.
Why Choose DIY Tie-Dye Canvas?
As a modest home art project or a blissful weekend escape, venturing into the creation of tie-dye canvas puts you in the driver's seat of your artistic journey, letting you craft bespoke pieces that are uniquely you.
From seasoned artists to DIY enthusiasts
Whether you're a seasoned artist exploring new dye techniques or a DIY enthusiast in pursuit of crafty inspiration, your handmade canvas can set the tone for your home decor, infusing it with a dazzling splash of color and personalized touch.
Ready to Dive In?
So, ready to dive in and paint your own rainbow tye-dye masterpiece? Let's kickstart this vivid adventure together, one step and stroke at a time.
Embracing a World of Vibrant Colors
There's something inherently rejuvenating about immersing yourself in the act of creating DIY Tie-Dye Canvas Art. Those playful splashes of vibrant colors seeping through the fabric, the childlike wonder of watching a bland canvas transforming into a tapestry of brilliant hues - trust me, it is an indulgence you wouldn't want to miss. Every dip of fabric paint into the canvas is a streak of freedom, an act of individualistic defiance against the monochromatic mundane world. The best part? You don't have to be a paintbrush ninja to do it! With DIY Art, it's all about the process, not perfection. In this magnificent world of fabric dyeing, your artistic instincts take over, unraveling a color palette that's as unique as you.
From choosing the right canvas art creation supplies to conducting your very own vibrant experiment of color mixing, this venture into the land of handmade canvas is bound to help you reignite your dormant sparks of creativity. The key here is to stay unrestrained, splurge with your favorite colors, and witness the magic happen. Whether it's the crimson twilight you're trying to capture or a suggestive shade of jaune, the rainbow tye-dye techniques offer you countless hue possibilities to play with. You can even recreate your favorite tie-dye patterns or set the path for fresh aesthetics all by yourself.
Getting your Hands-on
The beauty of DIY Tie-Dye Art is its absolute simplicity and flexibility. It's an easy art project that can be done at your own pace, in your preferred creative space, and rightly so, with your very favorite art supplies ranging from satin-smooth fabric paints to ready-to-dip paint brushes. Hung on the living room wall or adding a pop of color to your study space, this splash of color contributes to your home decor DIY, adding an artistic charm, and creating a personalized sanctuary of your tastes.
Beginners, worry not! There are countless beginner-friendly craft tutorials available that guide you through this exciting journey, step by step. From the type of art tape to use, to mastering the art of folding for that perfect spiral effect, these tutorials have got you covered. Or better yet, let your kids hop on this colorful carousel of a DIY project. It not only promotes their creative thinking but also makes for a memory-filled, fun family activity.
You'll soon find that this art form transcends beyond the simple steps and methods. It’s about expressing your individuality, your personality artistically. Each tie-dye canvas, thus, becomes a testament of your style, your vibrancy, and your vision. So, let's roll up those sleeves, grab those paints, and stir up a vibrant storm on the canvas.

In Conclusion...
Creating DIY tie-dye canvas art at home is more than just a project; it's a vivid journey filled with color, creativity, and individual expression. Through the hue-filled whirlwind, you'll not only create unique pieces of art but also let your personality shine through.
The Perfect Marriage of Art and Self-Discovery
It perfectly marries art and self-discovery, turning every splash of color into a colorful reflection of your inner self. Whether you’re an audacious artist or a novice DIY-er, remember, each stroke on the canvas stirs up a vibrant storm of possibilities.
Embrace The Paint-Speckled Journey
Embrace the paint-speckled journey, and let the power of colors transform your world of art and decor, one vibrant canvas at a time. Now, tie-dye away, and let's paint a vibrant, color-filled tomorrow together!
You May Also Like These:
DIY Time Capsule Craft
Ingredients:- 1 Photo Album or Scrapbook (in a size of your choice)
- Assorted Photos of this year
- 1 pen - for writing messages
- Memorabilia (tickets, postcards, drawings, etc.)
- 1 Large Metal or Plastic Box
- Wrapping Paper (Optional)
- Start by gathering all of your materials. Be sure to select a photo album or scrapbook that's big enough to hold not only your pictures, but also any memorabilia you want to include.
- Arrange the photos chronologically in the photo album. You might want to include photos from major events, vacations, or simply everyday moments that you want to remember.
- Once you've inserted all of the photos, you can start adding memorabilia. This could be anything from movie tickets to postcards, from art projects to letters. Include anything that has meaning to you and helps capture what your life was like at this time.
- Take your pen and add handwritten notes next to the photos and memorabilia. You might jot down memories associated with the items, explain who's in the photos, or write down your thoughts and feelings about the year.
- Next, it's time to prepare the box that will hold your time capsule. You might choose to wrap it in wrapping paper for an added touch, or you might simply leave it as is. Be sure to choose a box that's sturdy and sealable, as it needs to protect your items for many years to come.
- Place your completed photo album into the box, and seal the box. You've now completed your DIY Time Capsule!
- Finally, safely store your time capsule in a dry, secure place. You might choose to bury it in your yard, or you could hide it in a closet or under a bed. Remember where you put it, and then enjoy the anticipation of opening it again in the future!
Marker Crafts For Kids
Below are simple and easy crafts you can do with your kids using markers.
Ingredients
Below are the materials you need:
- Markers (various colours)
- White Paper
- Scissors
- Glue
- Transparent Tape
Instructions
1. DIY Colored Paper Lantern:
- Draw: Have your child draw a design on the white paper with the markers.
- Cut: Cut out the design. You can help them with this part if needed.
- Glue: Glue or tape the bottom of the design to form a circular lantern shape.
2. Colorful Paper Chains:
- Draw: Let your child draw colorful stripes on the white paper.
- Cut: Cut the paper into long stripes along the marker lines.
- Link: Create links with these stripes, securing with tape to form a chain.
Spectacular Marker Crafts for Kids
Ingredients
- Paper plates
- Permanent markers in various colors
- White construction paper
- Ribbon or string
- Glue
- Scissors
Instructions
1. Gather all your materials.
Before you start, make sure you have everything you need within reach. This will make the crafting process smoother and more enjoyable.
2. Prepare your work area.
Lay out an old newspaper or a sheet to protect your table or floor from any marker bleed-through or glue spills.
3. Craft your design.
Draw your design on the paper plates using the permanent markers. This could be anything - a landscape, a portrait, or an abstract pattern. Allow your child's creativity to flow!
4. Let it dry.
Set aside your paper plate to dry thoroughly. This usually takes around an hour, but it might be a few minutes more or less depending on the amount of marker ink you used. Make sure to warn your child not to touch it until it is completely dry.
5. Add finishing touches.
Once it's dry, you can now add any final touches. This could include gluing the white construction paper to the back of the plate and trimming it to fit, or threading a piece of ribbon or string through the top to hang it up.
With these easy-to-follow steps, you and your child will have a fun and creative afternoon, and end up with a beautiful piece of marker art to show for it!
DIY Stickers Craft Project
Materials Needed
- A sheet of adhesive paper or label paper
- Markers, colored pencils, or crayons
- Scissors
- Clear packing tape (optional)
Instructions
Step 1: Choose Your Images
Decide on what images you want for your stickers. You can draw your own or print images from the internet.
Step 2: Draw or Print Your Images
On the adhesive paper, use the markers, colored pencils, or crayons to draw your images. If you have printed images, cut them out and set them aside.
Step 3: Apply Clear Packing Tape (Optional)
If you want your stickers to be more durable, you can cover them in clear packing tape. Just make sure to press down firmly to avoid any bubbles.
Step 4: Cut Out Your Stickers
Using the scissors, carefully cut out your stickers. Try to cut as close to the image as possible for the best result.
Step 5: Enjoy Your Stickers!
Your DIY stickers are ready to use! Stick them in your notebook, on your phone, or anywhere else you want.
Easy & Fun Glitter Crafts for Kids
This is a precise guide designed for you to help your kids with a fun Glitter Crafts project. Below are the materials you'll require and step-by-step instructions for fun and easy completion of the craft!
Ingredients
- Colored Glitter
- White Craft Glue
- Plain Paper (ideally white)
- Paintbrush
- Old Newspaper (to keep the area clean)
Instructions
- Spread Newspaper: Start by spreading the old newspaper across the workspace. It will catch any excess glitter and makes cleanup much more manageable afterward.
- Choose A Design: Be creative and think of a simple design or shape. Using the paintbrush and craft glue, draw out the design lightly on the paper.
- Apply Glitter: Now comes the fun part! Sprinkle the glitter over the glue design, ensuring it covers all the sticky areas. You can use one color of glitter or mix it up for a rainbow effect.
- Let it Dry: Leave the picture to dry for a few hours. For the best results, ideally, let it dry overnight. Once the glue is dry, you can shake off any excess glitter.
And there you go, getting crafty with glitter has never been so easy! We'd love to see your creations, so feel free to share pictures of them on our blog.


