


As an affiliate, I earn from qualifying purchases, but this doesn't affect the reviews or recommendations—your trust is important to me!
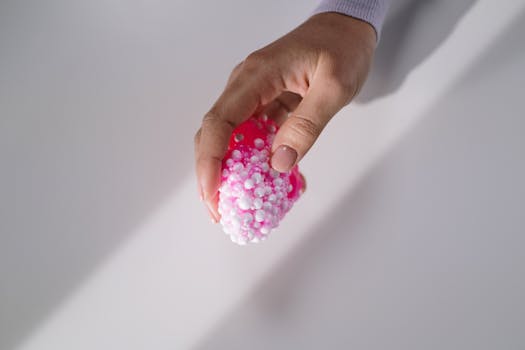
Unleashing Creativity with a Homemade Rainbow Slime Experiment

Today, We're Making:
- - Homemade Rainbow Slime Experiment
- - DIY Time Capsule: To commemorate the day (05-07-2025), help your child create a DIY Time Capsule. Kids can draw pictures, write letters or pop in mementos related to the current year and then seal it to be opened in the future.
- - Colorful Galaxy Jar: Similar to the spectrum of colors in a rainbow, this jar can be filled with cotton, tempered paint.
Ever wondered how to perfectly blend learning science through play and a creativity booster for your kids at the same time?
I've got just the thing to tickle your fancy; a Homemade Rainbow Slime Experiment. This isn't just another DIY project or art & craft session. Oh no, it's a vibrant journey of sensory play, bursting with rainbow colors that not only adds fun to your child's day but also serves as a fantastic educational fun project.
Whether you're an expert in crafting slime for leisure or a beginner seeking an easy slime recipe, this hands-on learning experience will undeniably unleash creativity your home has never seen before. Plus, we promise it to be just as exciting for the adults involved in the process—because who wouldn't enjoy being a kid again for a few blissful, color-soaked hours?
Creating a Rainbow of Possibilities
Let me paint a vivid picture of what you're about to experience. As you gather the simple ingredients required for this Homemade Rainbow Slime Experiment, you are setting the stage for a DIY science experiment that doubles as a creativity booster. This isn't 'mix this with that and voila!’ type of experiment… The secret ingredient here is none other than your innate creativity and curiosity!
So, brace yourself for an engaging session of mixing and matching, experimenting with varying proportions of ingredients, and witnessing firsthand how different compounds react with each other. In the process, watch as not just your hands, but your child's face light up with sheer joy as they squish and squash the colorful slime, absorbing the wonderful tactile feedback, which is a crucial element of sensory play. You'll love witnessing an educational fun session where they learn through play.
Time to Get Your Hands Dirty – Literally!
Moving on to the easy slime recipe, the beauty of this homemade rainbow slime experiment lies within its simplicity. We start with a clear slime base, which serves as our blank canvas. Slowly but surely, you and your little one embark on a creative crafting journey, dropping dollops of different colored slimes onto the canvas, swirling them gently to create an enchanting pastiche of rainbow colors.
At this stage, you might be amazed at how this seemingly simple slime project can unleash creativity in new and profound ways. With each burst of color, the children are free to interpret their rainbow, to decide where the reds, blues, or greens should cascade. This not only promotes problem-solving but walks your child through the delightful world of decisions, fostering independence and confidence as they pour their heart into their DIY projects.
Unleashing the Slime Scientist
While redecorating the universe with rainbow colors might be the most fun part of the art project for kids, it's not the only fun part. The slime tutorial doesn't end there. As the sensory play continues, it becomes a hands-on learning opportunity as you segue into a discussion about slime science. This Homemade Rainbow Slime Experiment offers the perfect platform to delve into the basic concepts of chemistry and physics, answer intriguing queries like 'Why does the slime stretch?', and unveil the mysteries of Non-Toxic Slime.
For all we know, this might spark an interest in them to conduct more science experiments for kids and further explore the world of DIY science. But at the end of the day, all we hope for is a few blissful hours of fun with science, creating priceless memories and invaluable learning experiences.

In Conclusion...
The brilliance of the Homemade Rainbow Slime Experiment lies in the beautiful fusion of fun, learning, and creativity. This isn't just about crafting oozing, colorful slime but also about fostering confidence, curiosity, and cognitive skills in children.
More than merely an experiment or a DIY project, it's a kaleidoscope of precious memories and vibrant impressions that your kid collects along this journey. As you dive into this intriguing world of sensory play and scientific exploration, remember, every slime blob and rainbow swirl is a step closer to uncovering the limitless creativity hidden within your child.
So, go ahead, roll up your sleeves and immerse yourself in this rainbow-hued galore of creative learning and play. Here's to creating, exploring, learning, and above all, a whole lot of gooey fun!
You May Also Like These:
DIY TIME CAPSULE: Commemorate the day 05-07-2025
Ingredients:
- A sturdy, airtight box
- Paper and pens
- Personal items (tiny keepsakes, letters, etc.)
- Photos
- A digital storage device (optional)
Instructions:
- Gather the Ingredients: Collect all the materials mentioned above. You can use a metal or plastic box, whichever you prefer, but make sure it's airtight.
- Choose Your Items: Choose items that hold significance to the current time. It could be photos, small keepsakes, or letters written by you or your children.
- Digital Content: If you're including digital content, ensure they're stored in a format that will likely be accessible in the future.
- Document: Make sure to document, especially on paper, what each item is and why it's significant. This will help future finders (or yourselves) understand the context of each item.
- Pack Your Capsule: Once you have all the items ready, pack them into your airtight box carefully to avoid damage. Make sure your box seals correctly to protect against the elements.
- Pick a Spot: Choose a spot in your home to hide your time capsule. Remember, the goal is not to be discovered until a designated date.
- Make a Reminder: Jot down the location of your time capsule and set a reminder for the future date of when you'll open the time capsule together.
Colorful Galaxy Jar
Materials Needed:- Clean glass jar with a lid
- Cotton balls
- Glitter
- Food coloring (multi colors)
- Water
Instructions:
Step 1: Prepare your JarEnsure that your jar is clean and dry. This will help the colors and glitter stick better.
Step 2: Add First Layer of CottonFill the jar about one third with cotton balls. Make sure to spread them out so they completely cover the bottom of the jar.
Step 3: Add Color and GlitterMix water and food coloring in a separate bowl or cup. Pour the colored water into the jar until the cotton balls are completely soaked. Sprinkle the first layer of glitter.
Step 4: Repeat the LayersRepeat Steps 2 and 3, using different colors of food coloring for each layer, until the jar is filled to the top.
Step 5: Seal the jarOnce you’re done with adding layers, seal the jar tightly. Now you have your colorful galaxy jar!
Step 6: Add a NoteOn a piece of paper, write a note or memory from the current year. You can also include small mementos or trinkets. Tuck this paper inside the jar before sealing the lid.
Step 7: Wait and OpenStore the jar in a safe place and open it in the future to reminisce about the year.
Time Capsule Craft
Materials needed:- A sturdy box or container with a lid
- Paper and pens for letters
- Various mementos related to the current year
- A sealing material, like wax or tape
- Choose a box or container that can withstand the passage of time
- Write a letter talking about the events, feelings, goals, and experiences of the current year
- Collect various mementos from this year: photos, trinkets, newspaper clippings, etc
- Place items and letters inside the container
- Seal the container with your chosen sealing material and mark it with today's date
- Keep the time capsule in a safe and dry place, to be opened in the future
Colorful Galaxy Jar Craft
Materials needed:- A clear jar with a lid
- Cotton balls
- Glitter in various colors
- Water
- Food coloring
- Fill a third of the jar with cotton balls.
- Add water until damp and then sprinkle some glitter on top.
- Add a few drops of food coloring.
- Repeat these layers until the jar is filled, alternating colors for each layer to create a galaxy effect.
- Close the lid tightly and shake the jar to mix up the colors.
- Enjoy your homemade galaxy jar, a colorful representation of the vastness of space.
Crafts for Kids: Cotton-Filled Jar
This easy and fun craft is perfect for kids of all ages and can be completed with just a few simple supplies. Here are step by step instructions on how to create your own cotton-filled jar.
Ingredients
- A glass jar with a lid
- Cotton balls or cotton batting
- Glue (optional)
- Ribbon or other decorations (optional)
Instructions
- Start with a clean, dry jar. If you’re using a jar that previously held food, make sure it’s been washed out thoroughly.
- Begin filling the jar with cotton. There’s no right or wrong way to do this, but it can be helpful to start by placing larger pieces at the bottom and smaller pieces up top.
- If desired, you can use glue to hold the cotton in place. This isn’t necessary, but it can help the cotton keep its shape.
- Once the jar is filled with cotton, put the lid back on.
- If you would like to decorate your jar, now is the time. You can tie ribbon around the lid, apply stickers to the outside of the jar, or use any other decorations you have on hand.
And just like that, you have a beautiful cotton-filled jar. This craft is perfect for a rainy day or as a homemade gift. Happy crafting!
DIY Crafts Using Non-Toxic Tempered Paint
If you are a parent looking for a fun and educational activity to do with your kids, creating crafts with non-toxic tempered paint is a brilliant idea. Follow our easy guidelines and create your own masterpiece!
Ingredients:
- Non-toxic tempered paint
- Brushes of different sizes
- Craft paper or canvas
- Water and cloth for cleaning brushes
- Pallet for mixing colors
Instructions:
- Preparation: Set up your crafting area. Make sure it is covered to avoid any accidental spills of paint. Arrange all materials in reach.
- Mixing Colors: Pour your tempered paints onto the pallet. Mix to create a combination of colors that you want to use in your craft.
- Painting: With the brushes, apply the paint to the craft paper or canvas. Experiment with different strokes and pressure to achieve different effects.
- Cleaning: Keep your brushes clean. Rinse them in water and wipe with cloth before switching colors.
- Drying: Allow your artwork to dry. Avoid touching or disturbing the craft until it's completely dry.
- Display: Once dry, you can display your art. Remember, it's not about the end product but the fun in the process of creating.
So get your tempered paint, and let's start creating memorable and fun experiences!


