As an affiliate, I earn from qualifying purchases, but this doesn't affect the reviews or recommendations—your trust is important to me!
Water Cycle in a Bag Experiment: Simple Science for Kids

Today, We're Making:
- Water Cycle in a Bag
- - 'Create Mini Water Cycle': This is a basic experiment where a bag, water, blue food coloring, a marker, and sunlight are used to show the entire process of the water cycle.
- - 'Temperature Effects on Water Cycle': This experiment involves creating two water cycle bags.
Imagine This:
It's a rainy Saturday afternoon and your kids are curious about why it's raining. What a perfect teaching moment! And what better way to quench their inquisitive minds than with a fun, interactive water cycle in a bag experiment?
This DIY Project
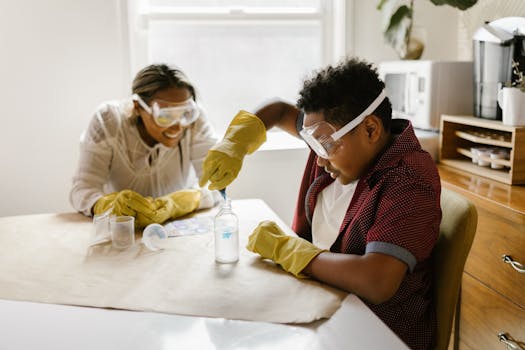
This simple science experiment for kids transforms your kitchen into a miniature learning lab. Using ordinary household items, you can create a hands-on experience that not only demystifies the hydrologic cycle but opens doors to a whole world of home-based learning possibilities.
Take a Deep Dive
So take a deep dive with us as we explore the phenomena of evaporation, condensation, precipitation, and collection, all in a resealable plastic bag. Welcome to a world of exciting science experiments at home!
Let's Dive Into The Water Cycle in a Bag Experiment!
So, let's get started with the Water Cycle in a Bag experiment, a journey filled with intrigue, exploration, and a fair amount of kid-friendly science fun. Before we kick things off, you need to gather all necessary supplies. You most likely have everything you need already in your kitchen. You'll require a resealable plastic bag, some water, blue food coloring (optional), and a marker. Yes, that's it, a straightforward DIY Experiment that takes minimal prep time and encourages your kids to delve into the water cycle process head-on.
The First Step: Aqua Fun
The first step in our bag experiment demands the participation of your little scientists. Let them pour water into the resealable bag. Just fill it a quarter of the way up, enough to create a miniature ocean environment. Add a few drops of blue food coloring if you want for a more dramatic touch, and seal the bag tightly. With the marker, draw the sun and clouds on the upper part of the bag. It's an easy science project that allows your kids to start engaging with the experiment themselves!
Moving On: Setting the Stage
Onwards to setting up our home lab. Find a sunny windowsill or a spot that gets direct sunlight. Tape your 'mini ocean' there. This is where the magic happens, where four stages of the water cycle come alive - evaporation, condensation, precipitation, and collection. By focusing on the water cycle step by step, the water cycle in a bag provides immersive, interactive learning.
Observe & Learn: Nature's Cycle in Your Bag
Watch as the sunlight warms the water, leading to evaporation. See how the water vapor rises, becoming cooler and transforming into droplets on the inside of the bag. This mimics condensation. Witness these droplets come together and form larger water droplets. The smaller droplets can no longer hold on to the bag and 'rain' down, showing precipitation. The water then collects at the foundation of the bag, starting the cycle anew, just like in the natural water cycle process.
The Discussion: Understanding The Water Cycle
While observing this bag experiment, engage your kids in discussions about how the water cycle works, the role it plays in the weather, and why it's essential for life on Earth. Relate it to the rain they witnessed earlier, making this simple science experiment not just a project, but a holistic learning experience in understanding the water cycle.
Educational Innovation At Home
In our homes, science can be made exciting and engaging, and the water cycle in a bag helps to achieve this. It's an example of learning science at home that is not only educational but also innovative. As you continue down the path of science projects with your kids, consider this engaging water experiment as a benchmark for what education, specifically homeschooling, can look like. A panorama full of exploration, innovation and most definitely, lots of fun!

In a World Emphasizing STEM Learning
In a world that's increasingly emphasizing the importance of STEM learning, the 'water cycle in a bag' experiment stands as a testament to how learning can be made fun, accessible and entirely hands-on. It transforms everyday items into implements of discovery, inviting your child on a journey of wonder and scientific curiosity.
Transforming Ordinary Afternoons Into Science Adventures
Remember this moment next time your child ponders aloud about why it rains or when you're stuck indoors on a drizzly afternoon. With every droplet, each evaporation and condensation, there lies an opportunity to instill in young minds, a healthy passion for exploring the grand, infinite world of science.
Harnessing Passion, Igniting Curiosity
Harness this passion, feed it with projects like the 'water cycle in a bag', and sit back as your home transforms into a playground of knowledge, responsible for igniting the next generation of thinkers, dreamers, and inventors. Let this be your stepping stone into a world of imaginative, hands-on learning. Until next time, happy experimenting!

You May Also Like These:
Create a Mini Water Cycle: A STEM Experiment
Introduce your child to the complex world of natural science at home by recreating their own mini water cycle! This exciting experiment requires minimal ingredients and is a perfect hands-on approach for understanding the science behind rain, evaporation, condensation, and collection.
Ingredients:- A clear zip-lock bag
- Blue food coloring
- Water
- Permanent marker
- Tape
Step 1: Fill the Bag with Water
Start by filling about a quarter of the zip-lock bag with water. This will represent a body of water such as a lake or an ocean.
Step 2: Add the Blue Food Coloring
Add a few drops of blue food coloring to the water. This is to mimic the appearance of water in nature and adds an exciting visual element to the experiment.
Step 3: Mark the Water Level
Using your permanent marker, draw a line at the water level. This will help your child visualize evaporation as the water level decreases.
Step 4: Seal and Tape the Bag
Seal the bag tightly ensuring there are no leaks. Then tape the top of the bag, leaving some air inside, to a sunny window or somewhere that gets direct sunlight. The heat will start the water cycle by causing the water to evaporate.
Step 5: Observe and Understand
Over the next few hours, observe the bag with your child. They will watch as the evaporation turns the water into water vapor, and as it rises, it cools and condenses to form tiny droplets on the bag, replicating clouds. Eventually, these droplets will get bigger and 'rain' down, simulating precipitation, thus completing the water cycle. Make sure to discuss this process with them, encouraging questions and promoting deeper understanding.
Step 6: Repeat!
If your child enjoyed the experiment, feel free to repeat or try in different weather conditions or times of the day, to explore how these variables affect the cycle.
Note:Always supervise your child when conducting experiments and ensure they understand safety measures and precautions.
STEM Water Experiment Instructions
Objective:
To understand the basic principles of water density and temperature.
Ingredients:
- Three clear containers
- Water
- Food coloring (red, blue, and yellow)
- Spoon for stirring
- Ice cubes
- Hot tap water
- Cold tap water
Procedure:
- Fill one container with hot tap water and add a few drops of red food coloring. Stir until the color is even.
- Fill the second container with room temperature water and add a few drops of yellow food coloring. Stir until the color is even.
- Fill the third container with cold tap water and add a few drops of blue food coloring. Stir until the color is even.
- Add an ice cube to the container with the blue (cold) water. Observe what happens.
- Slowly pour the yellow (room temperature) water into the blue (cold) water. Observe the changes.
- Finally, slowly add the red (hot) water to the rest of the water. Observe the final result.
Conclusion:
In this experiment, you will see that the density of water varies with temperature. The hot (red) water is less dense and floats on top of the cooler water, while the cold (blue) water is more dense and stays at the bottom.
How to Create Blue Food Coloring: A STEM Experiment
Explore the thrilling world of chemistry with your children by creating blue food coloring at home! Not only will this experiment explain the concept behind creating colors, but it's also a practical skill that can be used for cake decorating, play-dough making, and more.
Ingredients:
- 1 head of red cabbage
- Water
- Lemon juice or vinegar (acidic)
- Baking soda or washing soda (basic/alkaline)
- Coffee filters
Instructions:
- Chop the red cabbage: Cut your red cabbage into chunks.
- Boil the cabbage: Place the cabbage in a large pot, cover with water, and bring to a boil. Reduce the heat and let it simmer for 25-30 minutes.
- Strain the cabbage: Remove from heat and allow it to cool. After cooling, strain the cabbage, collecting the 'purple' water in a separate container. This is your pH indicator.
- Filter the Boiled Cabbage solution: Pour the cabbage mixture through a coffee filter to remove any potential cabbage pieces.
- Test the pH: Now pour a little of the cabbage water into two separate cups. In one, add a couple of drops of the acidic solution (lemon juice or vinegar), and in the other, add the basic solution (baking soda or washing soda). You will see the magic happens. The solution with the added acid will turn pink, and the one with the base will turn blue or green, showing how the pH level can affect color change.
- Create the Blue Food Coloring: The solution with a basic substance gives us the blue color we desire for our food coloring. If it's actually turned green, add a bit more of the base until you get a blue color.
- Store Properly: You can now store the blue food coloring in a clean glass bottle and use it as needed!
Remember: The intensity of the color may change depending on the dish you are preparing. Experiment and enjoy learning!
Magic Marker Chromatography STEM Experiment
Ingredients:
- Magic markers (Various colors)
- Coffee filters
- A tall clear glass
- Water
- Rubber bands
- Pencil or stick (longer than the width of your glass)
Instructions:
- Start by cutting the coffee filters into strip shapes. They should be about one inch wide and long enough to hang into the glass with one end sticking out.
- Using a single color marker, draw a straight line on one coffee filter strip, about an inch from the end. Repeat this with each different marker.
- Take the pencil or stick and attach each strip to it using rubber bands, make sure the marked end is hanging down.
- Fill the glass with water, just enough to cover the bottom, but not touch the marker line on the strip.
- Place the pencil across the top of the glass, allowing the coffee filter strips to hang down into the water. Make sure the ink line is above the water.
- Watch as the water makes its way up the coffee filter strip. As the water hits the ink line, it should start to separate out the colors.
- Leave the filters in the water until the water is just below the marker line or until all the colors have separated, then remove them from the water and lay them flat to dry.
- Once they're dry, take a closer look. Each color marker should have separated into different colors. This is because every color you see is actually made up of different colors. The colors separate as they move up the paper with the water depending on their mass. You can use this information to compare different brands of markers or just to discuss the science of color.
Sunlight Water Cycle Experiment
Ingredients
- A clear plastic bag
- Blue food coloring
- Water
- Permanent marker
- Tape
Instructions
- Fill approximately 1/3 of the plastic bag with water.
- Add a few drops of blue food coloring to the water. The blue color represents the ocean.
- Seal the bag and shake it to mix the food coloring evenly.
- With a permanent marker, draw the water cycle directly on the plastic bag. Make sure to include evaporation, condensation, precipitation, and collection.
- Tape the bag to a sunny window. Within a few hours, the students will be able to see the water cycle in action. The heat from the sun will evaporate the water, it will condense on the bag, and then 'rain' down back into the 'ocean'.
Temperature Effects on Water Cycle Experiment
Ingredients
- Two clear plastic bags
- Blue food coloring
- Water
- Permanent marker
- Tape
- Ice
Instructions
- Create two water cycle bags as described in the sunlight water cycle experiment.
- Place one bag in a sunny window and the other in a shady/cool area of the room.
- Monitor the bags over several hours and note the differences in evaporation, condensation, and precipitation based on the temperatures.
- For an added twist, add ice to the bag in the cooler part of the room to represent snow or hail in the water cycle.


